
Epoxy resin has become a go-to material for crafting custom phone cases due to its crystal-clear finish, durability, and ability to encapsulate designs seamlessly. However, one of the most common frustrations artisans face is the formation of bubbles—tiny air pockets that disrupt clarity and compromise the final appearance. While bubbles are nearly inevitable during the mixing and pouring process, they are not permanent. With the right techniques and tools, you can eliminate them entirely and achieve a glass-smooth, professional-quality finish every time.
Understanding Why Bubbles Form in Epoxy Resin
Bubbles in epoxy occur primarily during the mixing and pouring stages. When two components—resin and hardener—are combined, vigorous stirring introduces air into the mixture. Additionally, porous materials like dried flowers, paper, or fabric used inside the case can trap air that escapes slowly, forming visible bubbles. Temperature plays a role too: cold environments increase viscosity, making it harder for bubbles to rise and pop naturally. Even the shape of the mold or phone case tray can influence bubble retention, especially in corners or textured areas.
While some believe that all bubbles will \"self-heal\" over time, this is only partially true. Smaller bubbles may dissipate within hours, but larger ones often remain trapped, especially if the epoxy begins curing before they escape. The key is proactive intervention using reliable methods.
“Air entrapment is the number one issue I see with beginners. The good news? It’s 100% preventable with proper technique.” — Daniel Reeves, Resin Art Instructor & Material Scientist
Step-by-Step Guide to Eliminate Bubbles During Application
Eliminating bubbles isn’t about luck—it’s about precision and timing. Follow this detailed sequence to minimize and remove bubbles at each stage of the process:
- Prepare Your Workspace: Work in a clean, dust-free area with temperatures between 70°F and 75°F (21°C–24°C). Cold conditions thicken the resin, slowing bubble release.
- Measure Accurately: Use digital scales to mix resin and hardener in the exact ratio specified by the manufacturer. Inaccurate ratios can cause improper curing and increased bubbling.
- Stir Slowly and Thoroughly: Pour resin and hardener into a clean cup. Stir for 3–5 minutes, scraping the sides and bottom. Avoid whipping or fast stirring, which whips in air.
- Let the Mixture Rest: After stirring, let the mixed epoxy sit for 2–3 minutes. This allows larger bubbles to rise and pop on their own.
- Pour in a Thin Stream: When transferring epoxy to the phone case mold, pour slowly down the side of the container or in a thin ribbon. This reduces turbulence and air incorporation.
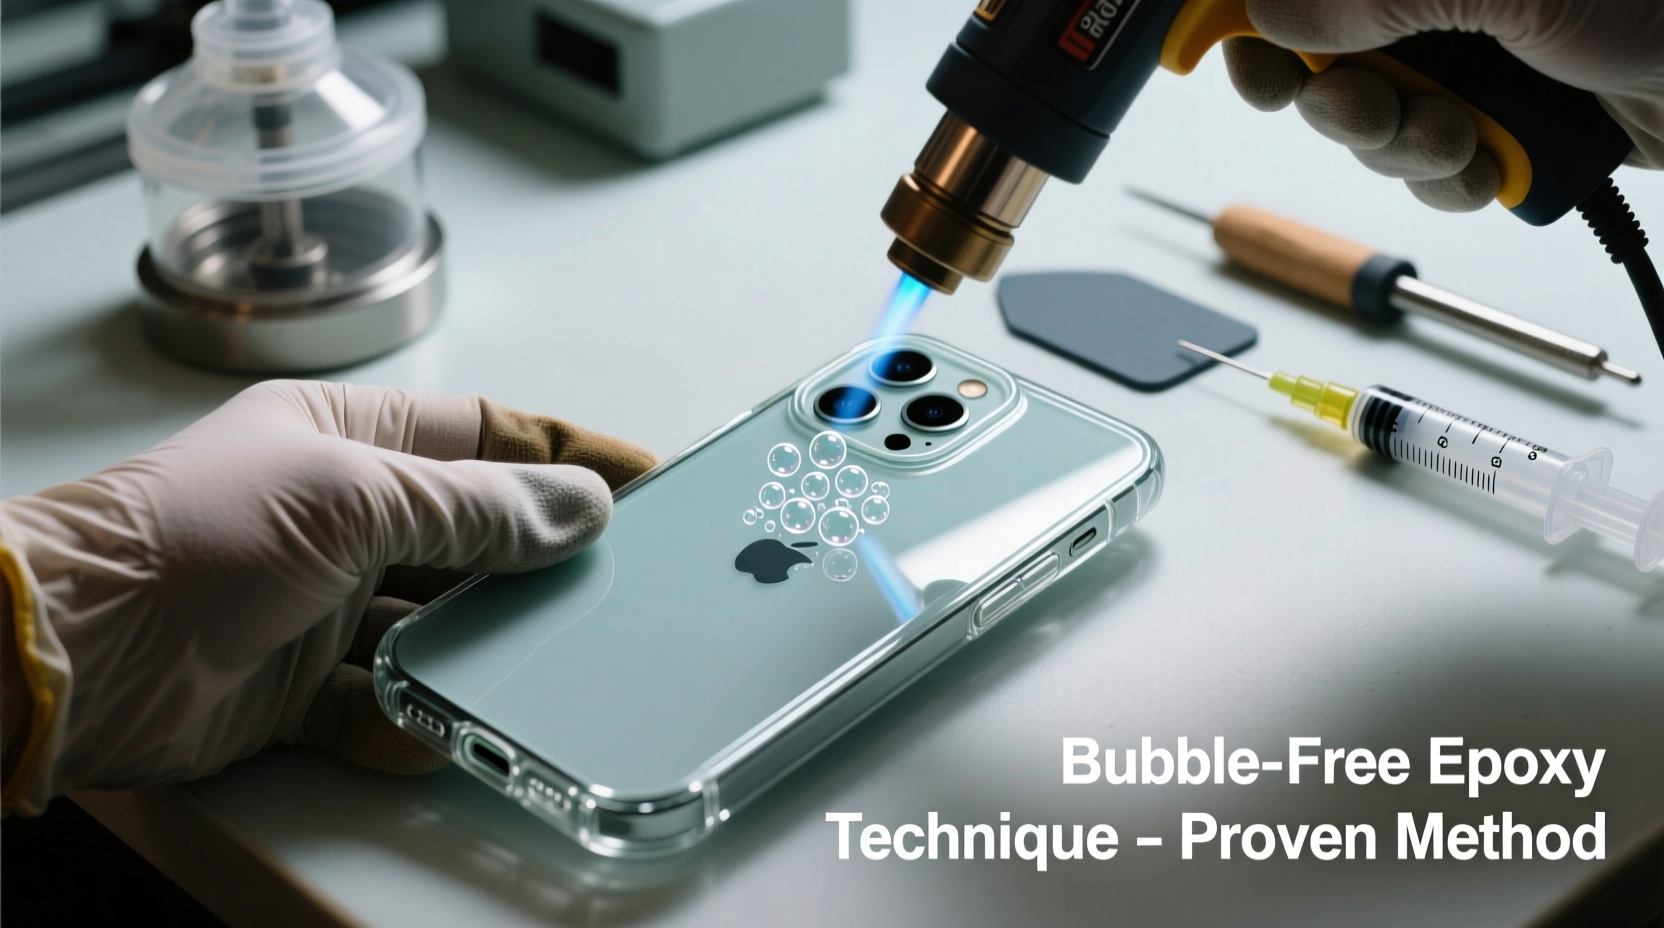
- Use a Heat Source Immediately: Within 5–10 minutes of pouring, pass a heat source (like a torch or lighter) over the surface to burst surface bubbles.
- Monitor for Late-Rising Bubbles: Some bubbles emerge 10–20 minutes after pouring. Reapply heat briefly if needed before the epoxy starts thickening.
Top 5 Tools and Techniques for Bubble Removal
Different tools offer varying degrees of effectiveness. Here’s a breakdown of the most reliable options and how to use them properly:
| Tool/Method | How It Works | Effectiveness | Best For |
|---|---|---|---|
| Propane or Butane Torch | Heat thins the surface layer, allowing bubbles to pop and escape | ★★★★★ | All types of epoxy projects, especially small molds |
| Heat Gun | Blows warm air to disrupt bubble membranes | ★★★☆☆ | Larger surfaces; less precise than a torch |
| Compressed Air (Canned) | Dislodges bubbles via short bursts | ★★☆☆☆ | Not recommended—can introduce moisture |
| Vacuum Chamber | Removes air from mixed epoxy before pouring | ★★★★★ | Professional setups; eliminates microbubbles |
| Toothpick or Pin | Punctures individual bubbles manually | ★★★☆☆ | Small, stubborn bubbles near edges |
A butane micro-torch is widely considered the most effective tool for hobbyists and professionals alike. Hold it 4–6 inches above the surface and make quick passes—do not linger, as overheating can scorch the resin or cause rippling.
Common Mistakes That Cause Bubbles (and How to Avoid Them)
Even experienced crafters occasionally fall into traps that invite bubbles. Recognizing these pitfalls helps ensure consistently smooth results:
- Mixing Too Quickly: Fast stirring aerates the epoxy like beating egg whites. Stir slowly and deliberately.
- Using Cold Materials: Store resin and hardener at room temperature. Cold bottles increase viscosity and trap air.
- Pouring from Height: Dropping epoxy from above creates splashes and air pockets. Pour close to the mold surface.
- Sealing Porous Inclusions Too Late: Items like glitter, photos, or botanicals should be sealed with a thin coat of resin first to lock out trapped air.
- Working in Humid Conditions: Moisture can react with epoxy, causing cloudiness and bubble clusters. Use a dehumidifier if necessary.
Mini Case Study: From Flawed to Flawless – A Craft Artist’s Journey
Sophia Lin, a resin artist based in Portland, struggled for months with inconsistent finishes on her custom phone cases. Her early attempts were plagued with pinholes and haze, leading to customer complaints. She experimented with heat guns and hairdryers, but both caused ripples or failed to eliminate deeper bubbles.
After attending a workshop on vacuum degassing, she invested in a small vacuum chamber. By placing her mixed epoxy under 29 inHg of vacuum for 5 minutes before pouring, she removed microscopic bubbles invisible to the naked eye. Combined with a butane torch for surface finishing, her success rate jumped from 60% to over 95%. Today, her line sells out within hours of launch, praised for its optical clarity and mirror-like finish.
Her turnaround wasn’t due to expensive materials—it was mastering bubble control through systematic technique.
Essential Checklist for Bubble-Free Epoxy Phone Cases
Before starting your next project, run through this checklist to ensure optimal conditions:
- ✅ Work in a space with stable temperature (70–75°F / 21–24°C)
- ✅ Warm resin and hardener to room temperature if stored in cool areas
- ✅ Measure components precisely using digital scales
- ✅ Stir slowly for 3–5 minutes, scraping container walls
- ✅ Allow mixed epoxy to rest for 2–3 minutes before pouring
- ✅ Pre-seal any porous inclusions (paper, wood, fabric)
- ✅ Pour in a thin, steady stream close to the mold
- ✅ Use a butane torch or heat gun within 10 minutes of pouring
- ✅ Inspect for late-forming bubbles and re-treat if needed
- ✅ Cover the mold and let cure undisturbed for 24–72 hours
Frequently Asked Questions
Can I fix bubbles after the epoxy has cured?
Yes, but it requires sanding and re-coating. Lightly sand the surface with 400–600 grit wet/dry sandpaper, wipe clean, then apply a thin second layer of epoxy. This new layer will self-level and create a fresh, smooth surface.
Is a torch safe to use on epoxy?
When used correctly, yes. Keep the flame moving and never hold it in one spot. A brief pass is enough to break surface tension. Avoid open flames near uncured resin fumes—work in a ventilated area and keep flammable materials away.
Why do bubbles keep coming back after I torch the surface?
This usually means air is escaping from porous materials inside the mold. Seal items like dried flowers or paper with a preliminary resin coat before the final pour. Also, ensure your initial mix wasn’t overly aerated during stirring.
Final Thoughts: Mastery Comes Through Method
Creating a flawless epoxy phone case isn’t about avoiding mistakes—it’s about understanding the science behind the material and responding with precision. Bubbles are a natural part of working with resin, but they don’t have to define your results. By controlling temperature, refining your mixing technique, and using proven tools like a micro-torch or vacuum chamber, you can consistently produce stunning, bubble-free finishes.
The difference between amateur and professional-quality work often lies in attention to detail. Implement these strategies in your next project, document your results, and refine your process. Over time, what once seemed like an unpredictable challenge becomes a repeatable craft.


 浙公网安备
33010002000092号
浙公网安备
33010002000092号 浙B2-20120091-4
Comments
No comments yet. Why don't you start the discussion?