
A broken screw can bring even the most well-planned project to a halt. Whether you're assembling furniture, repairing machinery, or working on home renovations, encountering a snapped or stripped screw is both frustrating and potentially costly if not handled correctly. The good news is that with the right tools, patience, and technique, it’s often possible to extract a broken screw without harming the surrounding material. This guide covers proven methods, practical tips, and expert-backed strategies to help you resolve this common issue efficiently and safely.
Understanding Why Screws Break
Screws typically break due to over-tightening, corrosion, poor quality metal, or using the wrong size driver. When torque exceeds the screw’s tensile strength, especially in older or brittle fasteners, the shaft can snap. Recognizing the cause helps prevent future issues and informs the best extraction method. For instance, a rusted screw may require penetrating oil, while an over-torqued one might respond better to drilling and an extractor.
Step-by-Step Guide to Extracting a Broken Screw
The key to success lies in a systematic approach. Rushing can lead to further damage. Follow these steps carefully to maximize your chances of clean removal.
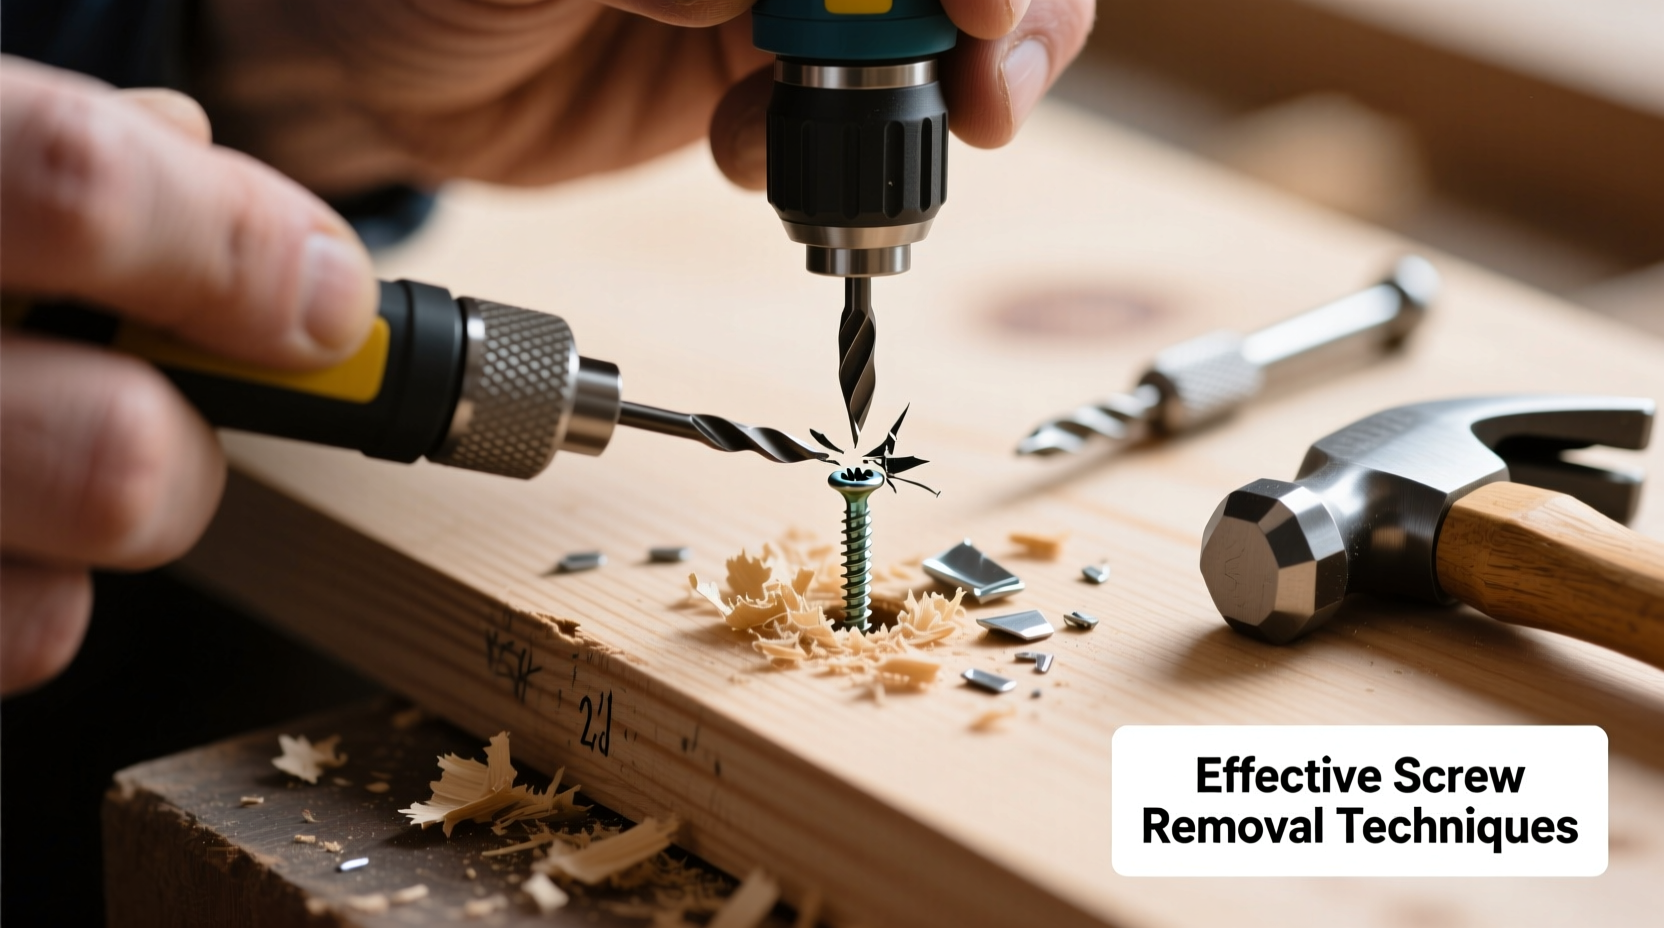
- Assess the Damage: Determine how much of the screw remains exposed. If there's a portion sticking out, grip it with locking pliers. If flush or below the surface, proceed to drilling.
- Apply Penetrating Oil: Spray a high-quality penetrating oil (like PB Blaster or Liquid Wrench) around the screw threads. Let it sit for 10–15 minutes—or longer for rusted screws—to loosen corrosion.
- Use Center Punch and Drill: Mark the center of the screw with a center punch to prevent drill bit slippage. Select a small pilot drill bit (1/16\") and carefully drill into the center of the screw shaft.
- Insert a Screw Extractor: Choose a left-handed spiral extractor that fits the pilot hole. Tap it gently with a hammer, then turn counterclockwise using a T-handle or wrench. The reverse thread design bites into the screw and backs it out.
- Clean the Threaded Hole: Once removed, use a thread chaser or tap to clean any debris or damaged threads. Replace with a new screw of the same size and grade.
“Patience is your greatest tool when dealing with broken screws. Rushing leads to cracked materials or secondary breakages.” — Carlos Mendez, Industrial Maintenance Technician with 20+ years of field experience
Alternative Methods When Standard Extraction Fails
If a screw extractor doesn’t work or isn’t available, several alternative techniques can be effective depending on the situation.
EZ-Out vs. Left-Hand Drill Bit Comparison
| Method | Best For | Pros | Cons |
|---|---|---|---|
| EZ-Out Extractor | Fully broken screws with minimal exposure | High torque transfer, designed specifically for removal | Fragile; can break if overtightened |
| Left-Hand Drill Bit | Rusted or seized screws | Doubles as drilling and removal; often backs the screw out during drilling | Requires precise alignment; limited availability |
| Center Punch & Hammer | Slightly recessed screws | No power tools needed; low risk of collateral damage | Only works if screw has internal structure to catch |
Using a Dremel or Rotary Tool
When only the head is missing but the shank remains slightly above the surface, a rotary tool with a cutting wheel can create a new slot. Cut a straight groove across the screw end, then use a flathead screwdriver to back it out. This method works well on softer metals and in tight spaces where pliers won’t fit.
The Welded Nut Technique
For larger bolts or machine screws in metal assemblies, welding a nut onto the broken end allows you to apply standard wrench torque. This industrial method requires professional equipment but is highly effective. Always ensure the base material can withstand heat without warping.
Mini Case Study: Restoring an Antique Wooden Desk
A woodworking enthusiast attempted to disassemble a vintage desk when two brass screws snapped inside oak drawer runners. With no exposed threads, traditional pliers were useless. After applying penetrating oil and letting it soak overnight, he used a 1/16\" carbide bit to drill a pilot hole. A small screw extractor successfully removed both screws without splitting the wood. He cleaned the holes with a thread file and installed slightly longer replacements. The repair preserved the desk’s integrity and avoided costly refinishing.
This example underscores the importance of material sensitivity—using light pressure on hardwoods and selecting corrosion-resistant replacement hardware.
Do’s and Don’ts of Broken Screw Removal
| Do’s | Don’ts |
|---|---|
| Use a center punch to guide your drill bit | Use excessive force when turning extractors |
| Lubricate with penetrating oil before drilling | Use dull drill bits—they increase slippage risk |
| Work slowly and maintain drill alignment | Attempt extraction without securing the workpiece |
| Select the correct extractor size for the screw diameter | Ignore safety gear—eye protection is essential |
Essential Tools Checklist
Before starting, gather the following tools to ensure a smooth process:
- Penetrating oil (e.g., WD-40 Specialist or Kroil)
- Center punch and hammer
- Set of high-speed steel or carbide drill bits
- Screw extractor set (left-hand threaded)
- T-handle or adjustable wrench for extractors
- Vise grips or locking pliers (for protruding screws)
- Safety glasses and gloves
- Thread chaser or tap (for post-removal cleanup)
FAQ
Can I remove a broken screw without a screw extractor?
Yes. Alternatives include drilling a new slot with a Dremel and using a flathead driver, using left-hand drill bits, or even gluing a nail or rod into the drilled hole with epoxy to create leverage. These methods vary in effectiveness based on screw size and material.
What should I do if the screw extractor breaks inside the screw?
Extracting a broken extractor is more difficult because they are made of extremely hard, brittle steel. In such cases, precision grinding with a diamond-coated bit or EDM (electrical discharge machining) may be required. For non-critical applications, consider enlarging the hole and using a helical thread insert (like a Helicoil) to restore the thread.
Will heat help loosen a stuck broken screw?
In metal-to-metal joints, applying localized heat with a propane torch can expand the surrounding material and break the bond caused by rust or thread locker. However, avoid heat on plastics, composites, or near flammable materials. Always cool the area gradually to prevent warping.
Prevention: Avoiding Future Breakages
Prevention is far easier than extraction. Use proper torque settings on drills and drivers—many modern tools have adjustable clutch settings to prevent over-tightening. Regularly inspect screws for signs of corrosion, especially in outdoor or humid environments. Applying anti-seize compound on threaded fasteners in high-moisture areas reduces galling and makes future disassembly easier.
Additionally, replace old or low-grade screws with higher tensile strength alternatives (e.g., Grade 8 for automotive, or stainless steel for outdoor use). Using pilot holes in hardwoods prevents splitting and reduces strain on screws during installation.
Conclusion
Removing a broken screw doesn’t have to mean scrapping your project or calling in a professional. With the right combination of preparation, tools, and technique, most broken fasteners can be extracted cleanly and safely. From simple plier grips to advanced drilling methods, each solution has its place depending on the context. The goal is always to preserve the integrity of the surrounding material while restoring functionality.


 浙公网安备
33010002000092号
浙公网安备
33010002000092号 浙B2-20120091-4
Comments
No comments yet. Why don't you start the discussion?