
A strong, well-supported spinal arch is essential for maintaining healthy posture, reducing back pain, and enabling fluid movement throughout daily life. The natural curvature of the spine—particularly the lumbar lordosis (inward curve of the lower back)—plays a crucial role in shock absorption, balance, and efficient biomechanics. However, modern sedentary lifestyles often lead to weakened core muscles, tight hip flexors, and flattened spinal curves, contributing to discomfort and long-term postural issues. Fortunately, targeted exercises, mindful movement, and consistent habits can restore and enhance the integrity of your back’s arch without strain or injury.
Understanding the Spinal Arch: Why It Matters
The human spine features three natural curves: cervical (neck), thoracic (upper back), and lumbar (lower back). The lumbar region forms a gentle inward arch that helps distribute weight and absorb impact during walking, running, and lifting. When this arch becomes too flat (hypolordosis) or exaggerated (hyperlordosis), it disrupts alignment, increases pressure on intervertebral discs, and strains surrounding muscles and ligaments.
Weak deep core stabilizers—such as the transversus abdominis and multifidus—and tight hip flexors from prolonged sitting are common culprits behind poor lumbar support. Strengthening these areas restores balance, improves pelvic alignment, and supports a resilient spinal arch.
“Restoring optimal lumbar curvature isn’t about creating more arch—it’s about restoring neuromuscular control and joint stability.” — Dr. Lena Patel, Physical Therapist & Spine Biomechanics Researcher
Key Techniques to Safely Enhance Your Back Arch
Improving spinal arch strength requires a combination of mobility work, muscle activation, and progressive loading. Below are five foundational techniques supported by clinical practice and movement science.
1. Pelvic Tilts with Neuromuscular Awareness
This foundational exercise re-establishes control over the pelvis and lower spine, teaching precise movement between neutral, posterior, and anterior tilt—essential for developing a stable yet mobile lumbar curve.
- Lie on your back with knees bent and feet flat on the floor.
- Engage your abdominal muscles slightly and gently press your lower back into the floor (posterior tilt).
- Then, allow your lower back to relax and create a small gap between your back and the floor (anterior tilt).
- Movement should be subtle—focus on isolating the pelvis, not overarching.
- Repeat 15 times, emphasizing control over range.
2. Dead Bug Progressions for Core Integration
The dead bug trains anti-extension—a critical function for maintaining a stable lumbar spine during dynamic movements. It strengthens the deep core while preventing excessive arching under load.
- Begin lying on your back with arms extended toward the ceiling and legs in tabletop position.
- Press your lower back gently into the floor and brace your core.
- Slowly extend one arm overhead while straightening the opposite leg, keeping both off the ground.
- Return to start and alternate sides.
- Perform 3 sets of 8–10 reps per side.
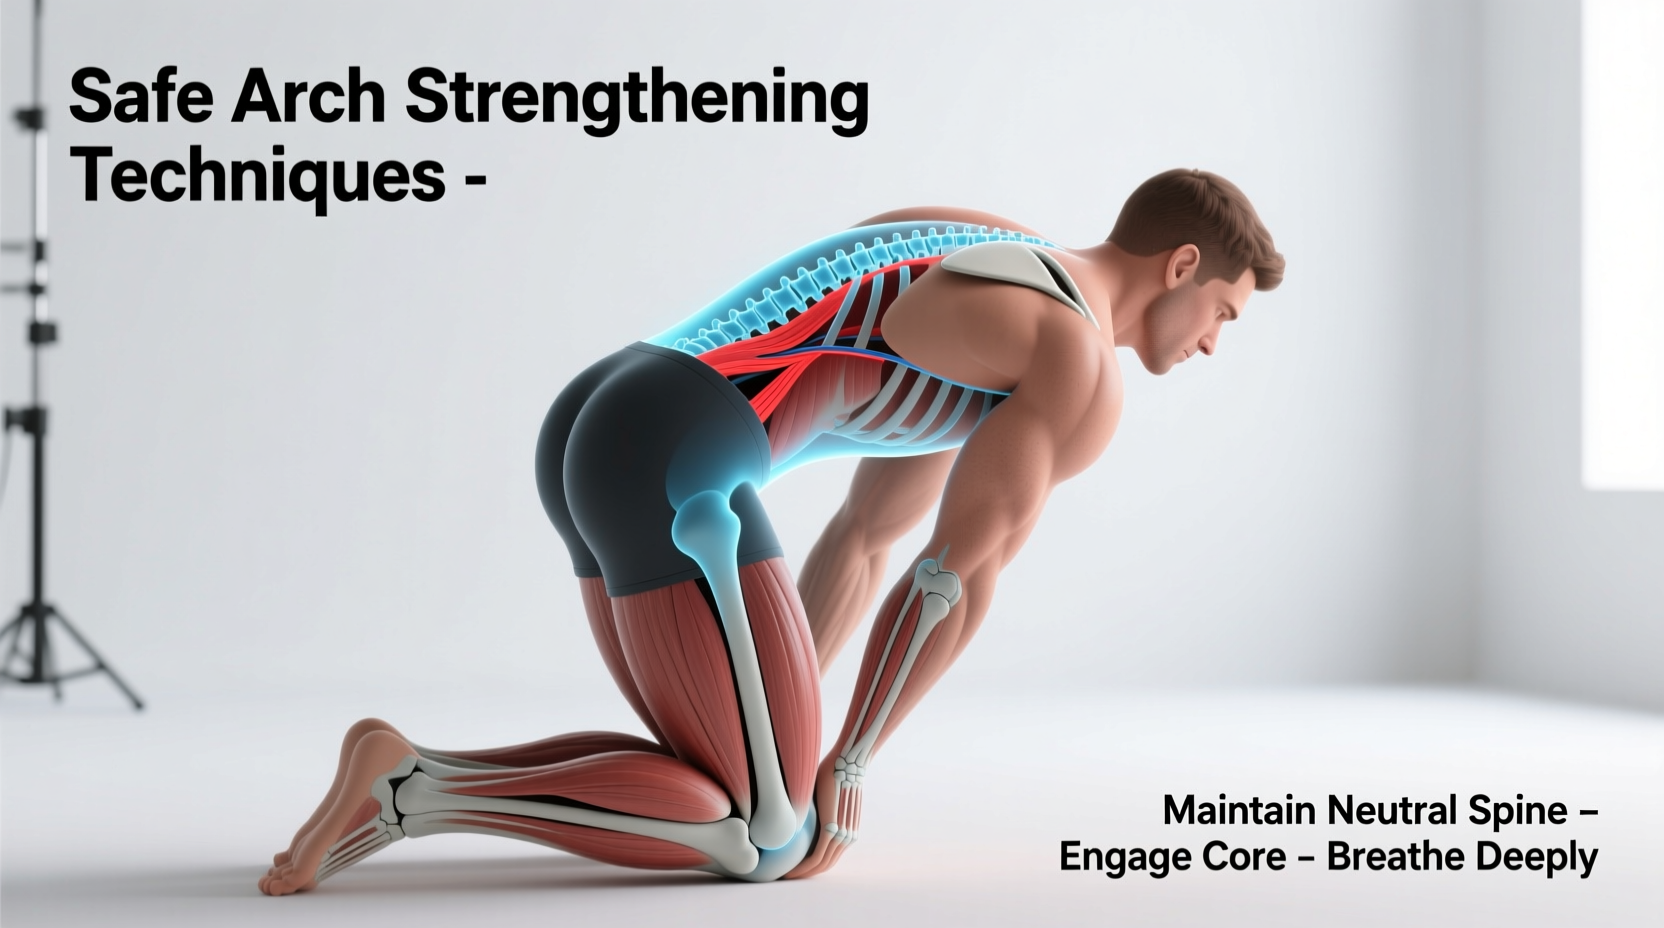
3. Bird-Dog for Segmental Stability
Bird-dog enhances coordination between the deep spinal stabilizers and glutes, promoting balanced extension without over-arching the lower back.
| Phase | Action | Focus Cue |
|---|---|---|
| Start | Quadruped, wrists under shoulders, knees under hips | Neutral spine, slight natural arch |
| Movement | Extend right arm forward and left leg back | Keep hips level; avoid twisting |
| Hold | 2–3 seconds at full extension | Engage glute and opposite shoulder |
| Return | Controlled return to start | Prevent lower back sagging |
4. Prone Press-Ups (McKenzie Extension Exercises)
These are particularly effective for individuals with flattened lumbar curves due to disc-related stiffness or chronic flexion postures. Done correctly, they encourage controlled extension and improve segmental mobility.
- Lie face down with hands placed under your shoulders.
- Use your arms to gently lift your upper body, allowing your lower back to arch naturally.
- Only go as far as comfortable—stop before sharp pain or nerve symptoms arise.
- Hold for 5 seconds, then lower slowly.
- Start with 10 reps, increasing only if tolerated.
5. Glute Bridges with Emphasis on Posterior Chain Activation
Strong glutes prevent anterior pelvic tilt compensation and support a balanced lumbar curve. This movement integrates hamstrings, glutes, and spinal extensors.
- Lie on your back, knees bent, feet hip-width apart.
- Drive through heels, squeeze glutes, and lift hips until body forms a straight line from shoulders to knees.
- At the top, focus on contracting glutes—not hyperextending the lower back.
- Lower with control. Perform 3 sets of 12–15 reps.
Common Mistakes That Undermine Progress
Even well-intentioned efforts can backfire if technique is compromised. Avoid these frequent errors:
| Mistake | Why It’s Harmful | Correction |
|---|---|---|
| Overarching during extensions | Concentrates stress on facet joints | Move within pain-free range; engage core |
| Using momentum in bird-dog | Reduces muscle engagement | Slow tempo; pause at peak contraction |
| Ignoring hip flexor tightness | Pulls pelvis forward, flattening arch | Add daily stretches like kneeling hip flexor stretch |
| Skipping warm-up | Increases risk of strain | Begin with cat-cow or marching in supine |
Mini Case Study: Recovery Through Controlled Arch Training
James, a 38-year-old software developer, experienced chronic lower back stiffness and a visibly flattened lumbar curve after years of desk work. He reported difficulty standing upright without fatigue and occasional tingling in his left leg. A physical assessment revealed weak deep core muscles, tight hip flexors, and reduced lumbar extension mobility.
His therapist prescribed a 12-week protocol: daily pelvic tilts, prone press-ups (5 reps, twice daily), glute bridges (3x12), and standing hip flexor stretches. James also adjusted his workstation to include a standing desk rotation and practiced posture resets hourly.
By week 6, he regained measurable lumbar extension and reported improved comfort. At week 12, follow-up imaging showed restored lordotic alignment, and he could stand and walk longer without discomfort. His case underscores how targeted, gradual interventions can reverse postural decline.
Step-by-Step Weekly Routine for Arch Support
Follow this structured plan to build strength and mobility safely over time:
- Day 1–7: Foundation Phase
Practice pelvic tilts (2x15), cat-cow (2x10), and supine marches (2x12 per leg). Focus on form, not intensity. - Day 8–14: Activation Phase
Add dead bugs (3x8) and kneeling hip flexor stretches (3x30 sec per side). Begin glute bridges (3x10). - Day 15–21: Integration Phase
Incorporate bird-dog (3x6 per side) and prone press-ups (2x10). Monitor for any discomfort. - Day 22–30: Progressive Loading
Increase reps gradually. Add single-leg glute bridges (2x8 per leg) and bodyweight squats with emphasis on neutral spine. - Ongoing Maintenance
Perform 3 sessions weekly combining mobility drills and strength exercises to sustain gains.
Frequently Asked Questions
Can strengthening my back arch help with lower back pain?
Yes, when done correctly. Restoring balanced lumbar curvature reduces uneven disc loading and muscular strain. However, acute pain or neurological symptoms require professional evaluation before starting exercises.
How do I know if my spinal arch is too flat or too curved?
A healthcare provider can assess your posture using visual inspection, palpation, or imaging. Generally, a lack of space under your lower back when lying flat may indicate hypolordosis, while an exaggerated arch with anterior pelvic tilt suggests hyperlordosis.
Are yoga poses safe for improving spinal arch strength?
Many yoga poses—like cobra, bridge, and cat-cow—are beneficial, but must be performed with proper alignment. Avoid pushing into deep backbends without adequate core engagement, as this can compress the spine.
Checklist: Daily Habits to Support a Healthy Back Arch
- ✅ Perform 2 minutes of pelvic tilts or cat-cow upon waking
- ✅ Take standing breaks every 30–45 minutes if sitting
- ✅ Stretch hip flexors daily (kneeling lunge hold for 30 seconds per side)
- ✅ Engage core lightly when lifting or bending
- ✅ Sleep with a pillow under knees (if back sleeper) to maintain natural curve
- ✅ Avoid high heels or unsupportive footwear for extended periods
Conclusion: Build Strength with Patience and Precision
Improving the arch in your back is not about forcing your spine into extreme positions—it’s about restoring balance, control, and resilience. By integrating mindful movement, targeted strengthening, and daily awareness, you can cultivate a spine that supports your activities with less strain and greater ease. Start where you are, progress gradually, and prioritize quality over quantity. Your back will respond not in days, but in consistent weeks of intelligent effort.


 浙公网安备
33010002000092号
浙公网安备
33010002000092号 浙B2-20120091-4
Comments
No comments yet. Why don't you start the discussion?