
Door handle covers, especially on interior or older doors, can become stuck over time due to paint buildup, corrosion, adhesive residue, or improper installation. Attempting removal with force often leads to scratches, dents, or even broken mechanisms. Knowing the right approach ensures you preserve both the hardware and surrounding surface. Whether you're refreshing a room, replacing a lockset, or repairing a latch, this guide delivers tested, non-destructive methods for removing stubborn door handle covers.
Understanding Why Covers Get Stuck
Before attempting removal, it's essential to diagnose why the cover won’t budge. Common causes include:
- Paint or caulk sealing: Multiple layers of paint or sealant can bond the cover to the door surface.
- Rust or corrosion: In humid environments, metal components may corrode, fusing parts together.
- Hidden screws: Some covers conceal mounting screws beneath decorative caps or under the trim plate.
- Adhesive backing: Modern or retrofit covers sometimes use strong adhesives instead of mechanical fasteners.
- Compression fit: Certain designs rely on tight friction fits that degrade over time, making disengagement difficult.
Identifying the root cause helps determine the safest removal strategy and prevents unnecessary damage.
Step-by-Step Guide to Safe Removal
Follow this systematic process to minimize risk while freeing a stuck door handle cover:
- Inspect for visible or hidden fasteners. Rotate the handle and examine all sides. Look for small dimples, slots, or removable caps that might hide set screws.
- Use a utility knife to break sealant or paint bonds. Carefully score around the edge of the cover with a sharp blade to separate it from painted surfaces.
- Apply penetrating oil if corrosion is suspected. Spray a small amount (like WD-40 or PB Blaster) into any accessible gaps and wait 5–10 minutes.
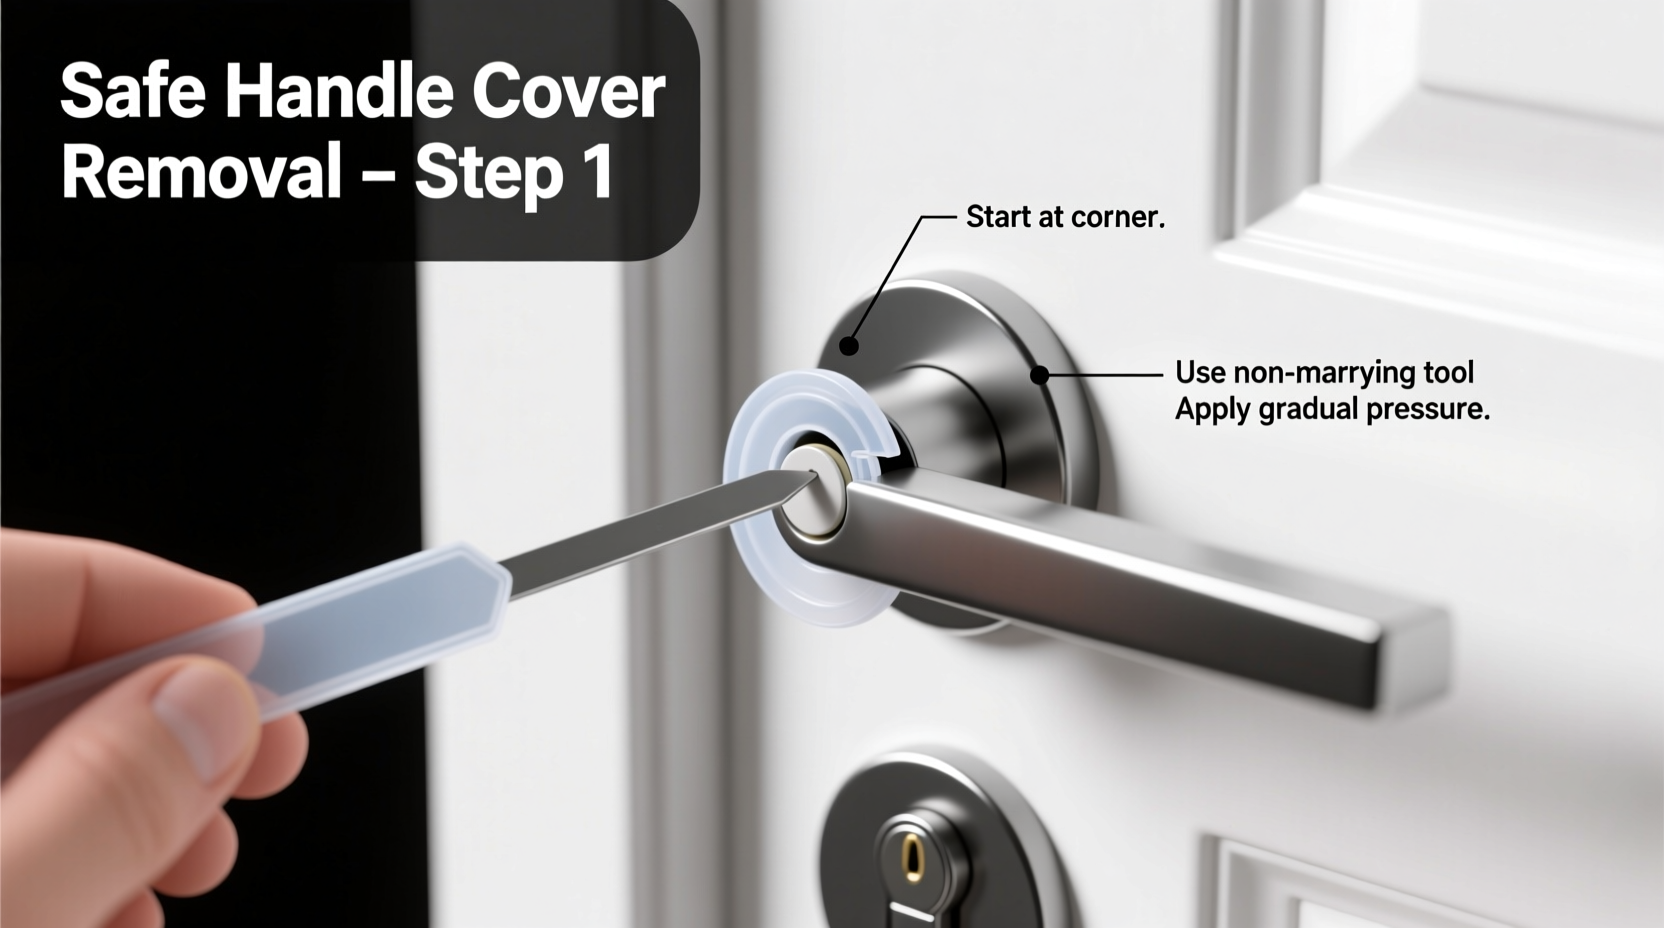
- Gently pry using plastic tools. Insert a plastic putty knife or guitar pick at the seam and twist slightly to create space. Avoid metal tools that scratch.
- Tap lightly with a rubber mallet. If the cover is part of a larger rosette, tap the outer edge to loosen internal tension.
- Twist slowly if designed to rotate. Some trim plates release with a quarter-turn counterclockwise motion once the central screw is removed.
- Remove completely and clean the area. Wipe away debris, old adhesive, or rust before proceeding with repairs or replacements.
When Screws Are Hidden Under Caps
Many modern handles conceal screws beneath a small sliding or pop-off cap. These are typically located on the side or underside of the lever. Use a flat-head screwdriver or needle-nose pliers to gently lift or slide the cap. Once exposed, unscrew the fastener before attempting to remove the cover.
“Never assume a cover should pull straight off. Many are engineered with rotational release mechanisms—forcing them only damages internal components.” — Daniel Reeves, Residential Hardware Technician
Do’s and Don’ts: Best Practices Table
| Do’s | Don’ts |
|---|---|
| Use plastic prying tools to avoid scratching finishes | Use screwdrivers or chisels as prying tools |
| Apply penetrating oil to corroded joints | Soak the entire mechanism in liquid |
| Score paint seals with a utility knife | Peel paint aggressively with metal scrapers |
| Check manufacturer instructions online | Assume all handles follow the same design |
| Work slowly and test movement frequently | Rush or apply excessive force |
Real Example: Removing a Paint-Sealed Bedroom Handle
A homeowner in Portland attempted to update vintage bedroom doors but found the brass lever covers immovable. After inspecting, they noticed no visible screws. Using a utility knife, they scored the joint between the rosette and door, breaking through six layers of paint. A few drops of penetrating oil were applied at the base. After five minutes, a plastic spudger was inserted and gently twisted. The cover loosened with a soft pop. Upon removal, a Phillips screw was revealed underneath—previously sealed shut by paint. The rest of the hardware came apart easily, allowing full replacement without damaging the door’s veneer.
Alternative Methods for Adhesive-Fixed Covers
Some retrofit or smart lock accessories use industrial-strength adhesives. For these:
- Apply heat with a hairdryer on medium setting for 1–2 minutes to soften the bond.
- Insert a thin wire (like a fishing line or piano wire) coated with soapy water and saw gently through the adhesive layer.
- Use commercial adhesive removers (e.g., Goo Gone or 3M Adhesive Remover) after removal to clean residue.
Always test heat and chemicals on an inconspicuous area first, especially on stained or varnished wood.
Essential Tools Checklist
Keep these items on hand before starting:
- Utility knife with fresh blades
- Plastic putty knife or spudger
- Precision screwdrivers (flat and Phillips)
- Penetrating oil (e.g., WD-40 Specialist Penetrant)
- Rubber mallet or soft-faced hammer
- Flashlight or headlamp for close inspection
- Needle-nose pliers for cap removal
- Clean microfiber cloths
Frequently Asked Questions
How do I know if my door handle cover is supposed to come off?
Most interior and exterior lever handles have removable trim plates or rosettes. If there’s a seam around the edge or a slight gap between the cover and door, it’s likely designed to be removed. Fixed plates are rare and usually part of a one-piece assembly.
What should I do if the screw is stripped?
If the screw head is damaged, try using a rubber band placed over the screwdriver tip for added grip. Alternatively, use a screw extractor kit. Drill a small pilot hole into the center of the screw, then insert the extractor to reverse it out.
Can I reuse the cover after removal?
In most cases, yes—especially if removed carefully. Inspect for bent tabs, worn threads, or finish damage. Clean thoroughly and ensure alignment pins or clips are intact before reinstalling.
Final Tips for Long-Term Maintenance
Once the cover is off, take the opportunity to lubricate the internal spindle and latch mechanism with dry graphite or silicone spray. Reassemble in reverse order, ensuring screws are snug but not over-tightened. To prevent future sticking, avoid painting over trim plates. If refinishing a door, mask around hardware completely.
“Prevention is better than repair. A little maintenance every six months keeps hardware functioning smoothly for decades.” — Lila Nguyen, Door Systems Consultant
Conclusion
Removing a stuck door handle cover doesn’t require brute force—just patience, the right tools, and a clear understanding of how the hardware is assembled. By following non-invasive techniques, diagnosing the cause of resistance, and working methodically, you can preserve both function and aesthetics. Whether you’re a DIY enthusiast or maintaining rental property, mastering this skill saves time, money, and frustration.


 浙公网安备
33010002000092号
浙公网安备
33010002000092号 浙B2-20120091-4
Comments
No comments yet. Why don't you start the discussion?