
A leaking water bottle is more than an annoyance—it can ruin electronics, stain clothing, and create unnecessary waste. Whether you're using a stainless steel, plastic, or glass bottle, leaks often stem from preventable issues like worn seals, improper assembly, or poor maintenance. The good news: with the right knowledge and habits, you can eliminate leaks for good. This guide breaks down proven strategies to keep your bottle watertight, extend its lifespan, and avoid the daily frustration of damp bags and desks.
Understand the Common Causes of Leaks
Before fixing a leak, it's essential to identify its source. Most leaks aren't due to manufacturing defects but rather misuse or wear over time. Common culprits include:
- Worn or damaged O-rings (gaskets): These small rubber seals around the cap are the primary defense against leaks. Over time, they degrade, crack, or shift out of place.
- Improper threading or tightening: Caps that aren’t fully screwed on—or are overtightened—can misalign the seal and cause seepage.
- Cracked or warped lids: Impact damage or exposure to extreme temperatures can distort the lid’s shape, preventing a proper seal.
- Debris in the sealing area: Leftover residue, mineral buildup, or food particles can interfere with closure integrity.
- Design flaws in certain models: Some bottles have known weak points, such as flip-top mechanisms or push-pull lids that fail under pressure.
Step-by-Step Guide to Prevent and Fix Leaks
Follow this systematic approach to ensure your bottle stays leak-free through daily use and travel.
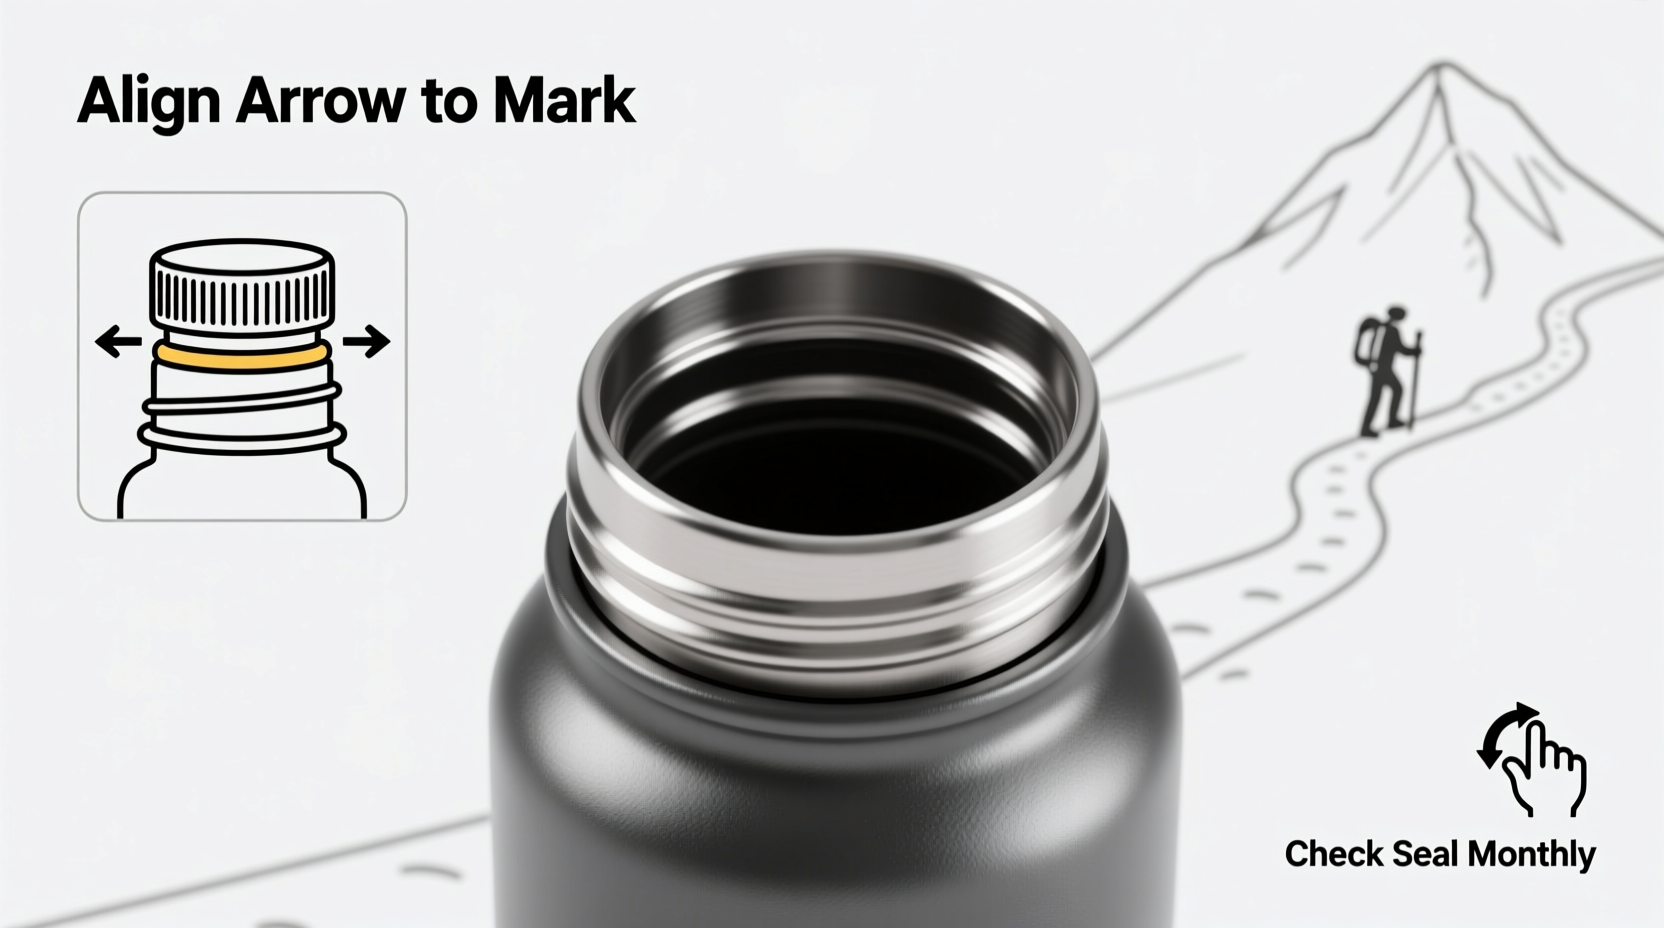
- Disassemble the cap completely. Remove the O-ring, mouthpiece, and any additional parts. Use warm soapy water and a small brush to clean each component thoroughly.
- Inspect the O-ring for damage. Look for cracks, warping, or stiffness. If the rubber feels brittle or doesn’t flex smoothly, it’s time to replace it. Many manufacturers sell replacement kits online.
- Check the threading on both the bottle and cap. Damaged threads prevent proper alignment. If stripped or cracked, consider replacing the lid or bottle.
- Reinstall the O-ring correctly. Ensure it sits flat in its groove without twisting or stretching. Apply a tiny drop of food-grade silicone lubricant to help it slide into place and improve sealing.
- Reassemble and test before filling. Screw the cap on by hand until snug—do not overtighten, as this can deform the seal. Invert the bottle over a sink and wait 30 seconds to check for drips.
Repeat this process monthly or whenever performance declines. Regular maintenance prevents gradual degradation that leads to sudden failures.
Do’s and Don’ts of Water Bottle Care
| Do’s | Don’ts |
|---|---|
| Clean all parts weekly with mild soap and a bottle brush | Use abrasive scrubbers that scratch plastic or silicone |
| Replace O-rings every 3–6 months with regular use | Put bottles with rubber seals in the dishwasher unless labeled safe |
| Store with the lid off to prevent moisture buildup and odor | Leave liquid inside for days, encouraging bacterial growth and seal deterioration |
| Hand-tighten caps—don’t force them | Drop the bottle on hard surfaces, risking internal cracks |
| Use compatible replacement parts from the manufacturer | Mix and match lids or seals from different brands or models |
Real Example: How One Commuter Solved a Persistent Leak
Jamie, a software developer in Portland, struggled with a stainless steel bottle that leaked in her backpack every morning. She assumed it was defective and considered returning it. Instead, she decided to troubleshoot. After disassembling the lid, she noticed the O-ring was slightly twisted and had a hairline crack near the hinge. She ordered a $5 replacement kit from the brand’s website, cleaned the threading with vinegar, and reassembled the cap carefully. Since then, her bottle hasn’t leaked—even when tossed sideways in her bag during rush hour. “I didn’t realize how much a 50-cent rubber ring could cost me in ruined notebooks,” she said. “Now I check it every time I wash the bottle.”
Expert Insight on Long-Term Durability
“Most people treat reusable bottles like disposables—they expect perfection without maintenance. But just like tires on a car, seals and hinges wear down. The key to longevity isn’t just buying high-end gear; it’s routine inspection and timely part replacement.” — Dr. Lena Torres, Materials Engineer and Sustainable Product Consultant
Checklist: Monthly Leak Prevention Routine
Stay ahead of leaks with this simple monthly checklist:
- ☐ Disassemble the entire lid mechanism
- ☐ Wash all components with warm, soapy water
- ☐ Inspect O-ring for cracks, dryness, or deformation
- ☐ Replace O-ring if older than 6 months or showing wear
- ☐ Check bottle neck and cap threads for damage
- ☐ Lubricate O-ring lightly with food-safe silicone grease (optional)
- ☐ Reassemble and perform a leak test
- ☐ Store upright with lid off when not in use
Frequently Asked Questions
Why does my new water bottle leak even though I haven’t dropped it?
New bottles can leak if the O-ring isn’t seated properly from the factory. Always disassemble and reassemble the cap before first use. Also, some lids require a break-in period—tighten gradually over the first few uses to allow the seal to conform.
Can I use petroleum jelly on my bottle’s O-ring?
No. Petroleum-based products degrade rubber and silicone over time, causing swelling, cracking, or loss of elasticity. Use only food-grade silicone lubricants designed for water bottles or kitchen appliances.
Is it safe to put my water bottle in the freezer?
Generally, no. Freezing water expands and can warp the bottle or dislodge the seal. Even if the bottle is labeled “freezer-safe,” remove the cap first. Never freeze bottles with tight-sealing lids attached.
Conclusion: Make Leak-Free Hydration a Habit
Stopping leaks isn’t about finding the perfect bottle—it’s about consistent care and attention to detail. By understanding how seals work, maintaining your equipment, and replacing worn parts promptly, you can enjoy reliable, mess-free hydration for years. Choose quality materials, follow a simple maintenance schedule, and treat your bottle like the durable tool it’s designed to be. Small habits make a big difference.


 浙公网安备
33010002000092号
浙公网安备
33010002000092号 浙B2-20120091-4
Comments
No comments yet. Why don't you start the discussion?