
Clip Studio Paint is a powerful digital illustration tool beloved by artists across the globe, especially on the iPad for its intuitive interface and responsive stylus support. While creating artwork is seamless, managing files—particularly deleting those no longer needed—can sometimes feel unclear, especially for new users. Unlike standard file systems, Clip Studio Paint organizes projects within its own internal structure, which means deletion isn’t always as straightforward as dragging a file to the trash.
Knowing how to properly delete saved files ensures you maintain optimal storage space, reduce clutter, and keep your creative workflow efficient. This guide walks you through every method available on the iPad version of Clip Studio Paint, including practical tips, common pitfalls, and best practices for file management.
Understanding File Storage in Clip Studio Paint
Before deleting anything, it’s essential to understand where your files live. Clip Studio Paint uses two primary locations for storing work: local device storage and cloud sync (if enabled via Clip Studio Assets). When you save a file, it typically goes into the app’s dedicated folder system, accessible only through the app itself unless exported manually.
This internal organization means that even if you close a project, it remains stored until explicitly deleted. Over time, unfinished sketches, test layers, or outdated versions can accumulate, consuming valuable iPad storage. Unlike desktop operating systems, iOS does not allow direct access to app folders, so all file management must occur within Clip Studio Paint.
“Artists often forget that closed files still occupy space. Regular cleanup is just as important as backing up finished work.” — Jordan Lee, Digital Illustration Instructor
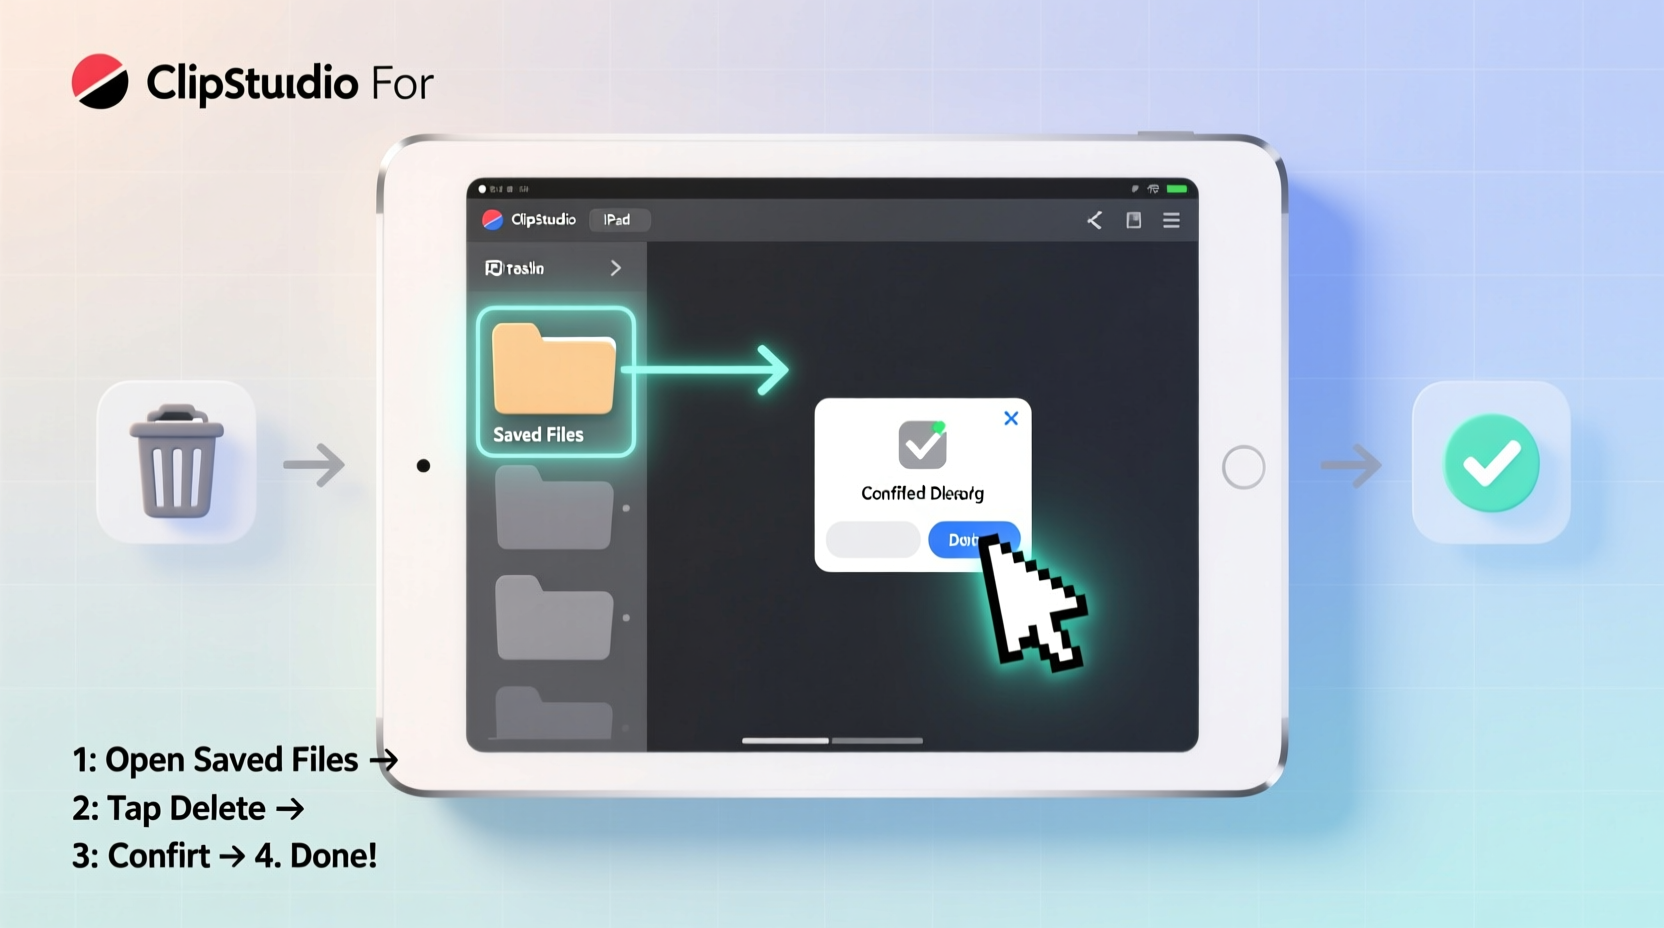
Step-by-Step Guide to Deleting Saved Files
Deleting a saved file in Clip Studio Paint on iPad follows a consistent process regardless of file type (.clip, .psd, or exported images). Here’s how to do it correctly:
- Open Clip Studio Paint on your iPad and wait for the startup screen to load.
- Navigate to the Home Screen (tap the house icon in the top-left corner if already in a project).
- Select \"File\" > \"Open\" > \"Open File\" from the menu bar at the top.
- In the file browser window, locate the file you want to delete. You can browse by date, name, or folder.
- Press and hold the file thumbnail for about one second until a context menu appears.
- Tap \"Delete\" from the options.
- Confirm the action when prompted. The file will be permanently removed.
This method works for both individual .clip files and imported documents you’ve saved within the app. Note that once deleted, recovery is only possible if you have a backup—either through iCloud, external export, or third-party cloud services like Dropbox.
Managing Multiple Files Efficiently
If you're working on multiple projects or have accumulated dozens of drafts, deleting files one by one becomes inefficient. Fortunately, Clip Studio Paint allows batch actions through folder-based organization.
Create custom folders under the \"My Documents\" section to group similar projects—such as “Concept Sketches,” “Client Work,” or “Abandoned Ideas.” Once organized, you can delete entire folders at once:
- Go to File > Open > Open File.
- Navigate to the parent folder containing your subfolders.
- Long-press the folder you wish to remove.
- Select Delete and confirm.
All contents within that folder—including nested files and subfolders—will be erased. This approach streamlines cleanup, especially after completing major projects or seasonal reviews.
Do’s and Don’ts of File Deletion
| Do’s | Don’ts |
|---|---|
| ✔ Back up important files externally before deletion | ✘ Assume deleted files go to a recoverable trash bin |
| ✔ Use descriptive names and folders for easier identification | ✘ Delete files without verifying their content first |
| ✔ Periodically review old projects for archiving or removal | ✘ Rely solely on auto-save without manual exports |
| ✔ Export final artwork to Photos or cloud storage before deleting source files | ✘ Ignore storage warnings from your iPad |
Real Example: Cleaning Up After a Manga Project
Sophie, a freelance manga artist based in Vancouver, recently completed a 24-page chapter using Clip Studio Paint on her iPad Pro. During development, she created over 50 file versions—thumbnails, rough layouts, panel variations, and color tests. After finalizing the pages, she realized her device was running low on storage, triggering performance lag.
Instead of randomly deleting files, Sophie returned to the Home Screen and opened the \"Open File\" browser. She navigated to her project folder labeled “Manga_Chapter_3” and reviewed each file by tapping to preview. She exported the final .clip files to her iCloud Drive and then long-pressed the entire folder, selecting “Delete.” Within seconds, over 1.2 GB of temporary data was cleared, restoring smooth app performance and freeing space for her next assignment.
Her disciplined approach prevented accidental loss of final artwork while eliminating redundant drafts—a model practice for any digital creator.
Alternative Methods: Exporting and External Management
Sometimes, you may want to remove a file from Clip Studio Paint but keep it accessible elsewhere. In such cases, exporting is safer than immediate deletion.
To export:
- Open the file in Clip Studio Paint.
- Tap File > Export > Export As.
- Choose format: PNG, JPEG, PSD, or PDF depending on need.
- Select destination: Save to Files, Photos, or a connected cloud service.
Once confirmed, the file is stored outside the app. Only then should you delete the original .clip file using the earlier method. This two-step process ensures nothing is lost permanently during cleanup.
FAQ
Can I recover a deleted Clip Studio Paint file?
No, Clip Studio Paint does not have a built-in recycle bin or undo-delete function. Once a file is deleted, it cannot be retrieved unless you previously exported or backed it up to an external location like iCloud, Dropbox, or your computer.
Why can’t I find my saved file in the Open menu?
If a file doesn’t appear, it may have already been deleted, moved to a different folder, or not saved properly. Ensure you’re checking the correct storage location (local vs. cloud) and use descriptive naming conventions to make future searches easier.
Does deleting a file in Clip Studio Paint free up iPad storage immediately?
Yes. Since all .clip files are stored locally within the app’s sandboxed environment, deletion removes them completely and reclaims storage space instantly. You can verify this by checking Settings > General > iPad Storage after deletion.
Essential Checklist for Safe File Removal
- ✅ Confirm the file is no longer needed or has been backed up
- ✅ Preview the file before deletion to avoid mistakes
- ✅ Export final versions to external storage (Photos, iCloud, etc.)
- ✅ Organize files into labeled folders for easier management
- ✅ Delete unnecessary folders or batches after project completion
- ✅ Monitor iPad storage regularly to prevent slowdowns
Final Thoughts
Maintaining a clean and organized workspace in Clip Studio Paint enhances both creativity and technical performance. Deleting saved files isn’t just about freeing up space—it’s about curating your digital studio so only meaningful, current projects remain visible and accessible.
By mastering the simple gestures of long-pressing thumbnails and navigating the file browser, you gain full control over your artistic archive. Combine this knowledge with regular backups and smart folder structures, and you’ll never face the stress of lost work or sluggish performance again.


 浙公网安备
33010002000092号
浙公网安备
33010002000092号 浙B2-20120091-4
Comments
No comments yet. Why don't you start the discussion?