
As soon as you unbox your new iPhone 16, the desire to protect it is immediate — and rightly so. A high-quality phone cover shields your investment from scratches, drops, and everyday wear. However, improper installation can lead to unintended consequences: cracked edges, misaligned ports, or even screen pressure that compromises structural integrity. The good news? Installing a case doesn’t have to be a tense, risky process. With the right approach, tools, and awareness of your device’s design, you can secure your iPhone 16 in its cover smoothly and safely every time.
Understanding Your iPhone 16 Design
The iPhone 16 continues Apple’s tradition of precision engineering, featuring tightly toleranced dimensions, flush camera bump alignment, and sensitive edge seals. Unlike older models with looser fits, modern iPhones demand careful handling during case installation. Most third-party and first-party cases are designed to snap securely around the frame, but excessive force or incorrect angles can stress the aluminum or titanium chassis, particularly near the volume buttons and charging port.
Before attempting installation, familiarize yourself with key areas:
- Camera module: Slightly raised; cases must accommodate height without pressing down.
- Speaker and microphone grilles: Easily blocked if the case isn't aligned properly.
- Button cutouts: Precision-molded; forcing them can crack internal button mechanisms.
- Charging port clearance: Debris or misalignment may interfere with MagSafe or USB-C connectors.
Step-by-Step Installation Process
Follow this methodical sequence to ensure a flawless fit without risking harm to your device.
- Clean both surfaces: Use a microfiber cloth to wipe down the iPhone and the interior of the case. Dust or lint particles act like sandpaper under pressure and can scratch coatings.
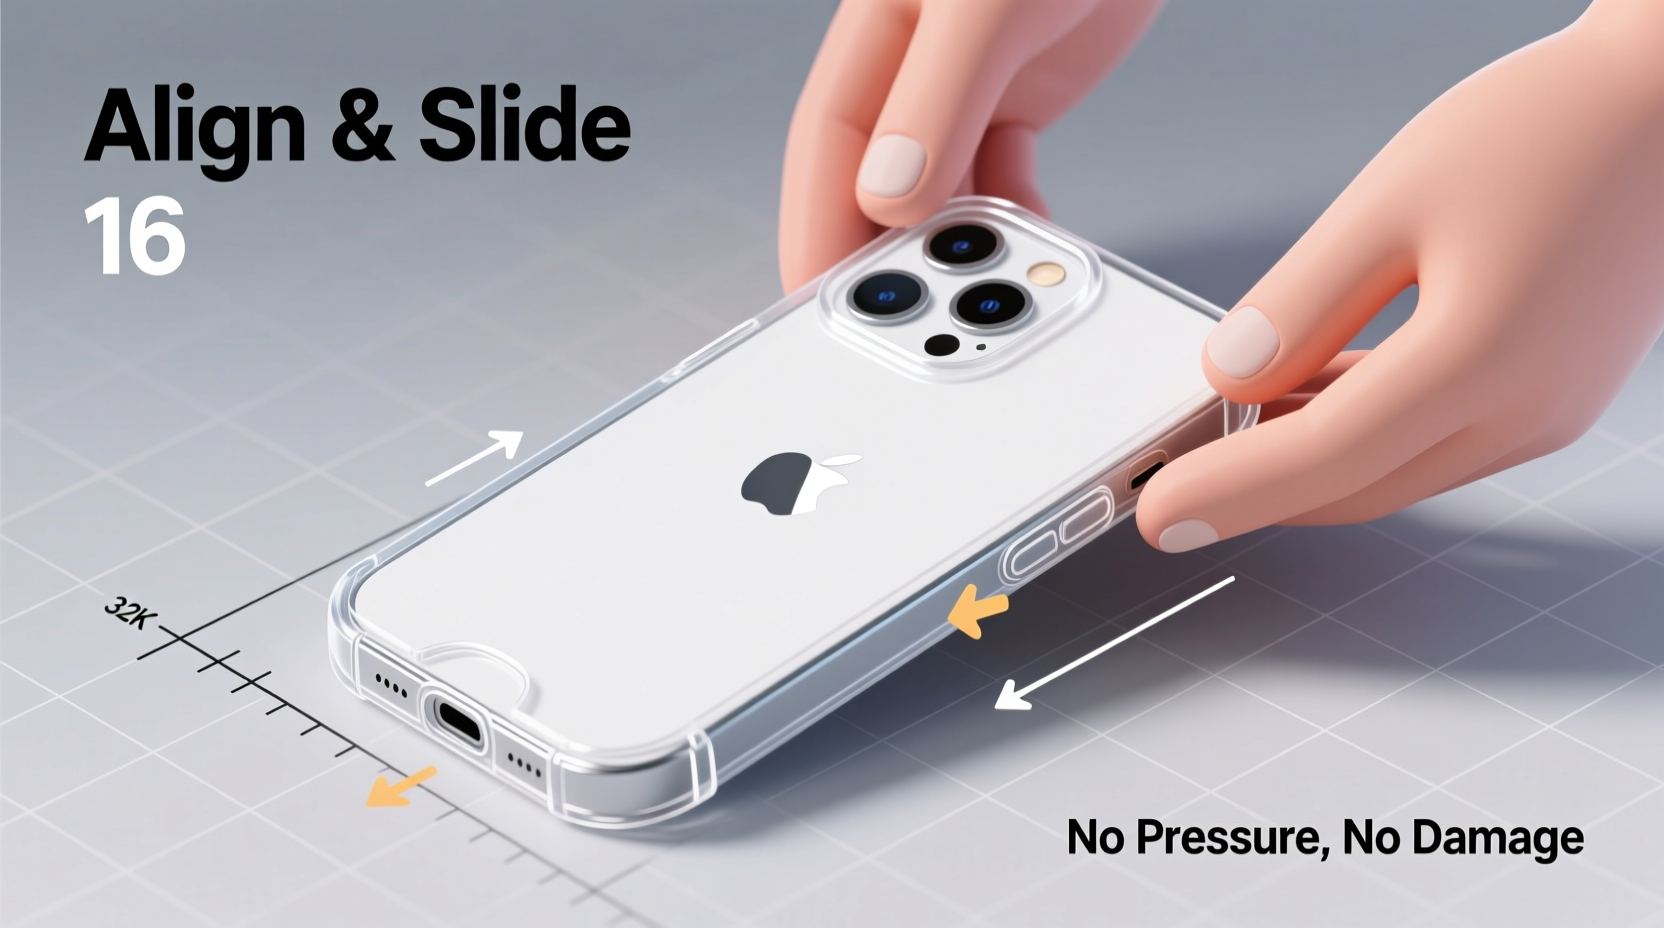
- Align the bottom first: Hold the case with the charging port facing downward. Gently guide the Lightning or USB-C port into place, ensuring no plastic obstructs the opening.
- Insert the top edge next: Once the bottom is seated, slightly flex the case upward and align the top corners. Do not twist or bend aggressively.
- Snap into place evenly: Apply gentle, symmetrical pressure along the sides. You should hear soft clicks indicating secure attachment. If resistance occurs, stop immediately and recheck alignment.
- Verify functionality: Test all buttons, check speaker clarity, and confirm full access to ports and camera lenses.
This technique minimizes lateral stress and prevents warping. Rushing through these steps increases the likelihood of cracking polycarbonate frames or damaging silicone linings inside hybrid cases.
Do’s and Don’ts When Installing Your Case
| Do’s | Don’ts |
|---|---|
| Use gloves for better grip (cotton or nitrile) | Use metal tools to pry or lever the case |
| Check manufacturer instructions for model-specific tips | Install the case over screen protectors with thick edges |
| Store the case in room-temperature environments before use | Force the case when one corner resists snapping |
| Inspect for manufacturing defects prior to installation | Stretch rubberized cases excessively beyond recommended limits |
| Remove the SIM tray before fitting tight-fitting cases | Install the case while the phone is warm (e.g., after charging) |
Thermal expansion plays a subtle but important role. Installing a case on a warm iPhone may seem easier due to softened materials, but as the phone cools, contraction can create tension within the case, leading to long-term warping or micro-cracks.
Expert Insight: Why Proper Installation Matters
“Over 30% of case-related iPhone damage stems from improper installation, not accidents. Users often underestimate how much force a modern smartphone frame can tolerate. A single misaligned snap can compromise water resistance seals or dislodge internal components.” — Dr. Alan Reyes, Senior Mobile Hardware Analyst at TechDurability Labs
According to Reyes, many users apply up to twice the necessary pressure when seating a case, especially with rugged or multi-layer designs. He emphasizes that most quality cases are engineered for intuitive placement — if it feels difficult, something is wrong.
Real Example: Sarah’s Near-Miss Experience
Sarah, a graphic designer in Austin, purchased a premium leather-backed case for her iPhone 16 Pro Max. Excited to protect her new device, she tried to install it straight out of the box without inspecting the interior. Unseen factory residue caused uneven adhesion, and when she pressed harder to “get it to click,” the top-left corner snapped with an audible crack.
Upon inspection, she found a hairline fracture on the case and minor scuffing on the phone’s finish. After contacting customer support, she learned the case had a slight molding defect. Replacing it was free, but the experience taught her to always inspect and test-fit before final installation. Now, she uses a lint roller on the inside of new cases and performs a dry alignment without pressure first.
Frequently Asked Questions
Can I install my iPhone 16 case with a screen protector on?
Yes, most cases are designed to accommodate flat-edged screen protectors. However, avoid installing cases over bulky or poorly fitted tempered glass with raised borders, as they can prevent proper closure around the display bezel and increase front pressure.
What should I do if the case won’t snap into place?
Stop applying force. Remove the case and double-check for debris, misaligned ports, or manufacturing flaws. Compare the case against Apple’s official dimensions (available online) to verify compatibility. If resistance persists, contact the manufacturer — some cases require break-in periods or have known fitment issues with certain batches.
Is it safe to use lubricants like silicone spray to ease installation?
No. Lubricants can degrade internal case materials, attract dust, and seep into seams where they may damage adhesive layers or electronic components. Never use oils, sprays, or household cleaners during installation.
Final Checklist Before Securing Your Case
- ✅ Clean the iPhone body and case interior
- Eliminates grit that could scratch surfaces.
- ✅ Confirm correct orientation
- Ensure camera cutout matches the module position (top-left on iPhone 16).
- ✅ Align bottom port first
- Establishes a stable anchor point.
- ✅ Snap sides gently and symmetrically
- Prevents twisting forces on the chassis.
- ✅ Test all controls post-installation
- Volume, power, mute switch, speakers, and charging function must remain fully accessible.
- ✅ Inspect for gaps or bulges
- A well-fitted case lies flush with no visible separation.
Conclusion
Protecting your iPhone 16 shouldn’t come at the cost of risking its integrity. By approaching case installation with patience and precision, you preserve both the device’s condition and the effectiveness of its protection. Whether you’re using a minimalist bumper or a heavy-duty drop-proof shell, the principles remain the same: clean surfaces, proper alignment, and controlled pressure. These small efforts compound into long-term benefits — maintaining resale value, preserving water resistance, and avoiding unnecessary repairs.


 浙公网安备
33010002000092号
浙公网安备
33010002000092号 浙B2-20120091-4
Comments
No comments yet. Why don't you start the discussion?