
Digital clocks are everywhere—in kitchens, bedrooms, offices, and on smartphones. Despite their ubiquity, many people overlook the importance of accurate time synchronization. A clock that’s off by even a few minutes can disrupt routines, cause missed appointments, or throw off smart home automation schedules. The good news is that syncing your digital clock doesn’t require technical expertise. With a few straightforward techniques, you can ensure precise timekeeping across all your devices—effortlessly and consistently.
Why Accurate Time Synchronization Matters
Time accuracy affects more than just punctuality. In today’s interconnected world, synchronized clocks support seamless communication, efficient workflows, and reliable automation. Consider a household where alarms, ovens, and thermostats operate on different times. This inconsistency can lead to confusion, inefficiency, and even safety risks. Similarly, in professional environments, mismatched timestamps on emails, logs, or video conferences can create accountability issues.
According to Dr. Alan Pierce, a systems engineer specializing in time synchronization protocols, “Even small time discrepancies can compound over days, leading to noticeable drift. Regular calibration ensures reliability across personal and networked devices.”
“Even small time discrepancies can compound over days, leading to noticeable drift. Regular calibration ensures reliability across personal and networked devices.” — Dr. Alan Pierce, Systems Engineer
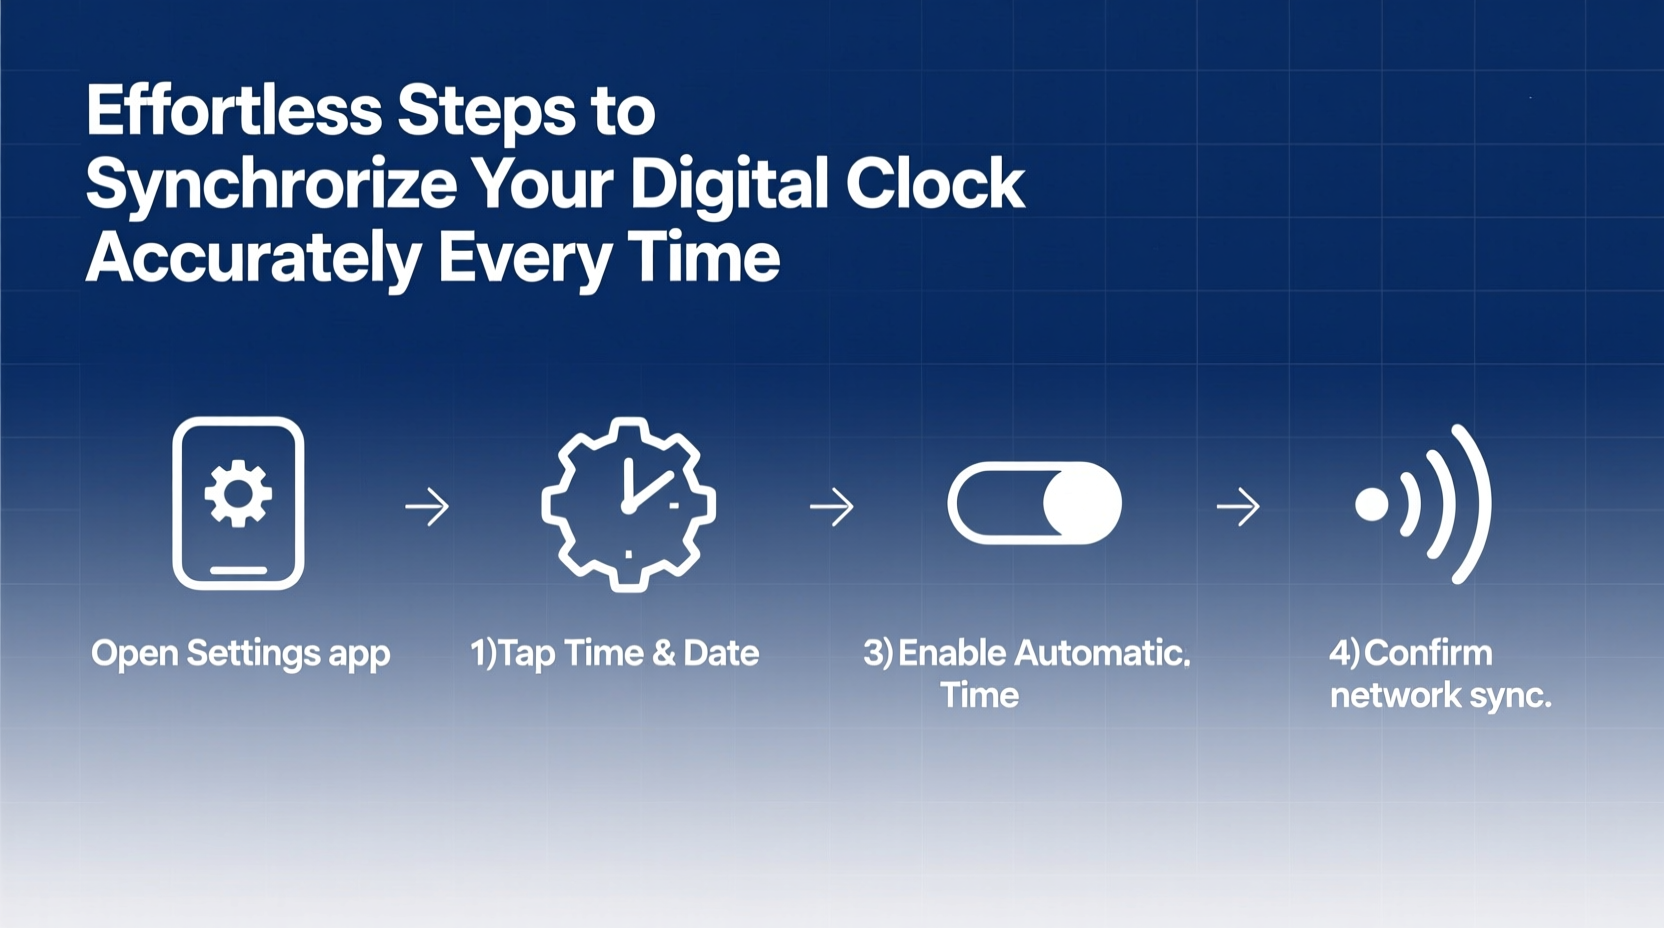
Step-by-Step Guide to Syncing Your Digital Clock
Whether it’s a standalone alarm clock, microwave display, or wall-mounted digital timer, the process of synchronization follows a predictable pattern. Follow these steps to achieve accurate results every time:
- Identify the clock type: Determine if your device syncs automatically (e.g., via radio signals, Wi-Fi, or NTP) or requires manual input.
- Select a trusted time source: Use an authoritative reference such as atomic clock websites (time.gov), smartphone time settings, or voice assistants like Google Assistant (“What time is it?”).
- Access the clock settings: Press and hold the “Set,” “Mode,” or “Clock” button until the display begins to flash.
- Adjust hours and minutes: Use increment/decrement buttons to match the reference time exactly. Be mindful of AM/PM settings.
- Confirm and exit: Press the set button again or wait for auto-save to finalize the update.
- Verify after 24 hours: Recheck the time the next day to detect any drift.
Automatic vs. Manual Synchronization: What’s Best?
Not all digital clocks are created equal. Some rely entirely on user input, while others use advanced technologies to stay accurate without intervention. Understanding the difference helps you choose the right approach—or upgrade strategy—for your needs.
| Feature | Manual Clocks | Automatic Clocks |
|---|---|---|
| Time Source | User input | Atomic signal, GPS, or internet (NTP) |
| Accuracy | Depends on user; prone to drift | ±1 second per month or better |
| Setup Effort | Moderate (requires periodic adjustment) | Low (initial setup only) |
| Lifespan Reliability | Decreases over time due to battery/crystal aging | Consistent with firmware updates |
| Examples | Basic alarm clocks, older microwaves | Smart displays, Wi-Fi thermostats, DAB radios |
For long-term convenience, automatic clocks are superior. They often use the Network Time Protocol (NTP) or receive radio signals from atomic clocks like WWVB in the U.S. These clocks self-correct during daylight saving transitions and maintain precision without user involvement.
Real-World Example: Fixing a Kitchen Clock Cluster
In Portland, Oregon, homeowner Lisa Tran noticed her kitchen appliances displayed three different times: the microwave was five minutes fast, the coffee maker two minutes slow, and the oven matched neither. After missing a Zoom meeting due to conflicting timers, she decided to resolve the issue.
Lisa used her iPhone—set to “Set Automatically” under Date & Time—as the master time source. She reset each appliance one by one, referencing the phone’s clock. For future ease, she replaced the microwave with a smart model that connects to Wi-Fi and updates time automatically. Within a week, her entire kitchen ecosystem was synchronized, improving both efficiency and peace of mind.
Checklist: Ensure Flawless Clock Synchronization
Use this checklist to maintain accurate time across all your digital devices:
- ✅ Identify all digital clocks in your home or workspace
- ✅ Confirm which ones support automatic synchronization
- ✅ Choose a single, reliable time source (e.g., smartphone or official atomic clock site)
- ✅ Adjust each manual clock using the step-by-step method
- ✅ Test alarm functions post-sync to ensure correct timing
- ✅ Schedule a monthly check for drift, especially in battery-powered units
- ✅ Upgrade outdated clocks to Wi-Fi or atomic models when possible
Frequently Asked Questions
Why does my digital clock lose time even after I set it?
Digital clocks use quartz crystals to track time, but these oscillators can age or be affected by temperature changes, leading to slight inaccuracies. Over weeks, this may result in gains or losses of several seconds. Battery-powered clocks are especially prone to drift as voltage drops.
Can I sync a digital clock without internet access?
Yes. You can manually set the time using a trusted external source like a radio time signal (e.g., WWV broadcasts), a dedicated atomic clock display, or a mobile phone with automatic time enabled. Some clocks also support Bluetooth pairing with smartphones for offline syncing.
Do atomic clocks need batteries?
Most consumer-grade “atomic clocks” still require batteries or power adapters. The term refers to their ability to receive radio signals from actual atomic time standards, not their internal power source. However, they will stop syncing if the battery dies or signal reception is blocked.
Maximizing Long-Term Accuracy
Synchronization isn’t a one-time fix—it’s part of ongoing time hygiene. To keep your clocks accurate over months and years, consider environmental factors. Avoid placing digital clocks near heat sources, refrigerators, or humid areas, as extreme temperatures affect quartz crystal stability. Dust buildup around buttons or sensors can also interfere with settings.
For households with multiple users, designate one person as the “timekeeper” responsible for routine checks. Alternatively, integrate smart speakers or hubs (like Amazon Echo or Google Nest) that announce the time on command and serve as centralized references.
“The most accurate clock is useless if no one trusts it. Consistency across devices builds confidence in your daily schedule.” — Maria Chen, Home Automation Consultant
Conclusion
Synchronizing your digital clock doesn’t have to be tedious or technical. By understanding your device types, using reliable time sources, and applying simple maintenance habits, you can achieve flawless accuracy with minimal effort. Whether you're streamlining a smart home or simply ensuring your morning alarm rings at the right moment, precise timekeeping enhances reliability and reduces stress.


 浙公网安备
33010002000092号
浙公网安备
33010002000092号 浙B2-20120091-4
Comments
No comments yet. Why don't you start the discussion?