
Switching your Apple Watch band can transform both the look and comfort of your wearable. Metal bands—whether stainless steel, Milanese loop, or link-style—offer durability, elegance, and breathability. But many users hesitate to install them at home, fearing damage to their device or struggling with alignment. The truth is, installing a metal Apple Watch band is simpler than it appears. With the right approach, you can complete the process in under five minutes, without tools or technical expertise.
Why Choose a Metal Band?
Metal bands are more than just a fashion upgrade. They provide structural support, resist wear from sweat and moisture, and often offer better airflow than rubber or leather alternatives. Stainless steel and titanium options are hypoallergenic for most users and maintain their luster over time with minimal care. Whether you're dressing up for a meeting or transitioning from gym to office, a well-fitted metal band elevates your Apple Watch’s presence.
Step-by-Step Guide to Installing Your Metal Band
The key to a smooth installation lies in understanding the release mechanism built into every Apple Watch. All models from Series 1 onward use a spring-loaded pin system that allows bands to slide in and lock securely. Follow this sequence carefully:
- Prepare your workspace: Choose a clean, flat surface with good lighting. Avoid carpets or cluttered areas where small parts could be lost.
- Remove the current band: Flip your Apple Watch over. On the back, locate the band release button—a small circular tab near the strap connector. Press and hold it while gently sliding the band outward. Repeat on the other side.
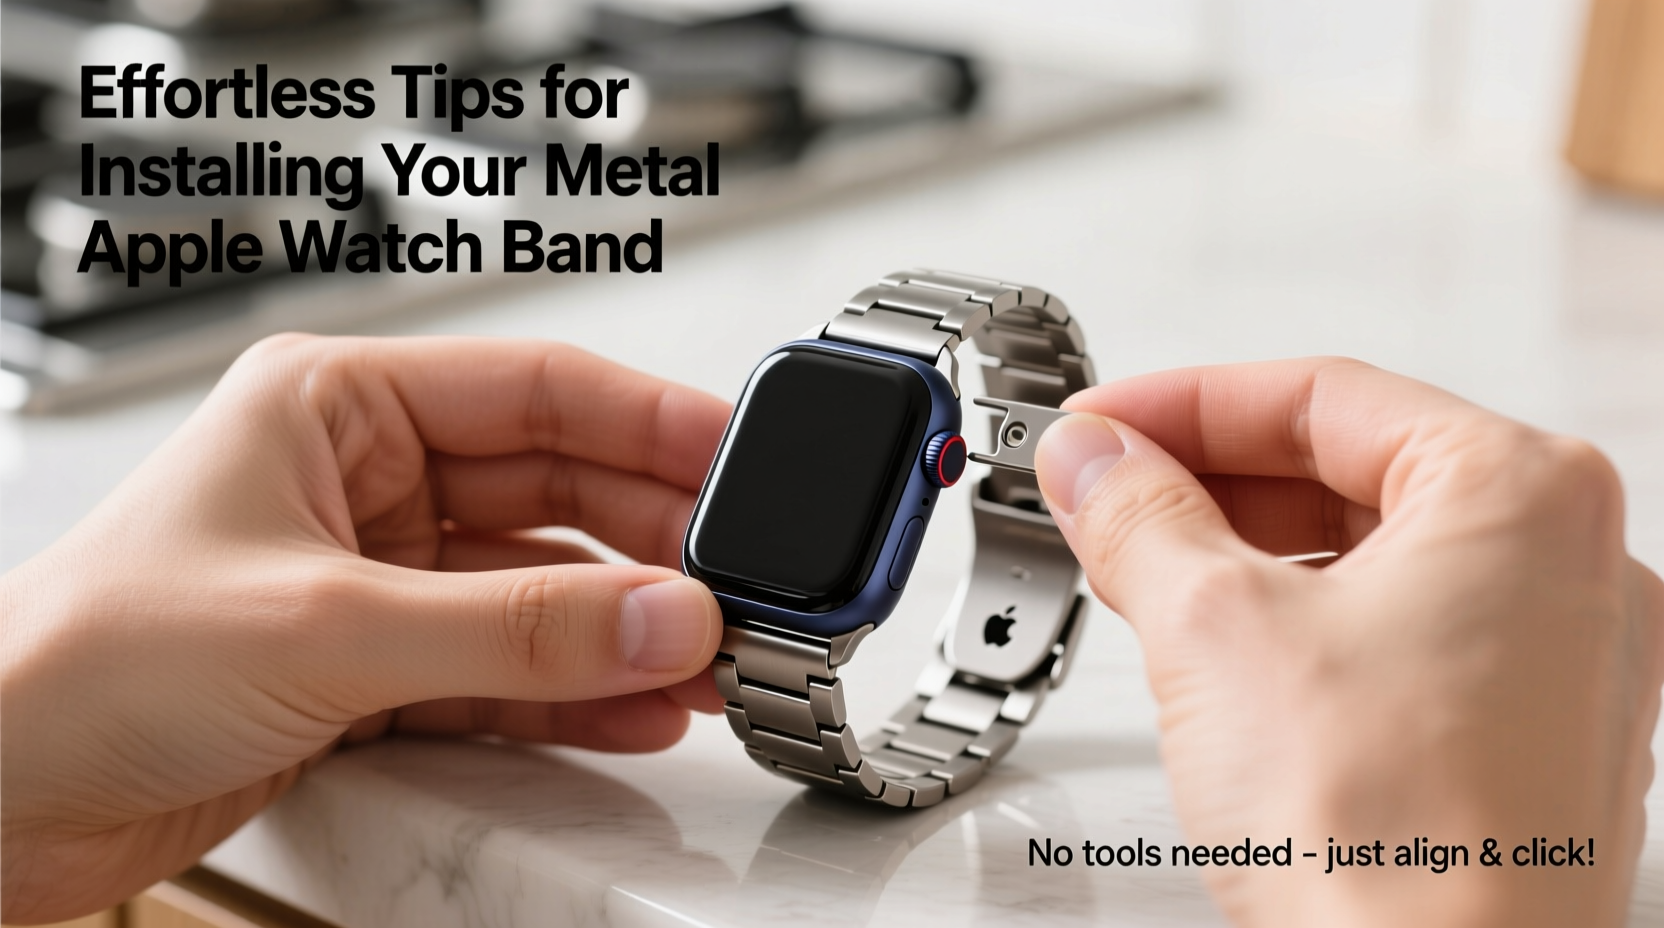
- Align the new metal band: Take the metal band’s connector end and align it with the slot on the watch body. Ensure the release button faces the same direction as on the original band (usually toward the center of the watch).
- Insert and click into place: Slide the band straight in until you hear a soft click. Apply even pressure—do not angle or force it. The internal spring will engage automatically.
- Repeat on the opposite side: Attach the second connector using the same method. Test both ends by gently tugging to confirm they’re secure.
Once both sides are locked, turn on your Apple Watch to ensure no error messages appear. If the display functions normally, the installation was successful.
Avoiding Common Installation Mistakes
Even experienced users occasionally misalign connectors or apply uneven pressure. These errors can lead to scratches or incomplete locking. To minimize risk, follow best practices and steer clear of frequent pitfalls.
| Do’s | Don’ts |
|---|---|
| Align the band straight before insertion | Angle or tilt the band during attachment |
| Press the release button fully when removing old bands | Pull aggressively without depressing the release |
| Use fingers only—no tools required | Use tweezers, keys, or screwdrivers to assist |
| Check compatibility between band model and watch size | Force a 42mm band onto a 38/40mm case |
| Clean connectors periodically with dry microfiber cloth | Expose connection points to water or cleaning agents |
Real Example: First-Time User Success Story
Sarah, a remote worker in Portland, recently upgraded her Apple Watch Series 7 with a brushed stainless steel link band. She’d avoided changing bands before, worried about breaking her device. After watching a tutorial video and reading safety tips online, she decided to try it herself one Saturday morning.
Using a kitchen table with indirect sunlight, she powered down her watch, removed the sport band, and slowly inserted the metal connector. Initially, the left side wouldn’t click. She paused, realigned the piece, and tried again—this time with full contact. It snapped in smoothly. Within three minutes, both sides were attached. She adjusted the links using the included tool (or visited a local jeweler for free resizing), and wore it confidently to her next Zoom meeting. “I felt like I’d unlocked a pro feature,” she said. “Now I switch bands weekly.”
Expert Insight on Band Maintenance
“Proper installation sets the foundation for long-term performance. A securely fitted metal band reduces stress on the watch casing and prevents wobbling that can loosen internal components over time.” — Jordan Lee, Wearable Technology Technician, iFixWear Inc.
Jordan emphasizes that routine checks matter. Every few weeks, inspect the connection points for debris or corrosion, especially if you live in humid climates or exercise frequently with the watch on. A quick wipe with a lint-free cloth keeps the interface clean and functional.
Essential Checklist Before You Begin
- ✅ Confirm band compatibility with your Apple Watch model and size
- ✅ Power off the device to prevent accidental touches
- ✅ Work on a stable, well-lit surface
- ✅ Inspect the metal band connectors for bends or damage
- ✅ Have the correct sizing tool ready (if adjusting links)
- ✅ Wash and dry hands to avoid transferring oils to the screen
This checklist ensures you approach the task with confidence and precision. Skipping even one step can increase the chance of mishaps.
Frequently Asked Questions
Can I install a third-party metal band safely?
Yes, provided the band is certified by Apple or adheres to official design specifications. Reputable brands like Belkin, Nomad, and WOSA manufacture high-quality metal bands with precise tolerances. Always verify product reviews and compatibility charts before purchase.
What if the band doesn’t click into place?
First, double-check the orientation. The release button on the band must face inward, toward the digital crown. If alignment is correct but still resistant, there may be dust in the port. Gently blow into the slot or use compressed air (at low pressure) to clear obstructions. Never force entry.
Do I need special tools to resize a metal link band?
Some bands come with a micro-adjustment system requiring only finger pressure. Others—especially traditional link styles—require a pin removal tool and a small hammer or pushpin. Many local jewelers offer free resizing services, which can save time and reduce risk of damaging the links.
Final Thoughts: Make It Effortless
Installing a metal Apple Watch band at home isn’t just possible—it’s designed to be intuitive. Apple’s engineering prioritizes user accessibility, so no screws, clips, or adhesives are involved. By respecting the mechanics of the connector system and taking a patient, methodical approach, anyone can master this simple maintenance task.
Once installed, your metal band offers lasting comfort and a polished aesthetic. Over time, switching bands becomes second nature, allowing you to personalize your device for different occasions. Whether you prefer sleek silver for workdays or dark gunmetal for evenings out, the ability to change bands empowers you to express yourself through your tech.


 浙公网安备
33010002000092号
浙公网安备
33010002000092号 浙B2-20120091-4
Comments
No comments yet. Why don't you start the discussion?