
Moving videos from your phone to your computer shouldn’t feel like a tech puzzle. Whether you’re backing up vacation clips, editing social media content, or freeing up space on your device, the process should be seamless, secure, and quick. Yet many people still rely on outdated methods—like emailing files to themselves or using unreliable third-party apps—that waste time and risk privacy.
The good news is that modern technology offers smarter, faster, and safer solutions. With the right tools and techniques, you can transfer high-resolution videos in seconds, preserve metadata, and avoid common pitfalls like file corruption or accidental deletion. This guide walks through proven methods that balance speed, security, and simplicity—so you spend less time managing files and more time creating or enjoying them.
Use a USB Cable for Fast, Direct Transfers
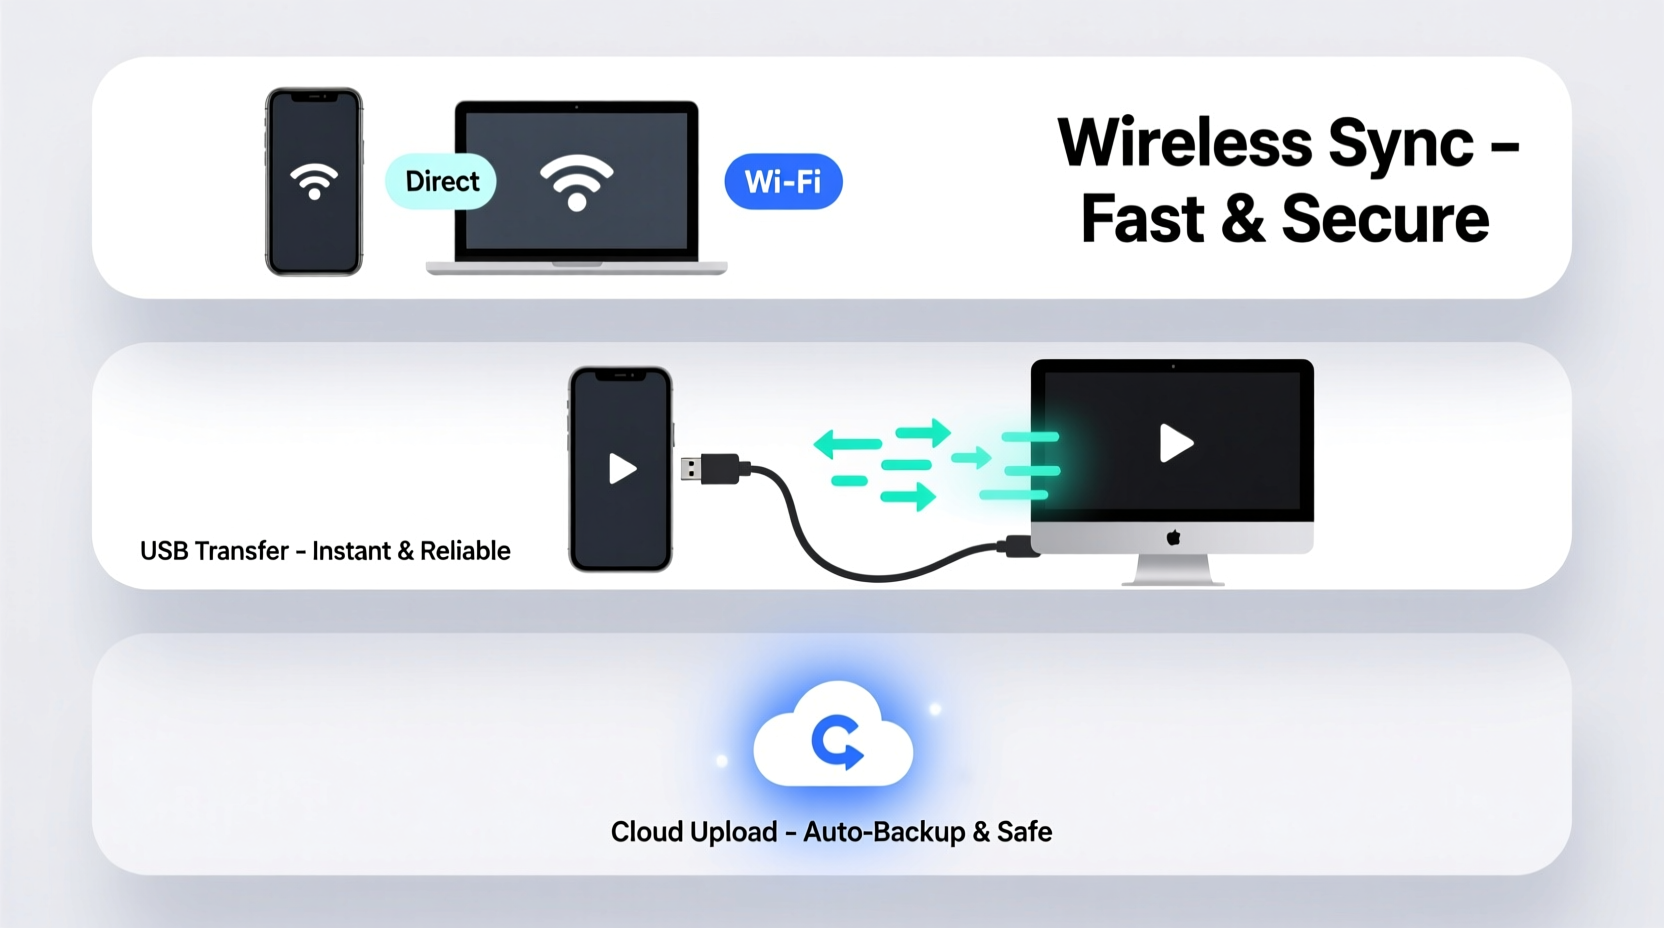
One of the most reliable and fastest ways to move videos from phone to computer is with a physical USB connection. Despite being low-tech, this method remains unmatched in speed and control—especially for large video files.
For Android users, plug your phone into your computer using the original charging cable. Unlock your phone and tap “Allow” when prompted to grant file access. On your computer, open File Explorer (Windows) or Finder (Mac), locate your device under “This PC” or “Locations,” navigate to the DCIM > Camera folder, and drag the desired videos to your desktop or designated folder.
iOS users can use a Lightning-to-USB cable and open the Photos app on Mac or the Import tool on Windows. Select specific videos or import entire events with one click. The transfer preserves all original quality and timestamps.
Leverage Cloud Services for Wireless Convenience
If you prefer not to deal with cables, cloud-based solutions offer hands-free transfers. Google Photos, iCloud, Dropbox, and OneDrive automatically sync videos from your phone to the cloud, making them instantly accessible on any computer via web browser or desktop app.
To set this up, ensure your phone’s Wi-Fi is active and open your preferred service. In Google Photos, go to Settings > Backup & Sync and toggle it on. For iPhone users, enable iCloud Photos in Settings > [Your Name] > iCloud > Photos. Once enabled, new videos upload in the background.
On your computer, log in to the same account and download the files directly. While upload speed depends on your internet connection, services like Google Photos offer “Storage Saver” mode (compressed quality) for faster syncing. For full resolution, choose “Original Quality”—but note this counts against your storage limit.
“Cloud backups are essential for digital hygiene. They protect against device loss and streamline cross-device workflows.” — Jordan Lee, Data Security Consultant
Explore Peer-to-Peer Transfer Apps
When you need to move multiple large videos quickly—and without relying on the cloud—peer-to-peer (P2P) apps like Snapdrop, Send Anywhere, or Portal by Pushbullet deliver impressive results. These tools create a direct wireless bridge between your phone and computer over the same Wi-Fi network.
Snapdrop, for example, works entirely in the browser. Open snapdrop.net on both devices, ensure they’re on the same network, and you’ll see your phone appear on the computer screen. Tap it, select videos, and send. No app installation, no account creation.
Send Anywhere allows transfers up to 10 GB with optional password protection. It generates a six-digit code or QR code—scan it on your computer to begin the transfer. Because data travels directly between devices (not through a server), it's faster and more private than email attachments.
Step-by-Step: Transfer Videos Using Snapdrop
- Connect both phone and computer to the same Wi-Fi network.
- Open a browser on both devices and visit snapdrop.net.
- Wait for your devices to appear on each other’s screens.
- On your phone, tap the computer’s icon.
- Select the videos you want to send.
- Confirm the transfer and wait for the download to complete on your computer.
Compare Transfer Methods: Speed, Security, and Ease
| Method | Speed | Security | Ease of Use | Best For |
|---|---|---|---|---|
| USB Cable | ★★★★★ | ★★★★☆ | ★★★★☆ | Large files, frequent transfers |
| Google Photos / iCloud | ★★★☆☆ | ★★★★☆ | ★★★★★ | Automatic backup, long-term storage |
| Snapdrop / Portal | ★★★★☆ | ★★★★☆ | ★★★★☆ | Quick sharing, no cables |
| Email / Messaging | ★☆☆☆☆ | ★☆☆☆☆ | ★★☆☆☆ | Very small clips only |
| Bluetooth | ★☆☆☆☆ | ★★☆☆☆ | ★★☆☆☆ | Not recommended for video |
Avoid Common Pitfalls: What Not to Do
- Don’t use Bluetooth—it’s painfully slow for video and often fails with files over 100 MB.
- Never share sensitive videos via unencrypted links—services that don’t require passwords or expiration dates expose your content.
- Avoid public Wi-Fi for cloud uploads—open networks increase the risk of interception.
- Don’t assume auto-sync is always on—check settings periodically to confirm backups are active.
Real-World Example: A Travel Vlogger’s Workflow
Maya, a travel content creator, films 4K videos daily across remote locations. She used to email clips to herself, but frequent disconnections and size limits caused lost footage. Now, she uses a hybrid approach: at the end of each day, she connects her Android phone to her laptop via USB and copies all new videos to a dedicated “Raw Footage” folder. Then, she backs them up to Google Drive using her hotel’s Wi-Fi. This two-step process ensures redundancy—her originals are safe locally, and a copy exists in the cloud. She labels each file with the date and location, making editing easier later. Her workflow takes under ten minutes and has prevented any data loss during her year-long journey through Southeast Asia.
Essential Checklist for Safe Video Transfers
- Before Transferring:
- ✅ Charge both devices to avoid interruptions
- ✅ Connect to a stable Wi-Fi or use a high-quality USB cable
- ✅ Check available storage on your computer
- During Transfer:
- ✅ Verify file integrity after copying
- ✅ Avoid renaming or moving files mid-transfer
- ✅ Keep transfer windows open until complete
- After Transfer:
- ✅ Organize videos into dated folders
- ✅ Back up critical videos to an external drive or second cloud
- ✅ Safely eject USB devices or close P2P sessions
Frequently Asked Questions
Can I transfer videos without losing quality?
Yes—methods like USB transfer, Snapdrop, and full-resolution cloud backups (iCloud, Google One) preserve original quality. Avoid compression-heavy services unless storage is limited.
Why won’t my computer recognize my phone?
This usually happens due to a faulty cable, disabled USB debugging (Android), or missing drivers. Try a different cable, restart both devices, or install the manufacturer’s software (e.g., Samsung Smart Switch).
Is it safe to use third-party file transfer apps?
Stick to reputable apps with clear privacy policies. Avoid those that require excessive permissions or store your data on their servers. Open-source tools like Snapdrop are transparent and don’t retain files.
Make Transfers Effortless—Start Today
Transferring videos from your phone to your computer doesn’t have to be tedious or risky. By choosing the right method for your needs—whether it’s the speed of a USB cable, the convenience of the cloud, or the flexibility of peer-to-peer apps—you gain control over your digital memories and creative projects. Implement one of these strategies today, establish a routine, and never worry about lost footage again. Your future self will thank you when every moment is securely backed up and easy to find.


 浙公网安备
33010002000092号
浙公网安备
33010002000092号 浙B2-20120091-4
Comments
No comments yet. Why don't you start the discussion?