
Building a glass aquarium from scratch is both an art and a science. Whether you're constructing a modest 20-gallon tank or a sprawling 100-gallon centerpiece, durability, safety, and longevity depend on precise planning and execution. A poorly built aquarium can leak, crack under pressure, or fail catastrophically—putting aquatic life at risk and causing water damage. This guide walks through the critical steps, materials, and best practices that ensure your custom aquarium stands the test of time.
Selecting the Right Materials
The foundation of any durable aquarium lies in its materials. Glass thickness, silicone sealant quality, and frame design (if used) directly impact structural integrity.
For most home aquariums, float glass is standard due to its clarity and cost-effectiveness. However, low-iron glass (such as Starphire) offers superior transparency and is ideal for high-end builds where visual clarity is paramount. Tempered glass is stronger but cannot be cut after tempering, making it less practical for DIY projects unless sourced pre-cut.
Silicone sealant is equally crucial. Only use 100% aquarium-safe silicone—never household caulks or kitchen/bath sealants, which may contain mildewcides toxic to fish. Look for products labeled “non-toxic” and “safe for potable water.” Brands like Momentive RTV108 or DAP Aquarium Silicone are trusted by professionals.
Determining Glass Thickness
Glass thickness must match water pressure, which increases with depth and volume. Too thin, and the panels bow or burst; too thick, and you add unnecessary weight and cost.
A general rule: for tanks up to 30 gallons, 1/4-inch (6mm) glass suffices. For 55–75 gallons, use 3/8-inch (10mm). Tanks over 100 gallons typically require 1/2-inch (12mm) or thicker, especially if exceeding 20 inches in height.
| Tank Size (Gallons) | Recommended Glass Thickness (inches) | Common Use Case |
|---|---|---|
| 10–20 | 1/4 (6mm) | Betta tanks, small species |
| 30–55 | 3/8 (10mm) | Community freshwater tanks |
| 75–90 | 3/8–1/2 (10–12mm) | Larger cichlids, reef-ready setups |
| 100+ | 1/2+ (12mm+) | Predatory fish, public displays |
“Glass thickness isn’t just about volume—it’s about height. A tall 55-gallon tank exerts more pressure than a wide, shallow one.” — Dr. Alan Reyes, Aquatic Structural Engineer
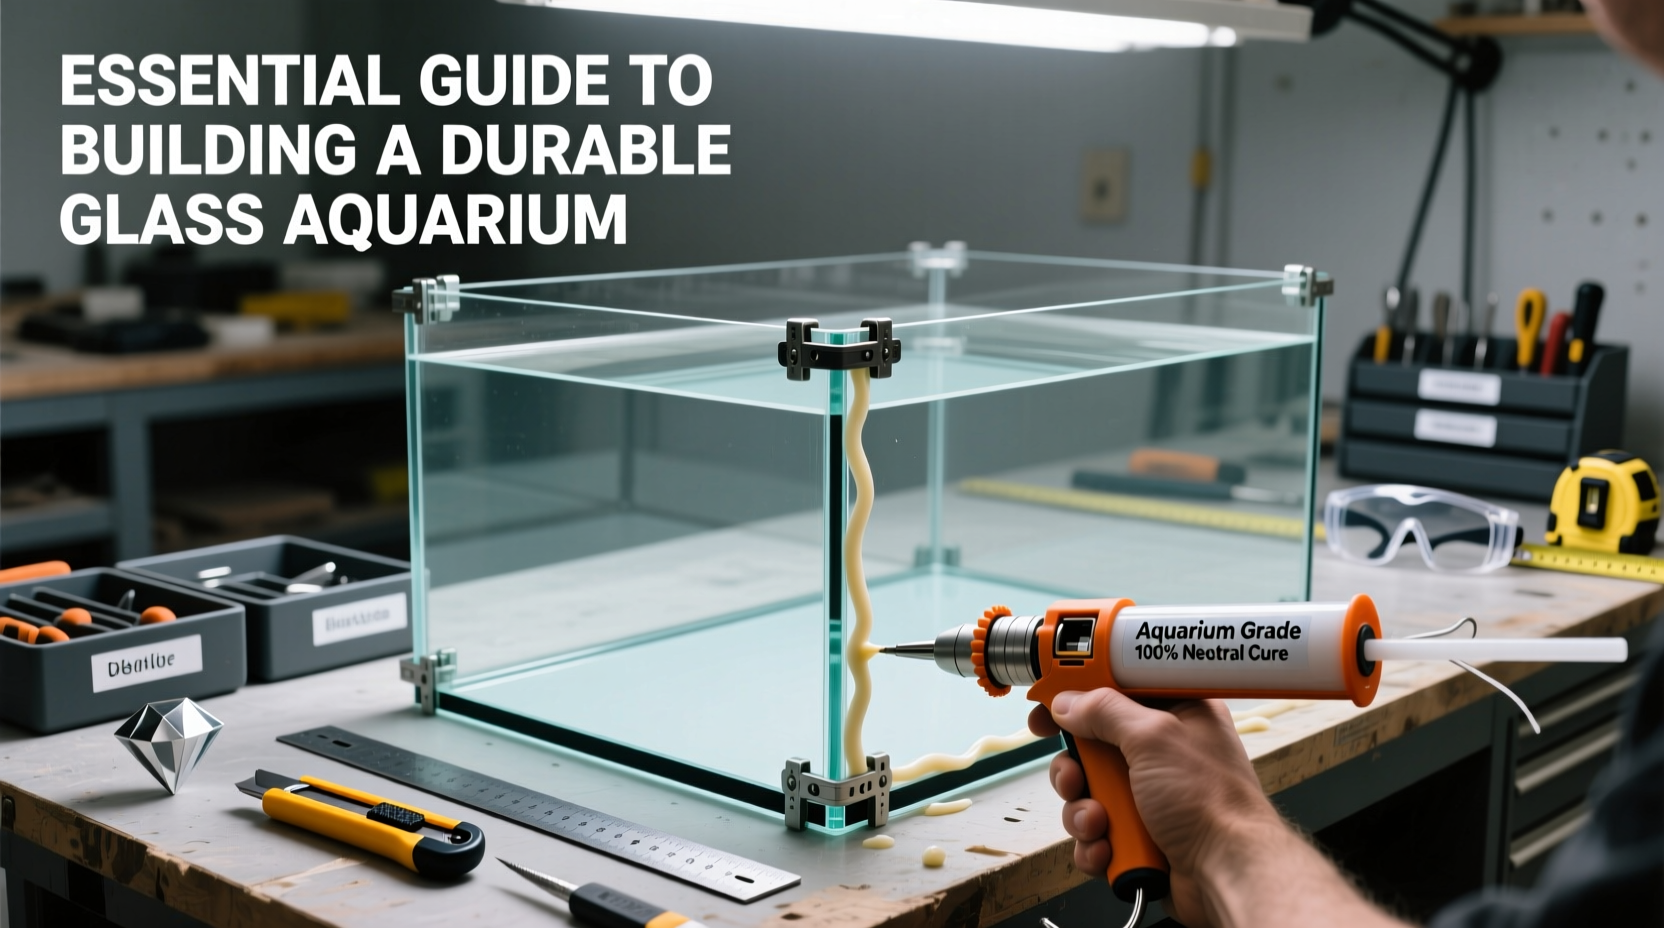
Step-by-Step Assembly Process
Building a glass aquarium requires precision, patience, and a clean workspace. Follow this sequence to assemble a watertight, durable tank.
- Cut and polish glass panels to exact dimensions. Edges should be smooth and square to ensure proper alignment and sealant adhesion.
- Clean all surfaces thoroughly with isopropyl alcohol to remove oils, dust, or residues that could compromise bonding.
- Apply silicone sealant evenly along the edge of the bottom panel. Use a caulking gun for consistent flow.
- Position side panels vertically and press firmly into the bead of silicone. Hold in place with tape or clamps until cured.
- Seal internal corners with a second bead of silicone, smoothing with a damp finger or tool for a continuous fillet.
- Cure undisturbed for at least 48 hours in a dust-free, room-temperature environment before testing.
For added strength in larger tanks, include a center brace or top frame made of glass or acrylic. These reduce lateral pressure on side panels and prevent bowing.
Testing and Quality Assurance
Never skip the flood test. Even a perfectly assembled tank can have invisible flaws in the silicone bond.
Fill the aquarium completely and let it sit on a level surface for 72 hours. Place it on cardboard or paper to detect seepage. Inspect all seams daily. If any moisture appears, mark the spot, drain, re-silicone, and repeat the test.
After passing the test, empty the tank, wipe dry, and allow it to air out for 24 hours before final setup. This ensures no uncured silicone fumes remain when adding livestock.
Real-World Example: The 120-Gallon Reef Build
Tomás Rivera, a marine hobbyist in San Diego, built a custom 120-gallon reef tank using 1/2-inch low-iron glass. He opted for a rimless design with a tempered glass bottom and two internal braces for rigidity.
He applied silicone in two stages: first for panel bonding, then a secondary interior fillet for reinforcement. After curing, he conducted a seven-day flood test, checking twice daily. On day five, a tiny bead formed at one corner. He drained, re-prepped, resealed, and passed the test on the second attempt.
Now three years later, the tank remains leak-free and supports a thriving coral ecosystem. “Patience paid off,” Tomás said. “I saved money versus buying retail, but only because I didn’t rush the sealant or skip testing.”
Essential Tools Checklist
To build a durable aquarium, gather these tools before starting:
- High-quality glass cutter or professional cutting service
- Edge polisher or fine-grit sandpaper (600+ grit)
- Isopropyl alcohol and lint-free cloths
- 100% aquarium-safe silicone sealant
- Caulking gun
- Masking or painter’s tape for alignment
- Clamps or weights to hold panels during cure
- Level and straightedge for alignment
- Gloves and eye protection
Common Mistakes to Avoid
Even experienced builders make errors that compromise tank integrity. Be mindful of these pitfalls:
- Rushing the cure time: Silicone needs 48–72 hours to fully cure. Moving or testing earlier risks bond failure.
- Using contaminated glass: Fingerprints, dust, or oil prevent proper adhesion.
- Inconsistent silicone application: Gaps or thin spots create weak seams.
- Ignoring water pressure dynamics: Taller tanks need thicker glass regardless of volume.
- Skipping the flood test: No visual inspection replaces real-world pressure simulation.
Frequently Asked Questions
Can I repair a leaking aquarium with new silicone?
Yes, but only after complete draining, thorough cleaning, and removal of old silicone. Reapply a fresh, continuous bead and allow full curing time. However, recurring leaks may indicate structural stress, requiring panel replacement.
Is butted or overlapped glass better for aquariums?
Butted joints (panels meeting at edges) are standard and sufficient when sealed properly. Overlapping (where one panel sits atop another) is rarely used in modern tanks and complicates sealing. Butted construction with strong silicone fillets is preferred for clarity and strength.
How long do homemade aquariums last?
A well-built and maintained aquarium can last 15–20 years or more. Factors like water chemistry, placement (avoid direct sunlight), and physical impacts affect lifespan. Regular inspection of seams helps catch issues early.
Final Thoughts and Call to Action
Building a durable glass aquarium is a rewarding project that combines craftsmanship with practical engineering. By selecting the right materials, following precise assembly steps, and rigorously testing the result, you create more than a container for water—you craft a stable, safe environment for aquatic life to thrive.
Whether you're a seasoned hobbyist or a first-time builder, attention to detail separates success from disaster. Take your time, respect the forces of water pressure, and never compromise on quality.


 浙公网安备
33010002000092号
浙公网安备
33010002000092号 浙B2-20120091-4
Comments
No comments yet. Why don't you start the discussion?