
Nail clippers are essential tools used regularly in personal grooming, yet they are often overlooked when it comes to cleaning and maintenance. Over time, these small instruments accumulate skin cells, bacteria, fungi, and organic debris—especially if shared or stored in humid environments like bathrooms. Without proper care, contaminated clippers can lead to infections, ingrown nails, or the spread of pathogens. More than just a hygiene issue, neglecting cleaning also shortens the lifespan of your tool due to corrosion and dulling. This comprehensive guide walks you through every critical stage of deep cleaning nail clippers to ensure they remain safe, effective, and durable.
Why Deep Cleaning Nail Clippers Matters
Unlike larger grooming tools, nail clippers have tight crevices where residue easily lodges. Their steel blades come into direct contact with keratin-rich nail tissue, creating an ideal environment for microbial growth. According to the CDC, improperly sanitized personal care tools can harbor staphylococci, pseudomonas, and even fungal spores like those causing athlete’s foot. Regular surface wiping isn’t enough—deep cleaning removes both visible debris and invisible contaminants.
Beyond health concerns, metal fatigue and rust compromise performance. Moisture trapped in hinge mechanisms accelerates oxidation, leading to stiffness or breakage. A well-maintained clipper cuts cleanly, reduces nail splitting, and lasts years longer than one left uncleaned.
“Sanitizing personal grooming tools after each use should be as routine as washing your hands. It prevents cross-contamination and preserves tool integrity.” — Dr. Lena Torres, Dermatology Hygiene Specialist
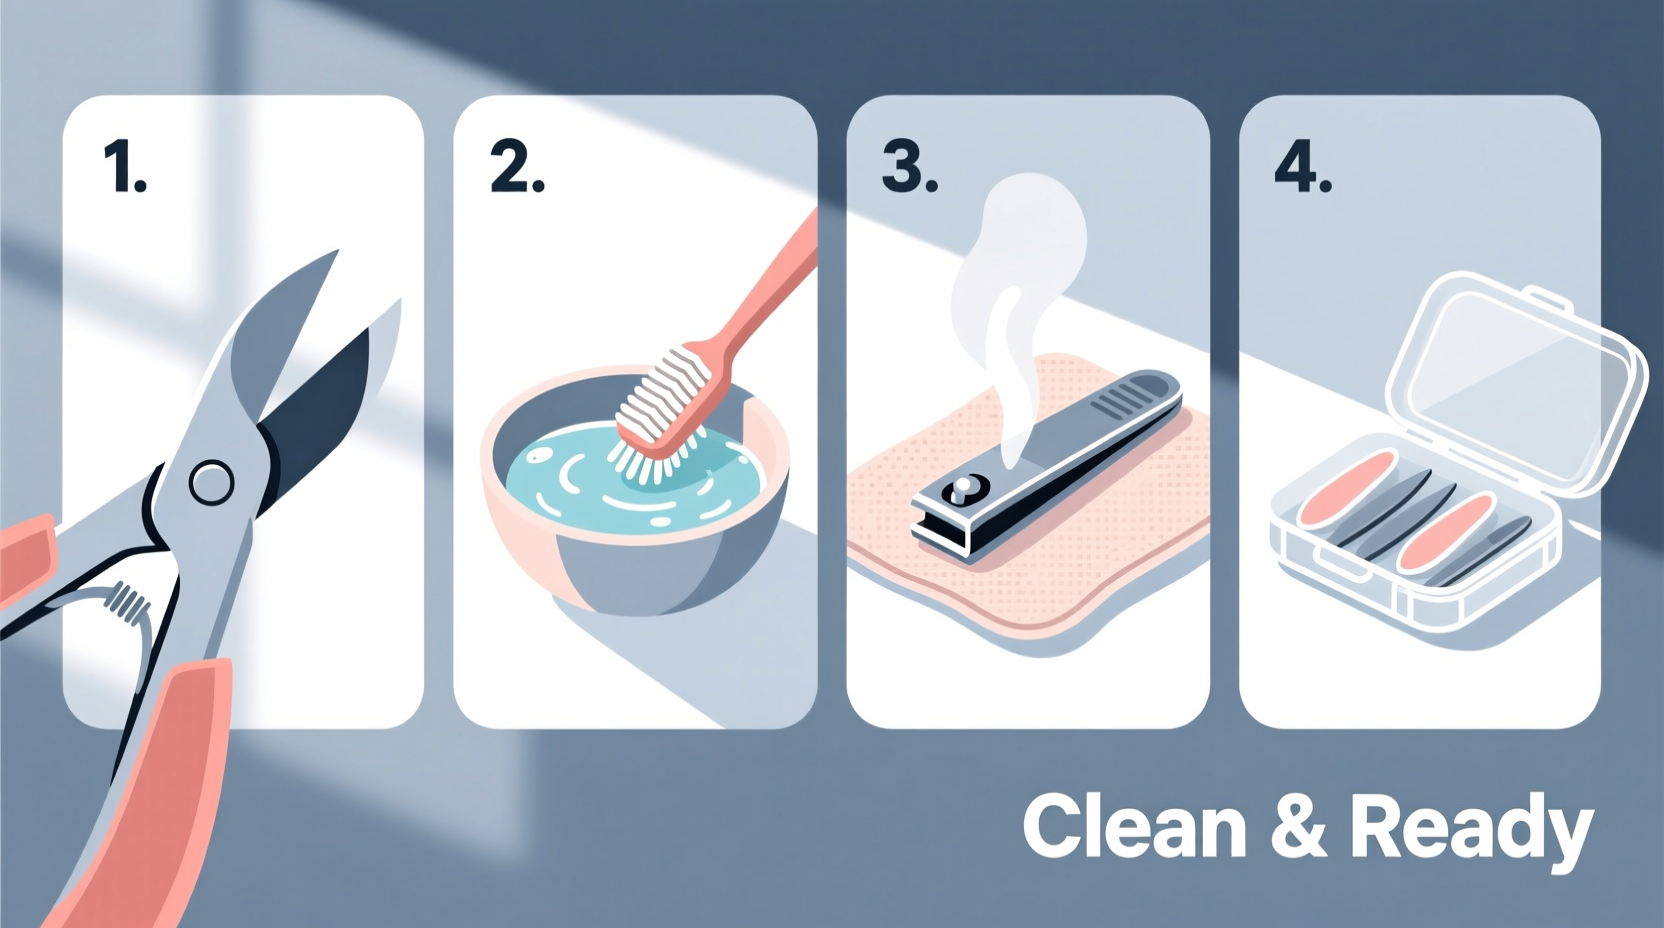
Step-by-Step Guide to Deep Clean Nail Clippers
A thorough deep clean involves disassembly (if possible), scrubbing, disinfecting, drying, and lubrication. Follow this sequence for optimal results:
- Disassemble the Clipper
Remove the pivot screw using a precision screwdriver. Separate the two blades and set aside springs or washers. Not all models allow full disassembly, but even partial separation improves access to hidden grime. - Rinse Under Warm Water
Hold parts under running warm water to flush loose particles. Avoid hot water, which may promote rust on carbon steel models. - Scrub with Soft Brush and Soap
Use a soft-bristled toothbrush or nail detail brush dipped in mild dish soap. Gently scrub along blade edges, inside hinges, and around pivot points. Pay attention to grooves where nail dust accumulates. - Soak in Isopropyl Alcohol (70% or higher)
Place all metal components in a small container filled with alcohol for 10–15 minutes. This kills bacteria, viruses, and fungi while dissolving oils and sanitizing microscopically. - Rinse Again and Dry Thoroughly
After soaking, rinse briefly with distilled water to remove alcohol residue (optional but recommended). Pat dry immediately with a lint-free cloth, then air-dry completely on a clean towel for 10–15 minutes. - Lubricate the Hinge
Apply one drop of lightweight machine oil (e.g., sewing machine or clipper oil) to the pivot point. Reassemble the tool and open/close several times to distribute the oil evenly. - Store Properly
Keep in a dry, sealed container away from moisture and humidity. Consider including a silica gel packet to absorb ambient dampness.
Do’s and Don’ts of Nail Clipper Maintenance
| Do’s | Don’ts |
|---|---|
| Clean after every use, especially if shared | Never use bleach long-term—it corrodes metal |
| Use isopropyl alcohol for reliable disinfection | Avoid abrasive pads that scratch blades |
| Lubricate monthly or after deep cleaning | Don’t store in damp bathroom drawers |
| Inspect for rust, pitting, or misalignment | Never leave clippers wet overnight |
| Replace worn-out tools showing dullness or cracks | Don’t share clippers without sterilization |
Real Example: Preventing Fungal Spread at Home
Sarah, a mother of three, noticed her youngest child developed recurring toenail discoloration. After a dermatologist visit, the diagnosis was early-stage onychomycosis (fungal nail infection). Upon investigation, the family realized they were sharing a single nail clipper across all members without any cleaning between uses. The doctor advised immediate disposal of the old tool and implementation of strict sanitation protocols. Sarah began deep-cleaning new individual clippers weekly using alcohol soaks and proper drying. Within months, no further infections occurred. This case highlights how simple hygiene practices can prevent persistent health issues.
Essential Tools and Supplies Checklist
To perform a professional-grade deep clean at home, gather these items beforehand:
- Isopropyl alcohol (70% minimum, preferably 90–99%)
- Mild dish soap or non-abrasive cleaner
- Soft-bristled brush (toothbrush or detailing brush)
- Precision screwdriver (for disassembly)
- Lint-free cloths or paper towels
- Lightweight machine oil (e.g., sewing or clipper oil)
- Small glass or plastic container for soaking
- Distilled water (optional, for final rinse)
How Often Should You Deep Clean?
Frequency depends on usage and environment:
- Personal use, low frequency: Deep clean once every 4–6 weeks
- Daily use or shared among household members: Clean biweekly
- After illness or suspected infection: Sterilize immediately and consider replacing the tool
Between deep cleans, wipe blades with an alcohol-soaked cotton swab after each use. This minimizes buildup and maintains sharpness.
Frequently Asked Questions
Can I boil my nail clippers to sterilize them?
Boiling is not recommended for most nail clippers. High heat can weaken the tempered steel, damage plastic handles, and degrade adhesives holding rivets. Instead, rely on isopropyl alcohol immersion, which effectively sterilizes without thermal stress.
What if my clippers are already rusty?
Minor surface rust may be gently removed with a baking soda paste (mix with water) and soft brush. However, if rust has caused pitting or blade misalignment, replacement is safer. Compromised metal cannot be fully restored and poses a risk of breaking during use.
Are UV sanitizer boxes effective for nail clippers?
UV-C devices can reduce surface microbes but only if exposure is sufficient and all surfaces are directly exposed. Shadowed areas like hinges and blade interiors may remain contaminated. For complete sanitation, UV should supplement—not replace—manual cleaning and alcohol disinfection.
Final Thoughts: Make Hygiene a Habit
Deep cleaning nail clippers isn’t complicated, but it requires consistency and attention to detail. Just a few minutes every few weeks ensures your grooming tools remain hygienic, functional, and long-lasting. Whether you're managing personal care or maintaining tools for professional use, treating nail clippers with the same respect as medical instruments pays off in health and performance. Establish a schedule, keep supplies handy, and treat each cleaning session as an investment in your well-being.


 浙公网安备
33010002000092号
浙公网安备
33010002000092号 浙B2-20120091-4
Comments
No comments yet. Why don't you start the discussion?