
A broken dog leash clip isn’t just an inconvenience—it can be a safety hazard. Whether you're mid-walk or preparing for a trip to the park, a malfunctioning clip could lead to your dog escaping or getting injured. While replacing the entire leash is often the safest long-term solution, knowing how to temporarily or permanently repair a damaged clip can save time, money, and stress. With the right tools, materials, and know-how, many leash clip issues can be addressed effectively at home.
Understanding Common Leash Clip Problems
Dog leash clips—typically spring-loaded snap hooks or bolt snaps—are designed for durability but are subject to wear from daily use, exposure to moisture, dirt, and accidental drops. Over time, these factors contribute to mechanical failure. The most frequent issues include:
- Weak spring tension: The clip doesn’t snap shut reliably.
- Corroded or jammed mechanism: Dirt or rust prevents smooth operation.
- Bent or warped hook: The metal deforms, making latching difficult.
- Worn latch: The internal catch no longer holds under pressure.
- Loose rivet or weld: The clip wobbles or separates from the leash ring.
Identifying the specific issue is the first step in choosing the correct repair strategy. Minor mechanical jams may only require cleaning, while structural damage might demand reinforcement or replacement of parts.
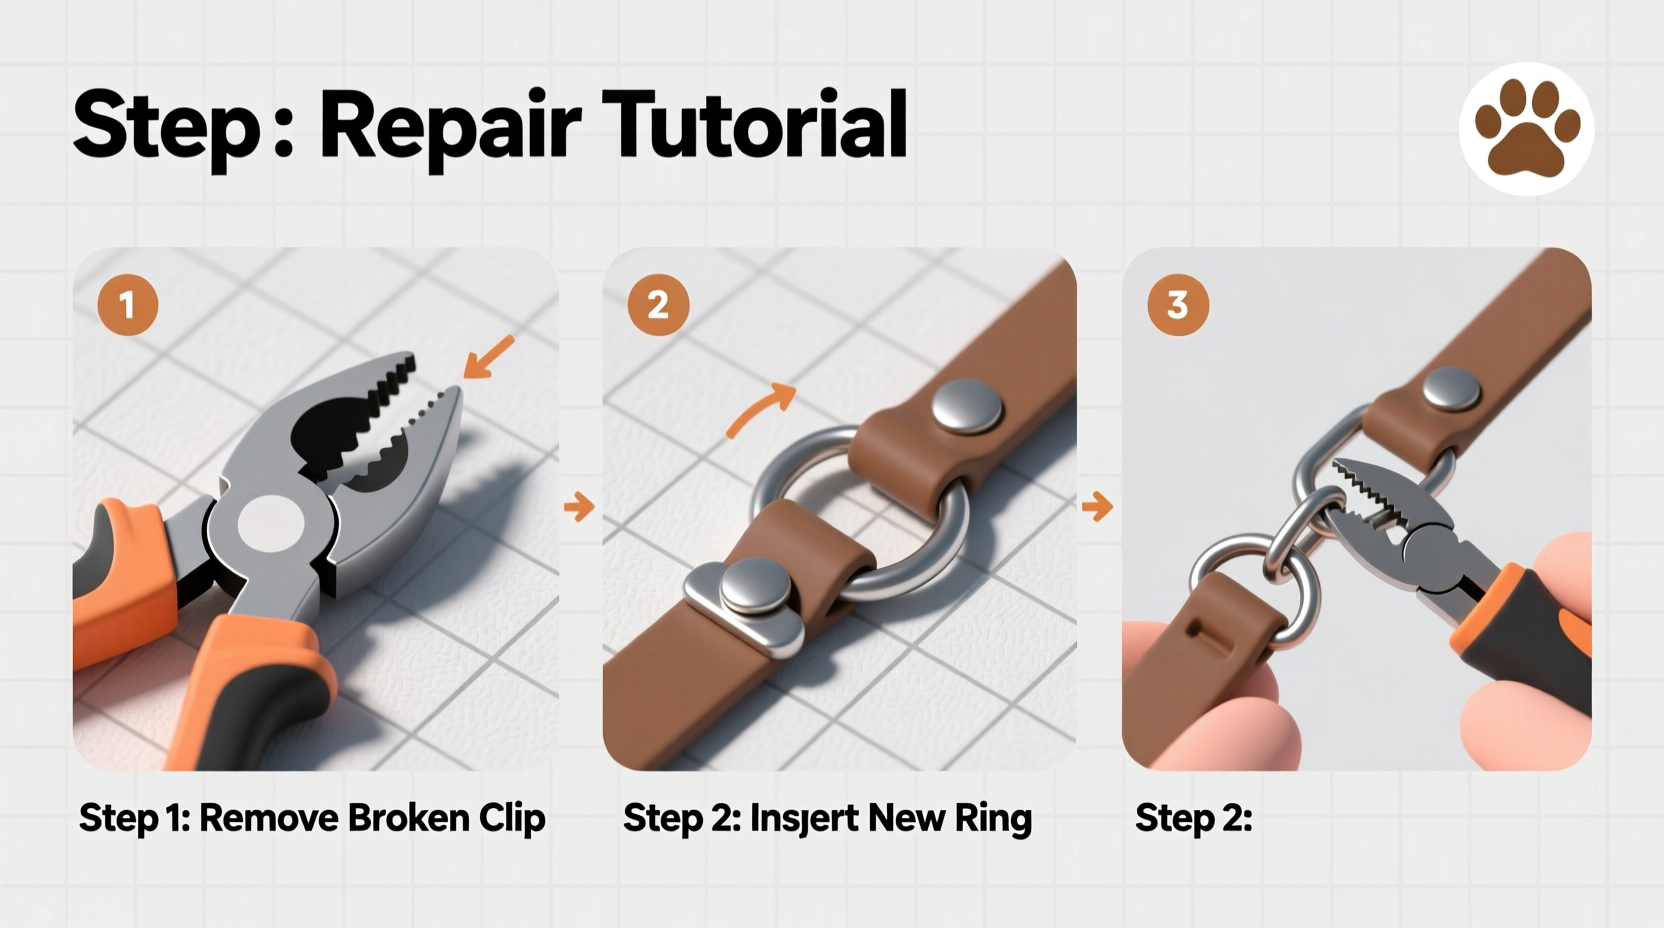
Step-by-Step Guide to Repairing a Leash Clip
Follow this systematic approach to assess and repair a faulty dog leash clip using household or basic hardware tools.
- Disassemble (if possible): Some clips have removable pins or screws. Use needle-nose pliers or a small screwdriver to gently open the housing and access internal components.
- Clean the mechanism: Soak the clip in warm, soapy water for 5–10 minutes. For stubborn grime, use a soft toothbrush to scrub around the hinge and spring. Rinse and dry thoroughly.
- Lubricate moving parts: Apply a small amount of silicone-based lubricant or petroleum jelly to the spring and latch. Avoid WD-40 unless it's specifically labeled for long-term lubrication, as it can dry out rubber components.
- Test the spring tension: Manually operate the clip several times. If it still feels loose, consider reinforcing the spring with a compatible metal coil or replacing it entirely.
- Reinforce weak attachment points: If the clip is attached via a rivet that’s loose, drill a small hole through both the clip base and leash loop (if made of leather or heavy fabric), then insert a brass grommet or eyelet to stabilize the connection.
- Secure with epoxy (for non-load-bearing fixes): In cases where minor cracks appear on plastic housings, use two-part epoxy to seal them. Note: This is not recommended for high-tension areas.
After completing repairs, perform a load test by applying firm hand pressure to simulate pulling force before using it with your dog.
DIY Replacement Options and Upgrades
Sometimes, fixing the original clip isn't feasible. Fortunately, upgrading to a stronger component is a practical DIY alternative.
Visit a local hardware store or online retailer to purchase heavy-duty swivel bolt snaps rated for at least 50 lbs (preferably more). Marine-grade stainless steel clips resist corrosion and offer superior longevity. Replace the old clip by detaching it from the leash end and attaching the new one using:
- A strong metal split ring (like those used for keys)
- A reinforced stitching method if sewing is required
- A crimping sleeve for metal cables or paracord leashes
For nylon or woven leashes, unpick the last inch of stitching, slide on the new hardware, and re-stitch with UV-resistant thread using a backstitch pattern for maximum strength. A sewing machine with heavy-duty settings works best, but hand-sewing with care achieves reliable results.
“Many leash failures start with unnoticed micro-tears or weakened springs. Proactive maintenance beats emergency fixes any day.” — Dr. Lena Torres, Veterinary Behaviorist & Pet Safety Advocate
Do’s and Don’ts of Leash Clip Repairs
| Do’s | Don’ts |
|---|---|
| Use corrosion-resistant materials like stainless steel or marine-grade hardware | Use duct tape or zip ties as permanent fixes |
| Test repaired clips under controlled tension before field use | Ignore signs of fraying or metal fatigue |
| Carry a spare mini carabiner or backup clip during walks | Over-tighten screws or crush delicate mechanisms |
| Replace worn springs or seals promptly | Use household glue instead of industrial-strength adhesives |
| Keep a small toolkit with pliers, lubricant, and spare parts | Allow children to handle or play with damaged clips |
Real Example: A Weekend Hiker’s Quick Field Fix
Mark, an avid hiker from Colorado, was halfway through a trail when his German Shepherd’s leash clip snapped shut but wouldn’t release. The spring had seized due to accumulated trail dust and morning dew. Without returning to his car, he used a pocket knife to carefully pry open the side plate, wiped the interior with a cloth, applied lip balm (a temporary lubricant), and restored partial function. Though not ideal, it held until he reached home, where he replaced the clip entirely with a rustproof model. His takeaway? “Always carry a multi-tool—and know your gear well enough to improvise.”
Essential Checklist for Leash Clip Maintenance and Repair
Stay prepared with this actionable checklist:
- ☐ Inspect leash clips weekly for resistance, wobble, or visible damage
- ☐ Clean clips monthly with mild soap and water
- ☐ Lubricate hinges and springs every 4–6 weeks
- ☐ Keep spare clips, split rings, and tools in your pet emergency kit
- ☐ Replace clips showing cracks, deep corrosion, or irreversible spring loss
- ☐ Upgrade older leashes with modern, load-rated hardware
- ☐ Teach yourself basic hand-sewing for fabric leash repairs
Frequently Asked Questions
Can I use a keychain carabiner as a temporary leash clip?
Yes, but only in emergencies. Most keychain carabiners aren’t rated for dynamic loads (like a dog lunging). Use only climbing-grade or load-tested carabiners if substituting, and replace immediately with proper pet hardware.
How do I know if a repaired clip is safe?
Perform a safety check by attaching the leash to a fixed object and simulating a pull with body weight. Also, manually test the latch 10–15 times to ensure consistent engagement. If there’s hesitation or slippage, do not use.
Is it worth repairing a cheap leash’s clip?
Often, no. Low-cost leashes use substandard metals and stitching. Investing in a durable replacement leash may be safer and more cost-effective than repeated repairs.
Final Thoughts and Call to Action
A secure leash clip is fundamental to responsible pet ownership. While quick fixes can get you through the day, understanding how to properly maintain, repair, and upgrade your dog’s leash ensures their safety and your peace of mind. These DIY methods empower pet owners to act confidently when problems arise—whether at home or on the go.


 浙公网安备
33010002000092号
浙公网安备
33010002000092号 浙B2-20120091-4
Comments
No comments yet. Why don't you start the discussion?