
Clippers—whether used for hair, beard, or animal grooming—are high-performance tools that endure constant strain, heat, and exposure to organic debris. Over time, accumulated hair, oil, and bacteria can degrade their efficiency and shorten their lifespan. Regular maintenance isn’t just about cleanliness; it’s a critical component of performance, safety, and cost-effectiveness. A well-maintained clipper runs cooler, cuts more smoothly, and lasts years longer than one left to deteriorate between uses.
The Importance of Deep Cleaning Clippers
Most users clean the surface of their clippers after each use, but few perform deep cleaning on a regular basis. This oversight leads to buildup beneath the blade assembly, which increases friction, overheating, and motor strain. According to industry experts, up to 70% of premature clipper failures are linked to poor maintenance rather than mechanical defects.
Deep cleaning removes microscopic residues that standard brushing can't reach. It also prevents corrosion, ensures consistent blade alignment, and reduces the risk of skin irritation or infections from bacterial growth—especially important in salon or veterinary settings where hygiene is non-negotiable.
“Proper maintenance doesn’t just extend tool life—it protects your clients’ health and your professional reputation.” — Dr. Lena Torres, Veterinary Dermatology Specialist
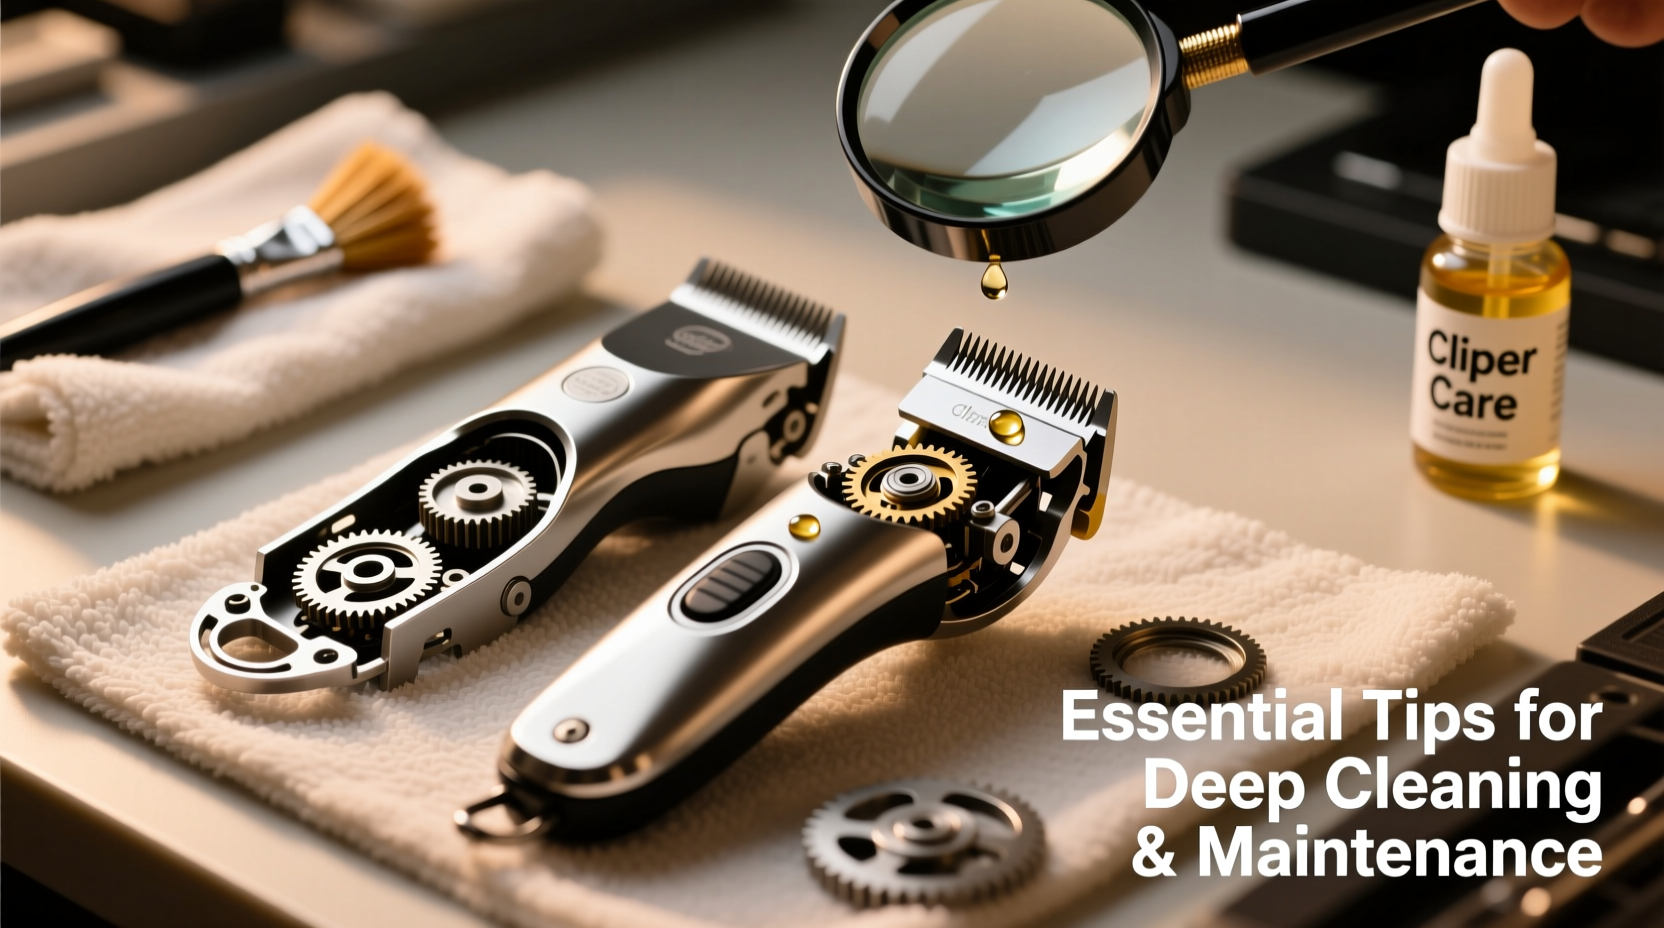
Step-by-Step Guide to Deep Cleaning Your Clippers
A thorough deep clean should be performed every 15–20 uses or at least once a month with regular use. Follow this detailed process to restore your clippers to peak condition:
- Unplug or remove battery: Always disconnect power before disassembling any electric tool.
- Remove loose hair: Use a small brush (preferably included with your clipper) to sweep away visible hair from the blade and housing.
- Detach the blade: Carefully slide or unscrew the blade assembly off the motor housing. Refer to your model’s manual if unsure.
- Soak blades in disinfectant solution: Submerge the blade in a clipper-specific cleaning solution or isopropyl alcohol (70% or higher) for 10–15 minutes.
- Scrub gently: Use a soft-bristle brush to clean between the teeth and along the cutting edge. Avoid steel wool or abrasive pads.
- Rinse and dry completely: If using a water-based cleaner, rinse with distilled water and air-dry on a lint-free towel. Never return damp parts to the motor.
- Clean the motor housing: Wipe down the interior with a cotton swab dipped in alcohol. Remove any trapped hair or dust.
- Reassemble and lubricate: Once dry, reattach the blade and apply 2–3 drops of clipper oil along the blade rails.
- Test run: Power on the clipper for 15–20 seconds to distribute oil and check for smooth operation.
Regular Maintenance Checklist
To keep your clippers in optimal condition between deep cleans, follow this weekly maintenance routine:
- Brush off hair and debris after every use
- Apply 1–2 drops of clipper oil before and after each session
- Inspect blades for nicks, dullness, or misalignment
- Check cord integrity (if applicable) for fraying or exposed wires
- Store in a dry, dust-free environment
- Run the clipper idle for 30 seconds weekly to circulate oil
Do’s and Don’ts of Clipper Care
| Do’s | Don’ts |
|---|---|
| Use manufacturer-recommended cleaning solutions | Use household cleaners like bleach or window spray |
| Lubricate blades before and after use | Over-lubricate—excess oil attracts dirt |
| Store in a protective case or pouch | Leave clippers exposed on damp surfaces |
| Replace worn blades instead of forcing use | Sharpen blades at home—precision grinding requires professional tools |
| Keep a maintenance log for professional kits | Ignore unusual noises or vibrations |
Real Example: How One Barber Saved His Business $800 a Year
Jamal Reynolds, a barber in Atlanta, used to replace his two primary clippers every nine months due to inconsistent performance and blade sticking. After attending a tool care workshop, he implemented a strict cleaning and oiling schedule. He began deep cleaning monthly, tracking usage, and rotating blades between shifts.
Within a year, Jamal extended the life of each clipper to over four years. He reduced replacement costs from $400 annually to under $100. More importantly, client complaints about rough cutting dropped by 90%. “I didn’t realize how much drag and heat were affecting my work,” he said. “Now my tools feel like new every day.”
Choosing the Right Lubricants and Cleaners
Not all oils are created equal. Standard machine oil is too thick and can gum up clipper mechanisms. Instead, use clipper-specific lubricants designed for high-speed, low-viscosity performance. These oils resist heat buildup and evaporate slowly, providing longer protection.
For cleaning, avoid water-based soaps unless explicitly approved by the manufacturer. Isopropyl alcohol (70–90%) is effective for disinfection and dries quickly without residue. Alternatively, commercial dip solutions like Oster Blade Wash or Andis CoolCare Plus offer targeted cleaning with rust inhibitors.
“Using the wrong oil is like putting diesel in a gasoline engine—it might run today, but you’re damaging it tomorrow.” — Mark Delvecchio, Master Clipper Technician
When to Replace Blades and When to Repair
No amount of cleaning can restore severely dulled or chipped blades. Signs it’s time for replacement include:
- Pulling or tugging hair instead of cutting cleanly
- Visible nicks or gaps between upper and lower blades
- Inconsistent cutting even after cleaning and adjustment
- Excessive vibration or noise during operation
Some high-end models allow professional rebuilding of motors or gear replacements. However, for most consumer-grade clippers, repair costs often exceed replacement value. Focus on preserving performance through prevention rather than expecting fixes later.
Frequently Asked Questions
How often should I oil my clippers?
Oil your clippers before and after each use. For occasional users, apply oil at least twice a week if stored unused. Consistent lubrication prevents metal-on-metal friction and rust formation.
Can I use baby oil or WD-40 as a substitute?
No. Baby oil contains additives that leave residue and can clog mechanisms. WD-40 is a degreaser, not a lubricant—it removes existing oil and accelerates wear. Only use products labeled specifically for clippers.
Why do my clippers get hot during use?
Some warmth is normal, but excessive heat usually indicates dull blades, lack of lubrication, or debris buildup. Clean and oil the unit immediately. Persistent overheating may signal motor strain and require servicing.
Final Thoughts: Make Maintenance a Habit
Deep cleaning and maintaining clippers isn’t a one-time fix—it’s an ongoing practice that pays dividends in performance, hygiene, and economy. Whether you're a professional stylist, groomer, or home user, treating your tools with care ensures they deliver precision and reliability every time.
Start today: pull out your clippers, inspect the blades, and give them the attention they deserve. A 15-minute deep clean now could save you hours of frustration—and hundreds of dollars—down the line.


 浙公网安备
33010002000092号
浙公网安备
33010002000092号 浙B2-20120091-4
Comments
No comments yet. Why don't you start the discussion?