
Capping pipes and surfaces is a critical task in construction, plumbing, industrial maintenance, and renovation projects. Whether you're sealing off unused piping, protecting open ducts during demolition, or preparing equipment for long-term storage, proper capping prevents contamination, moisture intrusion, pest infestation, and safety hazards. Done incorrectly, it can lead to costly repairs, system failures, or even health risks. This guide provides actionable insights, best practices, and expert-backed methods to ensure your capping work is both safe and effective.
Why Proper Capping Matters
Open-ended pipes and exposed surfaces are vulnerable. In plumbing systems, uncapped water lines can introduce debris, bacteria, or air into the network, compromising water quality and pressure. In HVAC applications, unsealed ducts allow dust, mold spores, and vermin to enter, degrading indoor air quality. During construction or demolition, open conduits pose tripping hazards and can become pathways for hazardous materials like asbestos fibers or chemical vapors.
The consequences of poor capping extend beyond performance issues. Regulatory bodies such as OSHA and local building codes often require temporary and permanent closures to meet safety standards. Failure to comply can result in fines, project delays, or liability in case of injury.
“Improperly capped systems are one of the most overlooked sources of contamination in commercial buildings.” — Carlos Mendez, Industrial Hygiene Consultant
Selecting the Right Capping Method
No single capping solution fits all scenarios. The method you choose depends on the material, environment, duration of closure, and system type. Here’s a breakdown of common options:
- Screw-on Caps: Ideal for threaded metal or plastic pipes. Provide a secure, reusable seal.
- Plug Caps: Inserted into the end of a pipe; commonly used with PVC or copper. May be glued for permanence.
- Cap Tape or Wrap: Temporary solution using waterproof tape (e.g., Teflon or aluminum foil tape) for short-term protection.
- Mechanical Covers: Clamp-on or snap-fit caps made from rubber, silicone, or plastic. Useful for irregular shapes or large openings.
- Blank Flanges: Bolted plates used in industrial piping systems for secure, long-term isolation.
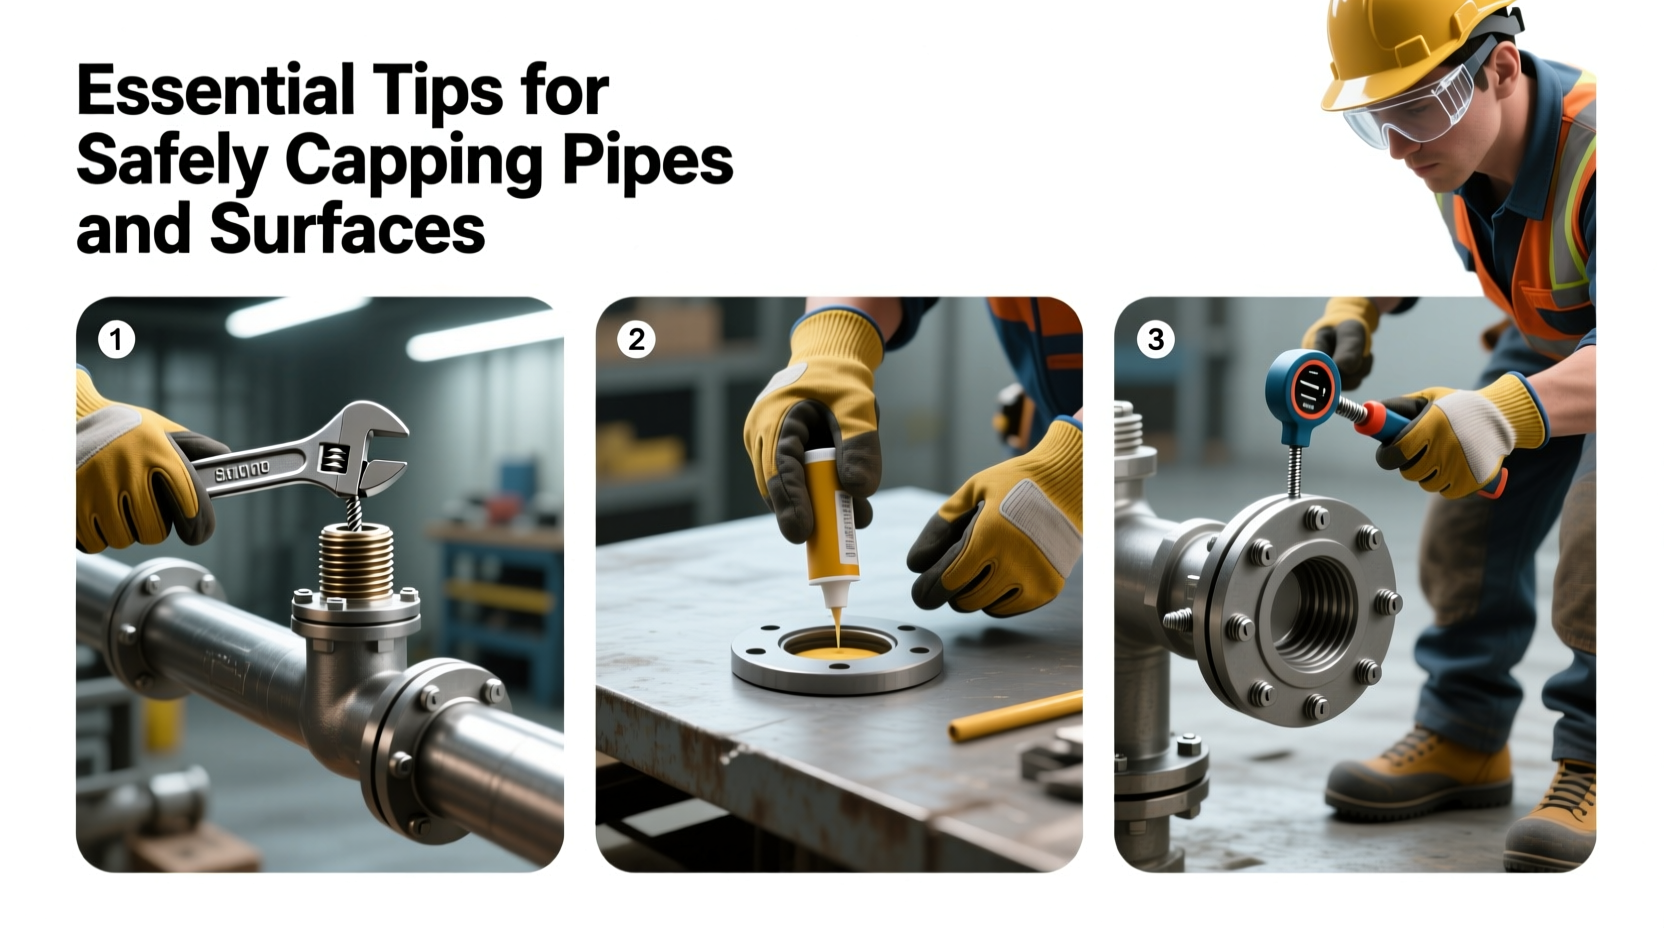
Step-by-Step Guide to Safely Cap Pipes and Surfaces
Follow this sequence to ensure reliable and safe capping across various applications:
- Shut Off System Pressure: Before beginning, turn off water, gas, or air supply. Relieve any residual pressure to avoid injury.
- Clean the Surface: Wipe the pipe end or surface with a dry cloth. Remove rust, grease, or debris that could compromise the seal.
- Inspect for Damage: Check for cracks, warping, or corrosion. Damaged ends may require repair before capping.
- Select the Correct Cap: Ensure the size and thread type match the pipe. Use calipers if dimensions are unclear.
- Apply Sealant (if needed): For threaded connections, wrap Teflon tape clockwise or apply pipe dope to create a watertight seal.
- Install the Cap: Hand-tighten first, then use a wrench for final tightening—avoid over-torquing, which can crack fittings.
- Test the Seal: Reintroduce low pressure and check for leaks. For non-pressurized systems, visually confirm stability.
- Label the Cap: Mark with paint, tag, or tape indicating contents, date capped, and responsible party.
Do’s and Don’ts of Pipe and Surface Capping
| Do’s | Don’ts |
|---|---|
| Use manufacturer-recommended caps for each pipe type | Reuse damaged or worn caps |
| Double-check compatibility between cap and pipe material | Leave caps loose or partially installed |
| Label capped lines clearly for future identification | Use duct tape as a permanent solution |
| Store spare caps in a dry, organized container | Ignore environmental factors like UV exposure or temperature swings |
| Inspect capped systems periodically during long-term shutdowns | Assume a cap will last indefinitely without maintenance |
Real-World Example: Preventing Contamination in a Renovation Project
A commercial building in Portland underwent a major HVAC retrofit. During demolition, contractors left several duct openings exposed overnight. Within days, workers reported respiratory irritation, and air testing revealed elevated mold spore counts. Investigation showed that dust and moisture had entered through uncapped ducts, creating ideal conditions for microbial growth.
The project was halted for two weeks while the ductwork was cleaned and sealed. The contractor implemented a new protocol: all openings were immediately capped with snap-on rubber covers and labeled with color-coded tags indicating system type and closure date. Subsequent air quality tests showed significant improvement, and the remainder of the project proceeded without incident.
This case underscores the importance of proactive capping—not just for function, but for occupant health and regulatory compliance.
Essential Safety Precautions
Safety must precede every capping job. Even seemingly minor tasks can carry hidden risks. Consider these precautions:
- Wear appropriate PPE: gloves, safety glasses, and respiratory protection when working in dusty or contaminated areas.
- Verify that no live electrical conduits run through the pipe being capped.
- Use lockout/tagout procedures when isolating pressurized systems.
- Avoid working at height without fall protection when capping overhead lines.
- Ensure ladders and scaffolds are stable and positioned correctly.
Frequently Asked Questions
How long can a temporary cap remain in place?
Temporary caps should not exceed 30 days unless specifically rated for extended use. Environmental exposure degrades materials like plastic and rubber. Inspect monthly for brittleness, warping, or leakage.
Can I cap a pressurized line without shutting it down?
No. Attempting to cap an active line is extremely dangerous and violates OSHA guidelines. Always depressurize and isolate the system before any work begins.
What’s the best way to cap irregular or non-circular openings?
For odd-shaped surfaces, use expandable foam bungs, inflatable bladder seals, or custom-cut gaskets with clamping rings. These provide a tight fit where standard caps won’t work.
Conclusion: Build Safety Into Every Closure
Capping pipes and surfaces isn’t just a mechanical step—it’s a commitment to safety, longevity, and professionalism. Whether you’re a plumber, electrician, facilities manager, or DIY enthusiast, taking the time to do it right protects people, property, and performance. By choosing the correct materials, following a disciplined process, and respecting safety protocols, you eliminate preventable risks and ensure systems remain ready for future use.
Make capping a standard part of your workflow, not an afterthought. Your attention to detail today prevents emergencies tomorrow.


 浙公网安备
33010002000092号
浙公网安备
33010002000092号 浙B2-20120091-4
Comments
No comments yet. Why don't you start the discussion?