
Installing a car amplifier can dramatically improve your vehicle’s audio experience, delivering richer bass, clearer highs, and more dynamic range. However, improper installation can lead to electrical issues, poor sound quality, or even damage to your car’s battery and audio components. A successful setup requires careful planning, attention to wiring standards, and adherence to safety practices. Whether you're upgrading an older system or building a high-performance audio rig from scratch, following the right procedures ensures reliability and longevity.
Plan Your Amplifier Setup Before You Begin
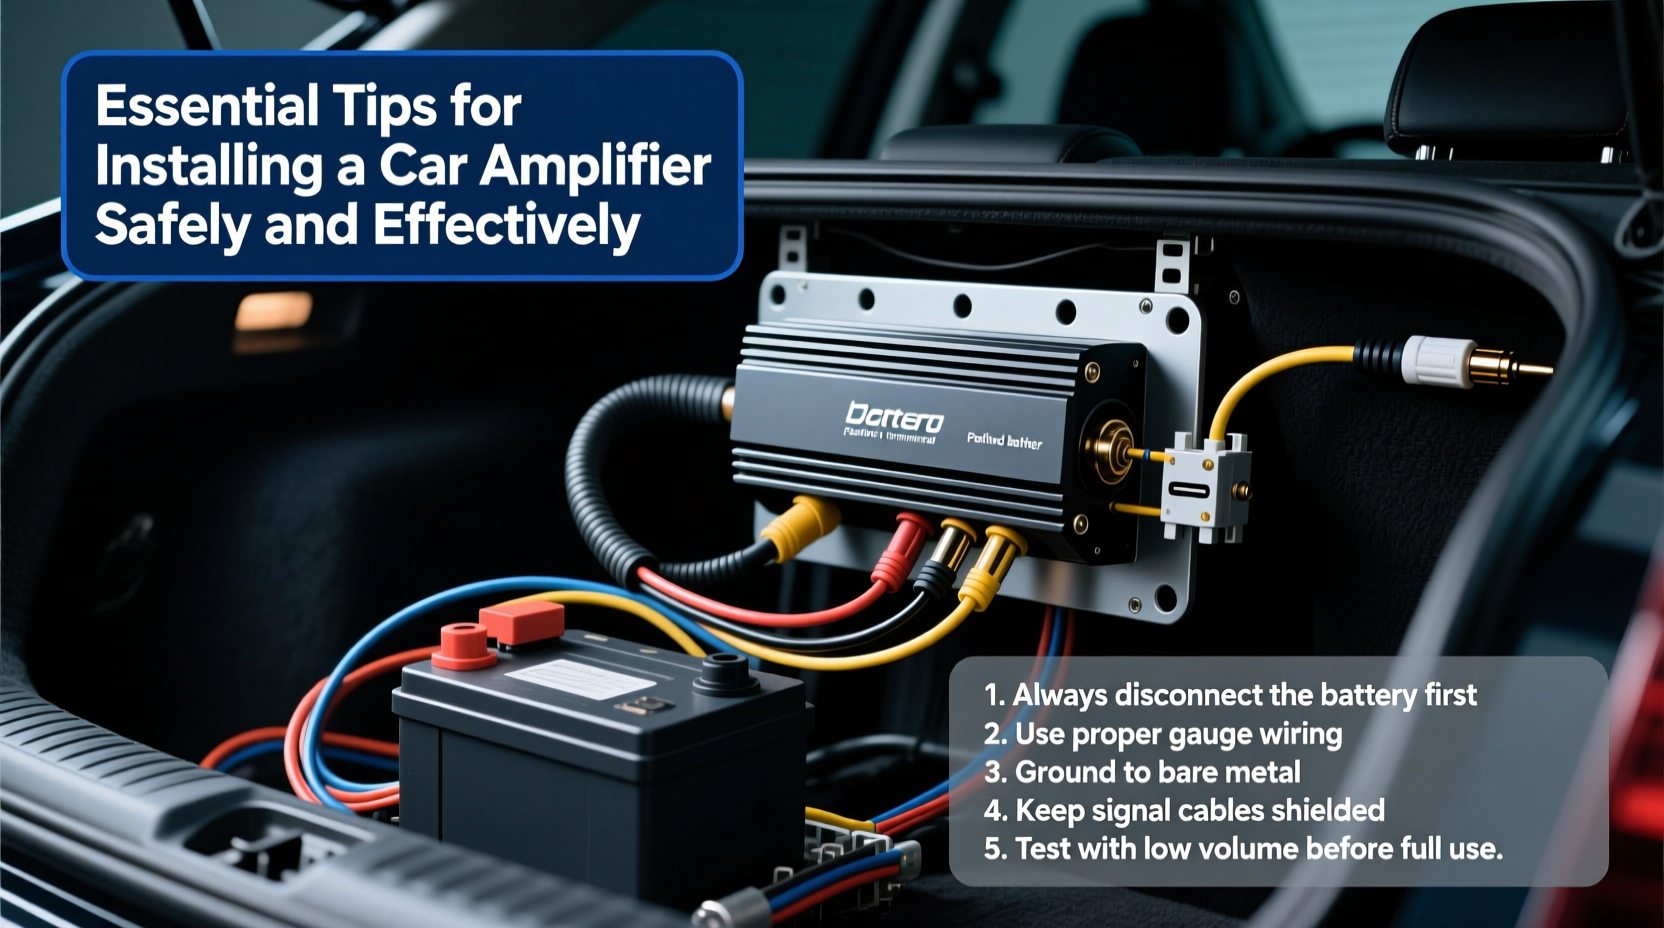
Before touching any tools or wires, take time to map out your amplifier installation. Determine where the amplifier will be mounted, how power will be routed from the battery, and how signal cables will travel from the head unit to the amp. Poor planning often leads to tangled wires, voltage drops, or interference noise.
Choose a mounting location that is secure, well-ventilated, and away from moisture. Common spots include under a seat, in the trunk, or behind interior panels. Ensure there's enough clearance for heat dissipation—amplifiers generate heat during operation, and restricted airflow can cause overheating and premature failure.
Select the Right Gauge Wire for Power and Ground
One of the most critical aspects of amplifier installation is choosing the correct wire gauge for power, ground, and speaker connections. Using undersized wire can result in voltage drops, reduced performance, and even fire hazards due to overheating.
The required wire gauge depends on the amplifier’s power output (measured in watts RMS) and the length of the power run. As a general rule, higher power demands thicker (lower gauge) wire. For example, a 1000-watt amplifier over a 15-foot run typically requires 4-gauge wire, while smaller 300–500 watt amps may work with 8-gauge.
| Amplifier Power (RMS) | Recommended Wire Gauge (AWG) | Max Distance (ft) |
|---|---|---|
| Up to 300W | 8-gauge | 15 |
| 300–700W | 4-gauge | 15 |
| 700–1200W | 2-gauge | 15 |
| 1200–2000W | 0-gauge | 15 |
| Over 2000W | 00-gauge | 15 |
Always use copper-core wire—never aluminum—and ensure both power and ground wires are the same gauge. The ground wire should be as short as possible (ideally under 18 inches) and connected directly to bare metal on the car’s chassis, free of paint or rust.
“Using the correct wire gauge isn’t just about performance—it’s a safety issue. Undersized wires can overheat and become a fire risk.” — Marcus Tran, Automotive Audio Technician
Step-by-Step Installation Guide
Follow this logical sequence to install your amplifier safely and efficiently:
- Disconnect the negative terminal of the car battery. This prevents accidental short circuits during installation.
- Route the power wire from the battery through the firewall (usually near the steering column) into the cabin. Use rubber grommets to protect the wire from abrasion.
- Install an in-line fuse within 18 inches of the battery. This protects the entire power line in case of a short.
- Mount the amplifier securely using screws or brackets. Avoid placing it on carpeted surfaces that restrict airflow.
- Connect the ground wire to a clean, unpainted metal surface close to the amplifier.
- Run the RCA signal cables from the head unit to the amplifier, keeping them away from power wires to prevent hum.
- Connect speaker wires from the amplifier outputs to the speakers, matching impedance ratings. <8> Connect the remote turn-on wire (usually blue) to the head unit’s remote output so the amp powers on automatically.
- Reconnect the battery and test the system. Listen for distortion, buzzing, or shutdowns.
Avoid Common Installation Mistakes
Even experienced DIYers make errors that compromise performance or safety. Recognizing these pitfalls helps you avoid frustration later.
- Daisy-chaining amplifiers: Connecting multiple amps via shared power/ground points increases resistance and instability. Use separate runs to the battery when possible.
- Mixing power and signal cables: Running RCA cables parallel to power wires induces electromagnetic interference, causing a persistent hum.
- Ignoring impedance matching: Driving 2-ohm speakers with an amp only stable down to 4 ohms can overheat and damage the amplifier.
- Skipping the fuse: An in-line fuse is not optional. It’s a critical safety component that protects against catastrophic shorts.
“Most amplifier failures I see stem from poor grounding or inadequate fusing—not the equipment itself.” — Lena Patel, Mobile Electronics Installer
Checklist: Pre-Power-On Verification
Before reconnecting the battery, go through this checklist to confirm everything is correctly installed:
- ✅ Battery negative terminal disconnected
- ✅ Power wire fused within 18 inches of battery
- ✅ Ground wire attached to clean, bare metal
- ✅ All connections tight and insulated
- ✅ RCA cables separated from power lines
- ✅ Remote turn-on wire properly connected
- ✅ Amplifier securely mounted with ventilation space
- ✅ Speaker wires matched to correct channels and polarity
Real-World Example: Troubleshooting a Humming Amplifier
Jason installed a new 800-watt subwoofer amplifier in his sedan. After powering up, he noticed a persistent low-frequency hum through the speakers—even with the volume off. He checked all connections and confirmed the power and ground were tight. The issue persisted.
After consulting a technician, Jason discovered he had routed the RCA cables alongside the power wire through the same grommet. This created electromagnetic coupling, inducing noise into the signal path. By rerouting the RCAs along a different path—near the vehicle’s center console, away from high-current wires—the hum disappeared completely.
This case highlights the importance of cable separation and understanding how electrical fields interact in confined spaces.
Frequently Asked Questions
Can I install a car amplifier without professional help?
Yes, many enthusiasts successfully install amplifiers themselves using detailed guides and proper tools. However, if you’re uncomfortable working with your vehicle’s electrical system or are installing a high-power multi-amp setup, professional assistance is recommended.
Why does my amplifier keep shutting off?
This usually indicates insufficient power delivery. Check for voltage drops by testing battery voltage at idle and under load. Causes include undersized wiring, weak battery, failing alternator, or poor grounding. Also verify that the amplifier’s thermal protection isn’t triggering due to overheating.
Do I need a capacitor for my amplifier?
A capacitor can help stabilize voltage in systems with large subwoofers that demand sudden bursts of power. It acts as a reserve reservoir, reducing headlight dimming. However, it doesn’t replace proper wiring or an upgraded battery/alternator in high-draw setups.
Final Recommendations for Long-Term Performance
A well-installed car amplifier should operate silently, deliver clean power, and enhance your listening experience for years. Regularly inspect connections for corrosion or looseness, especially in humid climates or vehicles exposed to road salt. Keep vents clear of dust and debris, and consider adding a transparent cover if the amp is mounted in a high-traffic area like a trunk.
Remember: great sound starts with solid fundamentals. Precision in wiring, respect for electrical safety, and attention to detail separate functional installations from truly exceptional ones.


 浙公网安备
33010002000092号
浙公网安备
33010002000092号 浙B2-20120091-4
Comments
No comments yet. Why don't you start the discussion?