
Installing a protective phone case should be a simple, routine task—but when done incorrectly, it can lead to scratches, cracked ports, or misaligned components. With iPhones becoming increasingly sleek and precisely engineered, even minor mishandling during case installation can compromise both protection and aesthetics. Whether you’re upgrading to a new model or replacing an old case, following the right approach ensures your iPhone stays in pristine condition while gaining maximum defense against drops and daily wear.
The goal isn’t just to get the case on—it’s to do so safely, securely, and without introducing stress points that could degrade performance over time. From choosing compatible materials to mastering alignment techniques, here are the essential steps and insights every iPhone owner should know before snapping on their next case.
Choose the Right Case for Your Model
Not all cases are created equal, and compatibility is the first line of defense against damage. Apple frequently adjusts dimensions between iPhone models—even within the same series—so using a case designed for an older or different iPhone can result in poor fit, pressure on buttons, or obstructed charging ports.
Always verify the exact model number of your iPhone (found under Settings > General > About) and cross-reference it with the manufacturer’s compatibility list. Premium brands like OtterBox, Spigen, and UAG provide detailed model-specific designs, ensuring accurate cutouts and proper button placement.
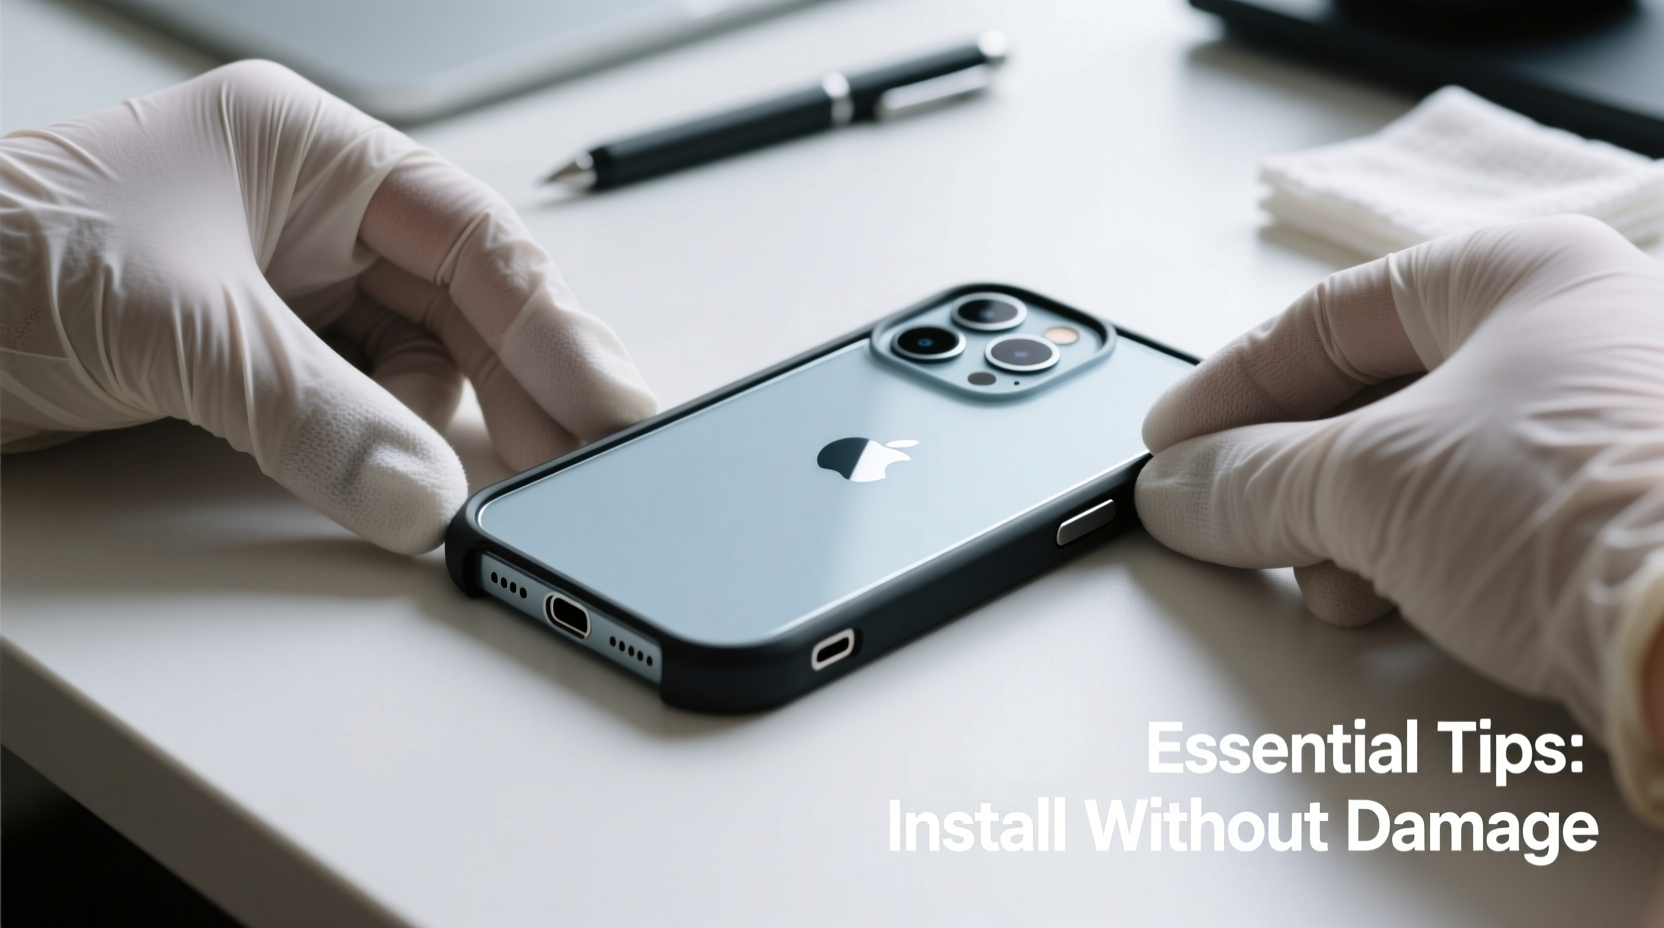
Prepare Your iPhone and Workspace
A clean environment is critical. Dust, lint, or debris trapped between the case and the iPhone can cause micro-scratches or prevent a snug fit. Before installation, power off your device to avoid accidental input during handling.
- Wipe down the iPhone with a microfiber cloth slightly dampened with isopropyl alcohol (70% or less).
- Clean the inside of the case with compressed air or a soft brush to remove manufacturing residue.
- Work on a flat, well-lit surface free from clutter to reduce the risk of dropping the phone during installation.
Never place your iPhone screen-down on hard surfaces. Use a soft towel or fabric mat to cushion it during the process.
Step-by-Step Guide to Installing Your Case Safely
Follow this sequence to minimize strain on your iPhone’s frame and ports:
- Align the bottom first: Hold the case with the Lightning port opening facing the correct direction. Gently guide the iPhone’s charging port into the case’s corresponding cutout. This ensures accurate positioning from the start.
- Slide in gradually: Instead of forcing the entire phone in at once, ease the bottom half into the case while keeping light upward pressure on the top edge. This reduces tension on the glass back and camera module.
- Secure the sides: Once the bottom is seated, press along the left and right edges evenly. Don’t use fingernails or tools—apply pressure with your fingertips in small sections.
- Check the top edge: After the sides are secure, gently press the top of the case around the speaker grille and front-facing sensors. Listen for a soft click indicating full closure.
- Test functionality: Reconnect your charger, press volume and side buttons, and inspect speaker and camera openings for obstruction.
“Improper case installation is one of the leading causes of premature wear on iPhone edges and ports. Taking 30 extra seconds to align correctly prevents long-term issues.” — Daniel Reyes, Senior Repair Technician at iFixMobile
Common Mistakes That Cause Damage
Even experienced users make errors that compromise their device. These pitfalls are easily avoided with awareness:
| Mistake | Consequence | Solution |
|---|---|---|
| Using excessive force | Bent frame, cracked back glass | Stop if resistance occurs; recheck alignment |
| Installing upside-down | Misaligned buttons, blocked ports | Verify logo orientation and camera position |
| Leaving stickers or film on | Scratches under case, trapped moisture | Remove all factory films before applying case |
| Using metal tools to snap case shut | Scratched aluminum rails, dented corners | Use only fingers or plastic prying tools if necessary |
Material-Specific Installation Tips
Different case materials require tailored handling:
- Silicone cases: Flexible but prone to stretching. Avoid twisting; instead, roll the case slightly as you slide the phone in.
- Rigid polycarbonate cases: Less forgiving. Ensure perfect alignment before applying pressure, especially near the camera bump.
- Hybrid cases (TPU + hard shell): Often have two parts. Attach the inner TPU sleeve first, then snap on the outer shell evenly.
- Folio or wallet cases: Check magnetic closures don’t interfere with MagSafe or wireless charging coils.
Mini Case Study: The Cost of Rushed Installation
Mark, a freelance photographer in Seattle, recently upgraded to an iPhone 15 Pro. Excited to protect his investment, he immediately installed a rugged third-party case he bought online. In his haste, he didn’t notice the case was labeled for iPhone 14. He forced the phone in, assuming the slight resistance was normal.
Within days, he noticed muffled sound from the bottom speaker and difficulty connecting his MagSafe charger. A visit to an authorized service center revealed the Lightning port was partially blocked and the aluminum frame had developed micro-bends. The technician confirmed the case was incompatible and caused cumulative stress. Mark ended up replacing both the case and paying for port cleaning—a fixable issue, but one entirely preventable.
This real-world example underscores why patience and verification matter more than speed.
Checklist: Safe Case Installation Routine
Before every case change, run through this checklist:
- ✅ Confirm iPhone model matches case specifications
- ✅ Power off the device
- ✅ Clean both iPhone and interior of case
- ✅ Work on a soft, stable surface
- ✅ Align charging port and camera cutouts first
- ✅ Apply even finger pressure—no tools
- ✅ Test buttons, ports, and wireless charging afterward
FAQ
Can I install a case on my iPhone without removing the screen protector?
Yes. Most modern cases are designed to accommodate phones with screen protectors. However, ultra-thick tempered glass or poorly applied protectors may cause screen-edge gaps. If the case presses into the screen edges, consider a slimmer protector.
Why does my new case feel loose after installation?
Some TPU cases have a \"break-in\" period and will conform to the phone’s shape over 24–48 hours. If looseness persists, check for incorrect model compatibility or manufacturing defects. Return or replace if needed.
Is it safe to use a case with MagSafe built-in?
Official MagSafe-compatible cases are safe and enhance charging efficiency. Third-party versions vary—choose ones certified by Apple’s MFi (Made for iPhone) program to avoid interference with NFC, charging, or compass functions.
Conclusion
Protecting your iPhone starts not with how strong the case is, but with how carefully it’s installed. A few moments of attention to detail can preserve your device’s integrity for years. By selecting the right fit, preparing properly, and avoiding common mistakes, you ensure your iPhone remains both shielded and functional.


 浙公网安备
33010002000092号
浙公网安备
33010002000092号 浙B2-20120091-4
Comments
No comments yet. Why don't you start the discussion?