
Your Nintendo Switch gamepad—whether Joy-Con or Pro Controller—is a precision instrument that sees constant use, sweat, oils, and environmental debris. Over time, grime builds up on buttons, analog sticks, and crevices, affecting responsiveness and potentially shortening the device’s lifespan. Proper cleaning and maintenance aren’t just about appearance; they’re essential for performance, hygiene, and durability. With the right approach, you can keep your controller feeling fresh and functioning like new for years.
Why Regular Maintenance Matters
Gaming controllers endure more physical contact than most electronics. Fingers press buttons hundreds of times per session, palms rest on surfaces, and moisture from hands accumulates. Dust, pet hair, and food particles can slip into seams, especially around the analog sticks and D-pad. Left unchecked, this debris causes stick drift, unresponsive inputs, and even internal corrosion.
Nintendo itself warns against using harsh chemicals or submerging controllers in liquid. Yet many users resort to improper tools like paper towels, alcohol wipes, or compressed air cans that push debris deeper. A thoughtful, consistent routine prevents damage while preserving sensitive components.
“Controllers are among the most frequently touched but least maintained gaming peripherals. A few minutes of care every few weeks can prevent costly replacements.” — Daniel Ruiz, Electronics Durability Analyst at TechLife Labs
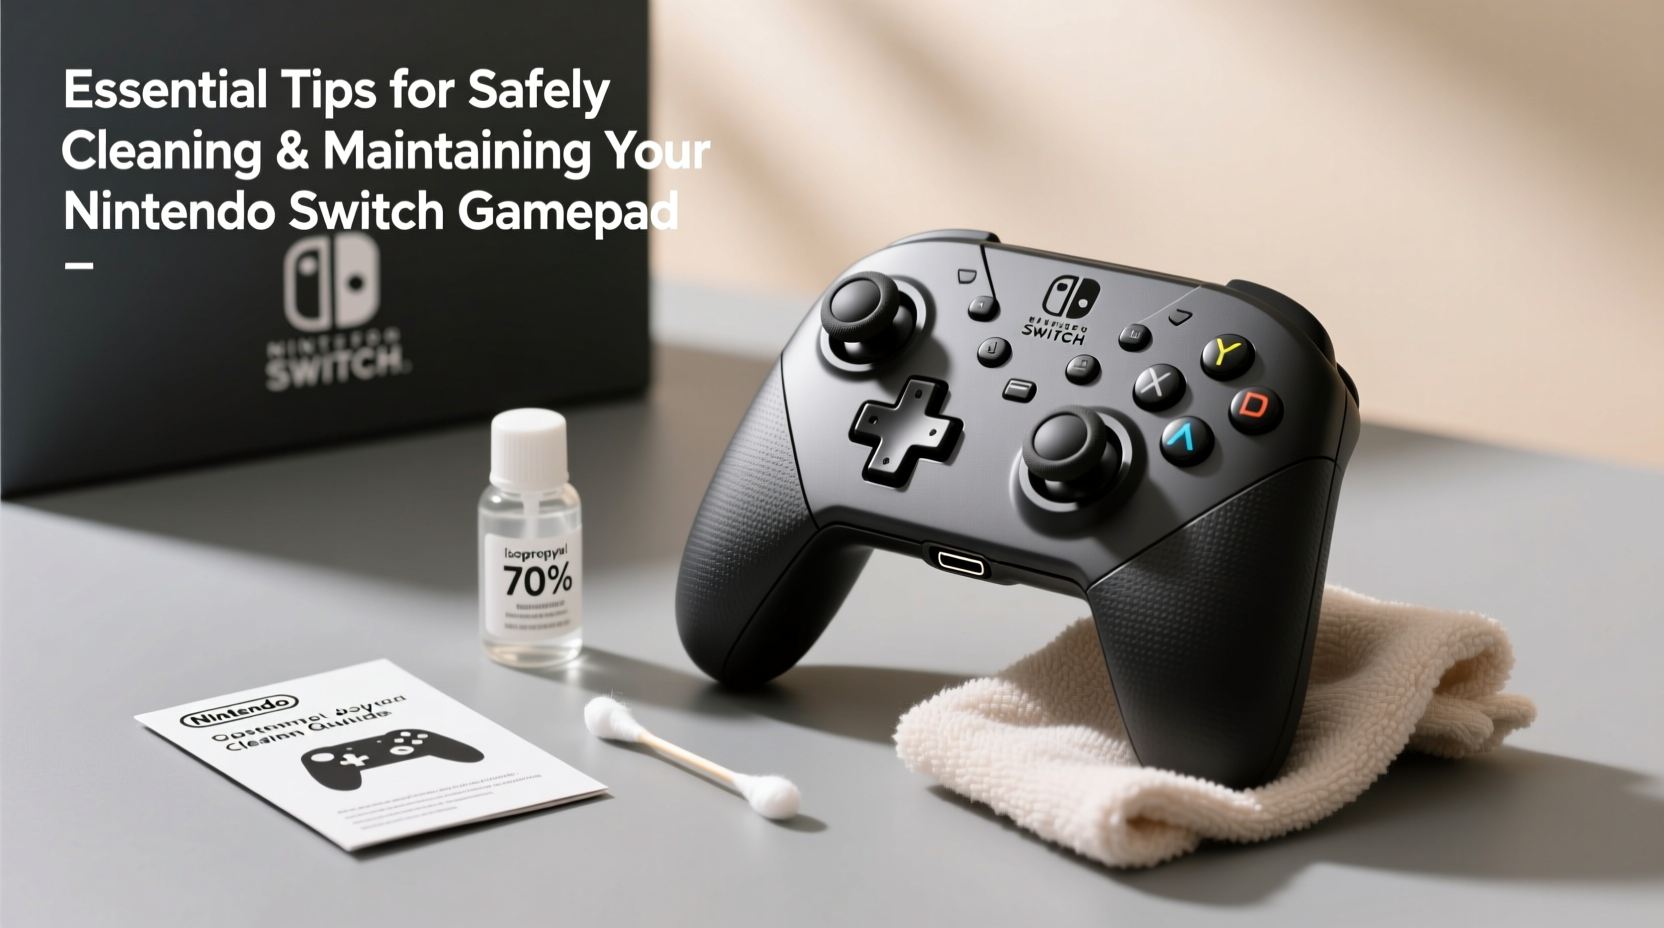
Step-by-Step: How to Safely Clean Your Gamepad
Cleaning your Nintendo Switch controller doesn’t require special equipment, but it does demand patience and precision. Follow this sequence to avoid damaging sensors, buttons, or internal circuitry.
- Power down and detach: Turn off the console and disconnect the Joy-Cons or unpair the Pro Controller via Bluetooth settings. If using Joy-Cons, slide them off the rails gently.
- Dry wipe surface: Use a soft, lint-free microfiber cloth (like those used for glasses) to wipe down the entire surface. Focus on areas with visible smudges or oily residue.
- Address stubborn grime: Moisten a corner of the cloth with distilled water—never tap water, which contains minerals. Gently rub sticky spots or button edges. Avoid soaking; damp is enough.
- Clean analog sticks and crevices: Wrap a cotton swab in the microfiber cloth and lightly dampen it. Rotate the swab around the base of each analog stick to lift dirt. Replace swabs as they collect debris.
- Disinfect (optional): For deeper sanitization, use a 70% isopropyl alcohol solution. Apply it only to the cloth—not directly to the controller—and never spray near openings.
- Dry thoroughly: Let the controller air-dry for at least 15–20 minutes before reattaching or powering on. Do not use heat sources like hairdryers.
Do’s and Don’ts: Cleaning Comparison Table
| Do | Don’t |
|---|---|
| Use a dry microfiber cloth daily | Use window cleaners or bleach-based solutions |
| Dampen cloths slightly with distilled water | Submerge any part of the controller in liquid |
| Clean analog stick bases weekly if gaming daily | Blow into the controller (moisture from breath worsens buildup) |
| Store in a low-humidity area away from direct sunlight | Leave controllers on charging docks indefinitely |
| Use compressed air sparingly and at an angle | Hold compressed air cans upside down (can release freezing liquid) |
Real Example: Preventing Stick Drift Before It Starts
Jamal, a college student and avid Splatoon 3 player, noticed his left Joy-Con was registering movement even when idle. After two months of daily gameplay, he began experiencing missed shots and erratic motion. Instead of replacing the unit immediately, he researched preventive maintenance and discovered that accumulated dust under the rubber gasket of the analog stick was likely the culprit.
Following a gentle cleaning method—using a wrapped cotton swab and isopropyl alcohol—he carefully cleaned around the stick housing. He avoided pressing down and instead rotated the swab to pull out grime. After 20 minutes of drying, the drift significantly improved. While not a permanent fix for all cases, Jamal extended the life of his Joy-Con by six months through regular upkeep, saving over $70.
This case illustrates how early intervention and proper technique can delay or even prevent hardware failure caused by neglect.
Maintenance Checklist: Monthly Routine
- Wipe down both sides of the controller with a dry microfiber cloth
- Inspect analog sticks for resistance or wobble
- Clean between buttons and along seam lines with a dry swab
- Check battery health via System Settings > Controllers and Sensors
- Ensure firmware is up to date (Settings > System > Update)
- Rotate usage if you have multiple controllers to distribute wear
- Store in a ventilated area, not buried under other devices or fabrics
Frequently Asked Questions
Can I use disinfectant wipes on my Switch controller?
No, most disinfectant wipes contain strong chemicals like ethanol, bleach, or hydrogen peroxide that can degrade plastic finishes and damage rubberized grips. If sanitizing is necessary, use a cloth lightly dampened with 70% isopropyl alcohol and wring it until almost dry.
How often should I clean my gamepad?
For casual gamers, a thorough cleaning once a month is sufficient. Daily players should perform light surface wiping weekly and deep clean every two to three weeks, especially around analog sticks and buttons.
Is stick drift always permanent?
Not necessarily. Early-stage drift may be caused by debris rather than hardware failure. Cleaning can restore function temporarily or permanently. However, if the issue persists after cleaning, recalibration or replacement may be needed. Nintendo offers repair programs for eligible drift issues, even outside warranty in some regions.
Long-Term Care: Extending Your Controller’s Lifespan
Beyond cleaning, how you use and store your controller impacts longevity. Avoid playing while eating or with wet hands. Sweat and grease accelerate material breakdown. Consider using silicone skins or removable button caps—they act as sacrificial layers that absorb wear and are easy to replace.
Charge smartly: Leaving controllers on docks 24/7 stresses batteries over time. Unplug once fully charged, especially if not gaming for extended periods. Lithium-ion batteries degrade faster when kept at 100% charge continuously.
Finally, keep firmware updated. Nintendo occasionally releases sensor calibration improvements and input responsiveness fixes. These don’t happen automatically unless the controller connects regularly and updates when prompted.
Conclusion: Small Habits, Lasting Results
Your Nintendo Switch gamepad is built for play, but it’s not indestructible. The difference between a controller that lasts two years versus five often comes down to simple habits: wiping it down, cleaning crevices gently, storing it properly, and avoiding preventable stressors. These routines take minutes but protect your investment and enhance gameplay quality.


 浙公网安备
33010002000092号
浙公网安备
33010002000092号 浙B2-20120091-4
Comments
No comments yet. Why don't you start the discussion?