
Building your own PC in 2025 doesn’t require advanced engineering skills, but it does demand the right tools and preparation. With components becoming more compact and efficient, and new standards like PCIe 5.0 and DDR5 memory now mainstream, having a reliable toolkit ensures your build is not only successful but also safe and stress-free. Whether you're upgrading from an old system or assembling your first machine, this guide outlines the essential tools, best practices, and overlooked details that make all the difference.
Why the Right Tools Matter in PC Building
A DIY PC build is more than just snapping parts together. It involves precision handling, static protection, cable management, and mechanical assembly—all of which can go wrong without the proper equipment. Using inappropriate tools can strip screws, damage connectors, or even short-circuit sensitive components. The goal isn't just functionality; it's longevity, performance, and safety.
In 2025, motherboards support higher power delivery for next-gen CPUs, and GPUs draw more current than ever. One misplaced metal tool on a live board—even during testing—can fry thousands of dollars in hardware. That’s why investing in the right tools upfront saves money, time, and frustration down the line.
“90% of failed builds I’ve seen weren’t due to bad parts—they were caused by improper handling or using the wrong screwdriver.” — Jordan Lee, Senior Technician at BuildRight Labs
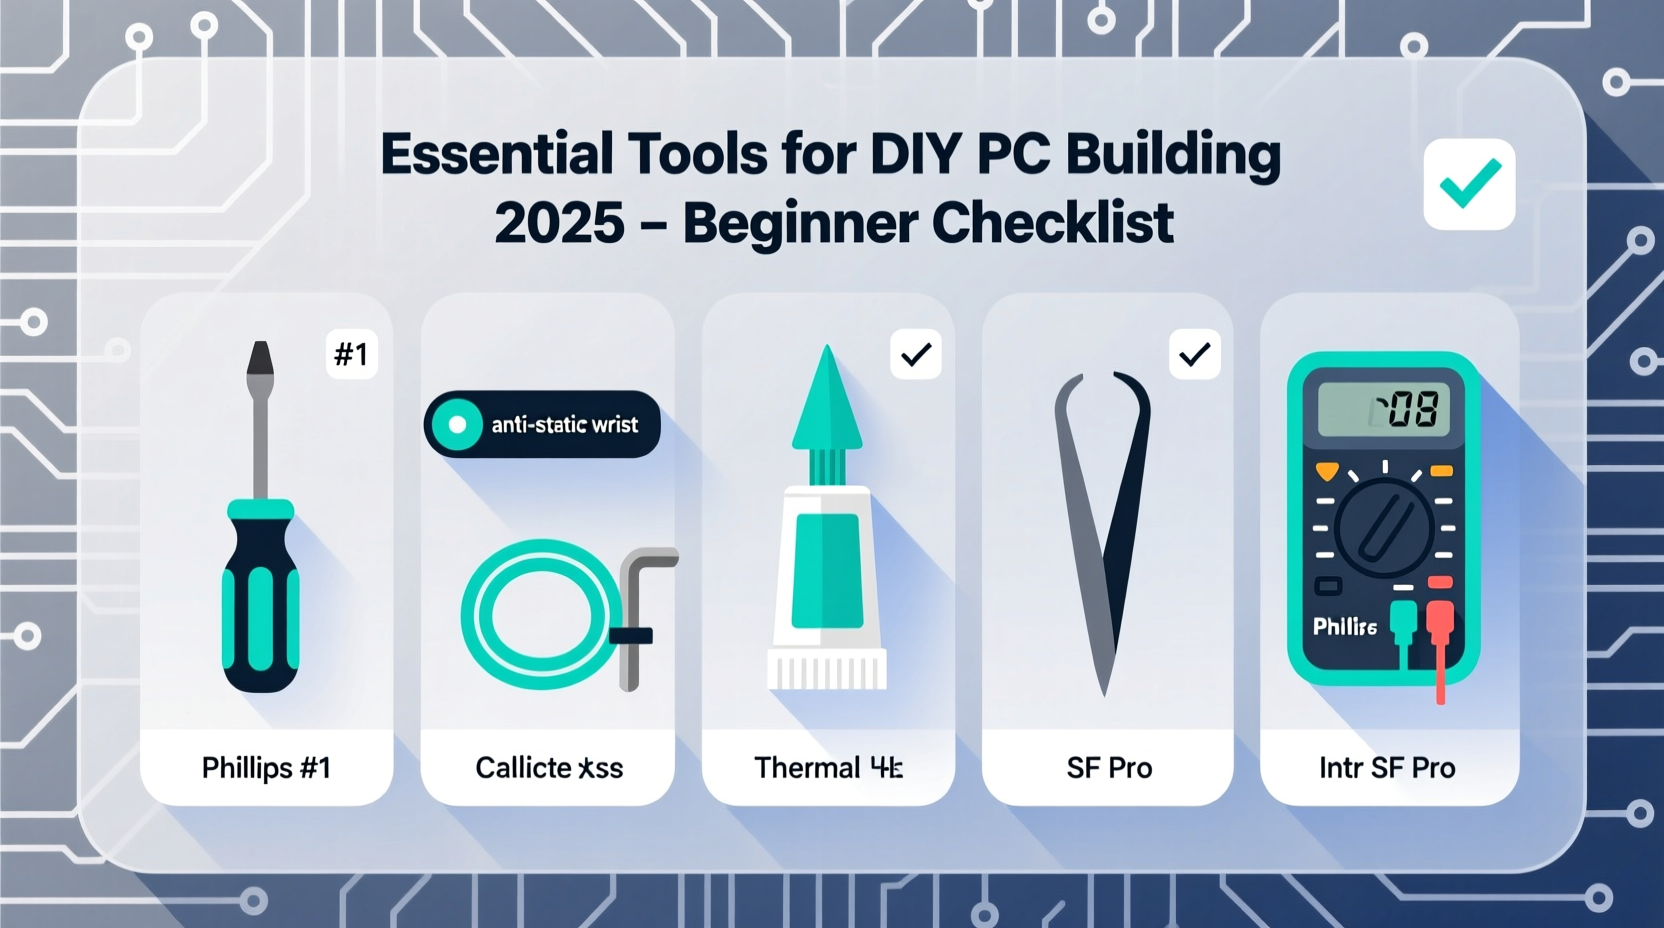
Core Toolkit: Must-Have Tools for Every Beginner (2025 Edition)
Below is a curated list of tools every first-time builder should have before opening a single component box. These items are affordable, widely available, and designed specifically for computer assembly.
1. Magnetic Phillips #2 Screwdriver
This is the workhorse of any PC build. A magnetic tip keeps small screws secured, reducing the risk of dropping them into tight spaces or onto circuitry. Look for one with an ergonomic grip and a non-conductive handle for added safety.
2. Anti-Static Wrist Strap
Electrostatic discharge (ESD) can damage components without immediate symptoms. An anti-static wrist strap connects you to ground via your case or a grounded outlet, neutralizing static buildup as you work. Even if you’re working on carpet, this simple device prevents invisible harm to RAM, CPU, and motherboard.
3. Precision Tweezers
Useful for retrieving dropped screws, placing tiny jumpers, or adjusting front-panel connectors. Non-magnetic, insulated tweezers prevent accidental shorts and offer better control than fingers alone.
4. Cable Ties or Velcro Straps
Clean cable management improves airflow and aesthetics. Reusable Velcro straps are ideal because they allow adjustments post-build. Avoid zip ties unless you’re certain of final routing—they’re permanent and hard to remove.
5. Flashlight or LED Work Light
Modern cases often have deep interiors or dark finishes. A flexible-neck LED light clamped to the edge of your workspace illuminates hidden corners, especially when connecting rear I/O shield screws or SATA cables behind drive cages.
6. Spare Container for Screws
PC kits come with multiple types of screws: standoffs, drive screws, GPU brackets, and more. Use a magnetic tray or divided container to organize them by type. Losing a single standoff can delay your build or compromise grounding.
7. Thermal Paste Applicator (Optional but Recommended)
While many coolers include pre-applied thermal pads or paste, having a high-quality thermal compound like Arctic MX-6 and a micro-spatula ensures optimal CPU cooling. Precise application prevents pump-out and hotspots.
Checklist: Pre-Build Preparation Steps
Before touching any tools, follow this checklist to ensure a smooth build process:
- Choose a clean, dry workspace – A wooden table away from carpets reduces static risks.
- Unpack all components – Verify everything is present: CPU, cooler, RAM, GPU, PSU, storage, case, and accessories.
- Ground yourself – Attach the anti-static wrist strap and connect it properly.
- Lay out tools and containers – Have your screwdriver, tweezers, and screw trays ready.
- Review manuals – Check motherboard layout, fan headers, and front-panel pinouts.
- Install CPU and RAM before mounting motherboard – Easier access outside the case.
- Test boot (bench test) – Before installing in the case, connect PSU and verify POST.
Tool Comparison Table: What You Need vs. What You Don’t
| Tool | Recommended? | Notes |
|---|---|---|
| Magnetic Phillips #2 Screwdriver | Yes | Ideal for most case and drive screws. |
| Non-Magnetic Jeweler’s Screwdriver Set | Yes | Useful for delicate tasks like M.2 SSD installation. |
| Hammer | No | Never needed. Forces can crack PCBs. |
| Power Drill | No | Too much torque. Can strip threads instantly. |
| Anti-Static Mat | Optional | Great for frequent builders; overkill for one-off projects. |
| Digital Multimeter | Optional | Helpful for diagnosing PSU issues later, not required for initial build. |
| Compressed Air Can | Yes | Use after build to clean dust from heatsinks and fans. |
Step-by-Step: Assembling Your PC Safely in 2025
Follow this sequence to minimize errors and maximize efficiency during your build:
- Prepare the Case: Remove side panels, install standoffs (if not pre-fitted), and route I/O shield into the backplate area.
- Mount the Power Supply: Slide it into place following airflow direction (fan usually faces down). Secure with four screws.
- Install CPU: Lift the socket arm on the motherboard, align CPU pins (match triangle marker), and gently lower it. Close the arm without force.
- Apply Thermal Paste (if needed): Use a rice-grain-sized drop in the center for modern CPUs. Spread only if instructed.
- Attach CPU Cooler: Follow bracket directions precisely. Tighten screws diagonally in stages to ensure even pressure.
- Insert RAM: Press modules firmly into DIMM slots until clips snap automatically. For dual-channel, use slots A2 and B2 (check manual).
- Mount Motherboard: Carefully lower it into the case, aligning ports with I/O shield. Screw in using standoffs—don’t overtighten.
- Connect Front Panel Cables: Use the motherboard manual to identify POWER_SW, RESET, HDD_LED, etc. Test switches before closing up.
- Install Storage: For M.2 NVMe drives, insert at 30-degree angle and secure with one screw. For SATA SSDs/HDDs, mount in drive bay and connect data/power.
- Install GPU: Remove expansion slot covers, insert card fully into PCIe x16 slot, and secure with screws. Connect PCIe power cables from PSU.
- Route and Connect Cables: Use modular PSU cables where possible. Group similar wires (e.g., SATA, RGB) and secure with Velcro.
- Bench Test Boot: Temporarily power on outside the case to confirm BIOS screen appears. If not, recheck connections.
- Final Assembly: Once confirmed working, close the case, attach dust filters, and position the PC in its final location.
Real Example: Sarah’s First Build Gone Right
Sarah, a college student in Austin, decided to build her own gaming rig in early 2025. She bought a mid-tower case, B760 motherboard, RTX 4060, and Intel i5-14600K. Initially, she tried using a household screwdriver from her kitchen drawer. After struggling with stripped screws and nearly shorting the board by dropping one inside the case, she paused and invested $35 in a basic toolkit: magnetic screwdriver, wrist strap, tweezers, and cable ties.
Starting over with the right tools, she completed the build in under three hours. Her bench test worked on the first try, and thanks to good cable management, temperatures stayed low even during extended gaming sessions. “I wasted less time and felt way more confident,” she said. “The tools paid for themselves in peace of mind.”
Frequently Asked Questions
Can I build a PC without an anti-static wrist strap?
Technically yes, but it's risky. Touching a grounded metal object (like a radiator or plugged-in PSU case) frequently helps, but a wrist strap offers continuous protection. They cost under $10 and are worth every penny.
Do I need special tools for M.2 SSD installation?
No. Most M.2 drives require only a standard Phillips screwdriver and one standoff. Some compact toolkits include a tiny hex key for specific brands, but these are rare. Always check your motherboard manual for included hardware.
Is a powered screwdriver ever acceptable?
No. Even low-torque electric drivers increase the risk of stripping soft brass standoffs or damaging plastic retention clips. All screws in PC building should be hand-tightened for control.
Expert Insight: Long-Term Maintenance Starts at Build Time
The choices you make during assembly affect how easy upgrades and repairs will be months or years later. Clean cable routing isn’t just about looks—it reduces heat buildup and makes swapping parts simpler.
“Your first build sets the foundation for future confidence. Do it right once, and you’ll enjoy upgrading for years.” — Marcus Tran, Founder of DIYCompute.org
Consider adding removable dust filters, planning for future liquid cooling, and labeling internal cables. These small habits compound into major benefits over time.
Conclusion: Start Smart, Build Confidently
Building a PC in 2025 is more accessible than ever, but success hinges on preparation. The right tools eliminate common pitfalls and transform a daunting task into a rewarding experience. From the magnetic screwdriver that saves a lost screw to the wrist strap that protects your expensive GPU, each item plays a role in a flawless build.
You don’t need a professional workshop—just a few thoughtful purchases and attention to detail. Now that you know exactly what to gather and how to use it, there’s no reason to delay. Gather your components, set up your workspace, and take the first step toward owning a machine built by you, for you.


 浙公网安备
33010002000092号
浙公网安备
33010002000092号 浙B2-20120091-4
Comments
No comments yet. Why don't you start the discussion?