
Installing a large canvas on your wall can transform the character of a room, adding depth, color, and personal expression. But even the most stunning artwork can fall flat if it’s poorly sized or incorrectly placed. The key to a flawless display lies in precise measurement and thoughtful planning. Many homeowners rush this process, only to face awkward spacing, unbalanced proportions, or last-minute returns due to incorrect sizing. Taking the time to measure your wall correctly ensures that your canvas becomes a focal point—not a fix-it project.
Why Accurate Measurement Matters
A large canvas is more than décor—it's architecture within your space. When sized and positioned correctly, it anchors a room, draws the eye, and enhances flow. But an oversized piece can overwhelm, while one too small disappears into the background. Proper measurement prevents costly errors, reduces stress during installation, and maximizes visual impact.
Interior designers emphasize proportion as a foundational principle. A canvas should relate harmoniously to the furniture beneath it and the wall around it. For example, a sofa-centered gallery wall should span 50–75% of the sofa’s width. Above a bed, the art should leave at least 6–8 inches of clearance on each side. These ratios rely entirely on accurate initial measurements.
“Art should feel intentional, not accidental. Measuring isn’t just about fit—it’s about emotional resonance.” — Lena Patel, Interior Stylist & Gallery Curator
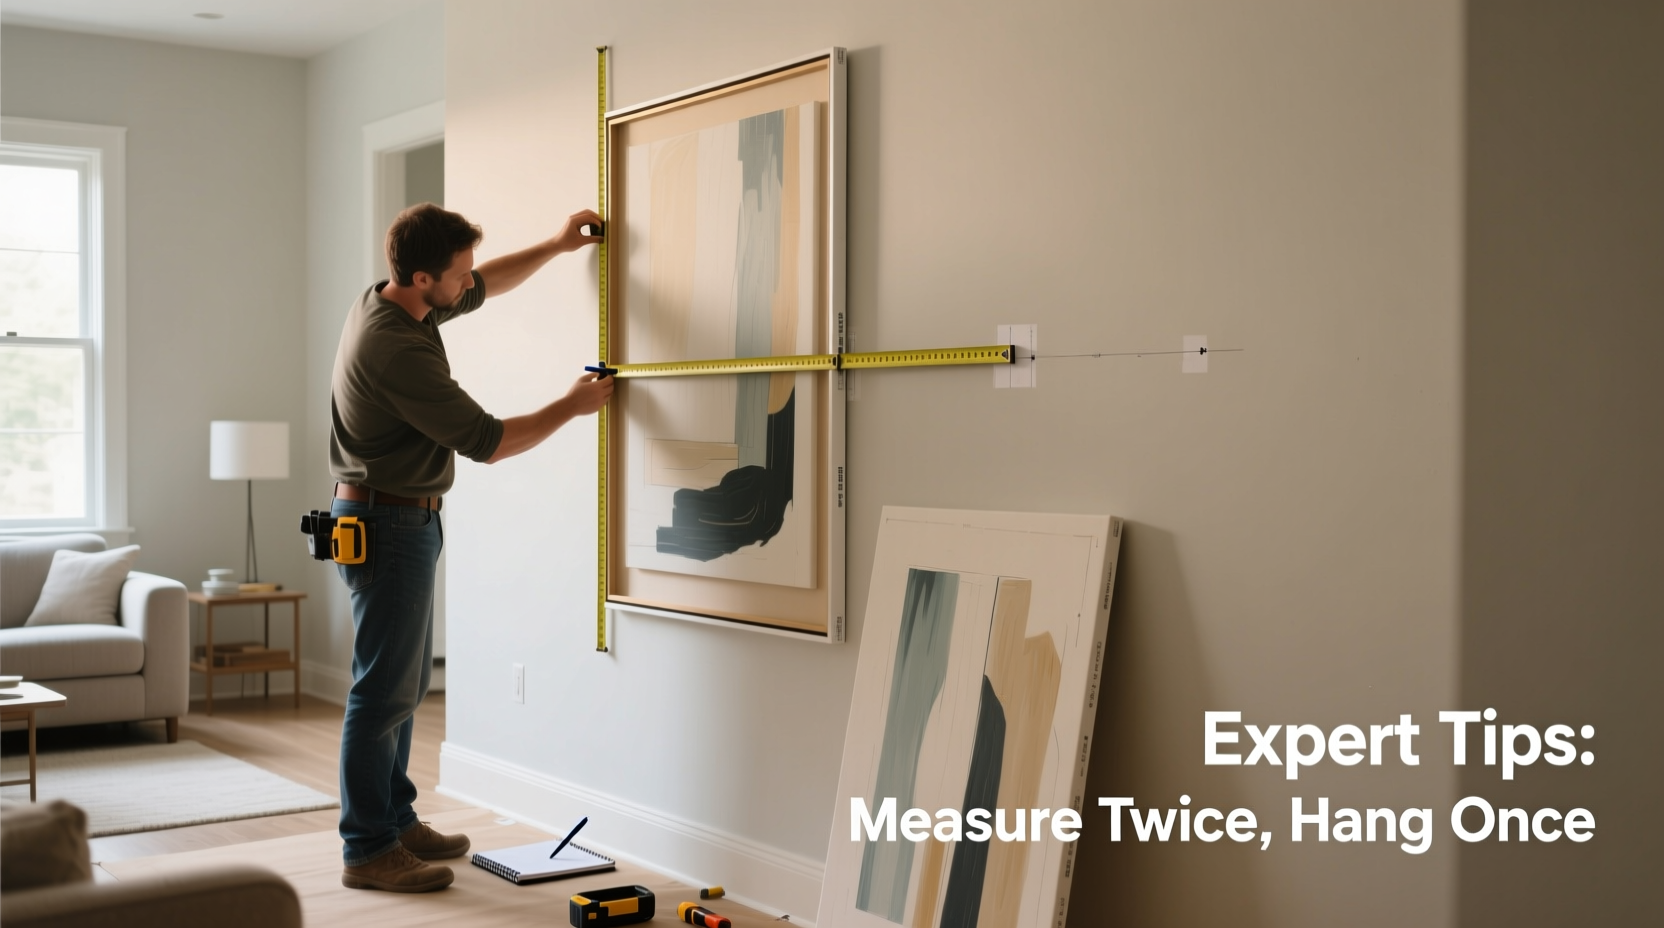
Step-by-Step Guide to Measuring Your Wall
Follow this sequence to ensure precision from floor to ceiling and corner to corner.
- Gather your tools: Use a steel tape measure (not fabric), pencil, level, painter’s tape, and a notepad. Laser measures are ideal for large spaces.
- Clear the wall: Remove existing décor, outlet covers, or switch plates that may interfere with measurement.
- Measure wall dimensions: Record the total width and height of the available wall space. Note any obstructions like windows, doors, or molding.
- Determine ideal hanging height: For eye-level viewing, position the center of the canvas 57–60 inches from the floor. Adjust slightly based on ceiling height and furniture layout.
- Calculate negative space: Decide how much breathing room you want around the canvas. Minimum: 4–6 inches on all sides. For dramatic effect: 12+ inches.
- Mark the center point: Use a pencil to mark the midpoint of the wall horizontally and vertically based on your target height.
- Test with tape outline: Use painter’s tape to create a full-scale mock-up of the canvas on the wall. Step back and evaluate from multiple angles and distances.
Common Measurement Mistakes to Avoid
Even experienced decorators make avoidable errors when sizing walls for large canvases. Recognizing these pitfalls helps prevent frustration later.
| Mistake | Why It’s Problematic | Solution |
|---|---|---|
| Measuring only once | Faulty readings due to warped walls or tape slippage | Take multiple measurements across the same plane |
| Ignoring ceiling height | Canvas looks \"floating\" or disconnected from the room | Ensure vertical proportion aligns with room scale (e.g., taller ceilings allow larger pieces) |
| Forgetting frame thickness | Total size exceeds expectations, causing tight fit | Add 1–3 inches per side to canvas dimensions for framed works |
| Not considering lighting | Glare or shadows obscure the artwork | Observe light patterns at different times; avoid direct sunlight on glossy surfaces |
| Overlooking electrical outlets | Canvas covers switches or outlets, violating safety codes | Keep at least 6 inches clearance around functional fixtures |
Planning for Multi-Panel or Gallery Displays
When working with multi-panel canvases or assembling a gallery wall, spatial math becomes more complex. Each panel must align visually while maintaining consistent spacing.
- For triptychs, allow 2–4 inches between panels unless designed as a continuous image.
- Treat the entire arrangement as one unit when calculating wall space. Add combined width + gap space before marking.
- If mixing sizes, use a grid system: lay out arrangements on the floor first, then transfer dimensions to the wall using tape.
Real Example: Transforming a Living Room Accent Wall
Jamal wanted to install a 48” x 72” abstract canvas above his sectional in a modern loft. At first, he measured only the width and assumed height wasn’t critical. After mounting, the top of the canvas nearly touched the crown molding, creating a cramped look. He removed it, re-measured, and discovered the wall had a slight pitch—his initial reading was off by 3 inches. He recalculated with proper negative space, lowered the center point to 58 inches, and used painter’s tape to visualize the footprint. The second attempt created a balanced, museum-quality display that guests consistently complimented.
Checklist: Pre-Hanging Wall Assessment
Before purchasing or installing any large canvas, complete this checklist:
- ✅ Measured total wall width and height at three points
- ✅ Noted locations of outlets, vents, switches, and trim
- ✅ Confirmed ceiling height and room proportions
- ✅ Determined ideal centerline (57–60 inches from floor)
- ✅ Accounted for frame or matting dimensions
- ✅ Tested layout with painter’s tape or paper cutout
- ✅ Checked natural and artificial lighting angles
- ✅ Verified weight capacity of wall (drywall vs. stud location)
Frequently Asked Questions
How high should I hang a large canvas above furniture?
Leave 6–10 inches between the top of the furniture and the bottom of the canvas. This creates visual connection without crowding. Ensure the width of the artwork is no more than ¾ of the furniture’s width for balanced proportion.
What if my wall has uneven edges or sloping corners?
Use the longest straight section as your baseline. Focus on eye-level alignment rather than corner-to-corner symmetry. Mark reference points independently on left and right sides, then level between them.
Can I hang a large canvas on drywall without studs?
Yes, but only with proper hardware. Use toggle bolts or heavy-duty drywall anchors rated for the canvas weight. For pieces over 50 lbs, locate and anchor into wall studs whenever possible.
Final Thoughts and Action Steps
Measuring your wall for a large canvas isn’t just about numbers—it’s about intentionality. Precision turns impulse decor into lasting design. Whether you’re enhancing a bedroom, living area, or office, taking 30 minutes to map your space saves hours of correction and avoids costly missteps. Remember: the right canvas in the right place doesn’t just fill a wall—it completes a room.


 浙公网安备
33010002000092号
浙公网安备
33010002000092号 浙B2-20120091-4
Comments
No comments yet. Why don't you start the discussion?