
Upgrading your Apple Watch with a leather strap transforms both comfort and style. Unlike sport bands, leather straps offer a refined, timeless look that pairs well with formal attire or casual elegance. But despite their sophistication, many users hesitate to install them—worried about damaging the watch or struggling with stubborn spring bars. With the right technique and a few expert insights, however, attaching a leather strap is simple, safe, and satisfying.
This guide walks you through everything from selecting compatible hardware to mastering installation without tools. Whether you’re switching straps daily or making your first upgrade, these proven methods ensure a secure, scratch-free fit every time.
Understanding Your iWatch Strap Mechanism
All Apple Watch models use a spring bar system to attach bands. These small metal rods sit inside the lugs (the protruding connectors on either side of the watch case) and expand when pressed, allowing the band to slide off. The spring bar retracts into the lug once released, holding the band securely in place.
Leather straps typically come with integrated quick-release pins or standard spring bars. Quick-release systems feature push-button mechanisms that disengage the bar with minimal force. Standard spring bars require a tool to depress the pin and release tension. Knowing which type you have determines your installation approach.
“Precision matters when handling spring bars. A steady hand prevents scratches and ensures long-term durability.” — Daniel Reeves, Watch Accessory Designer at TimeCraft Studio
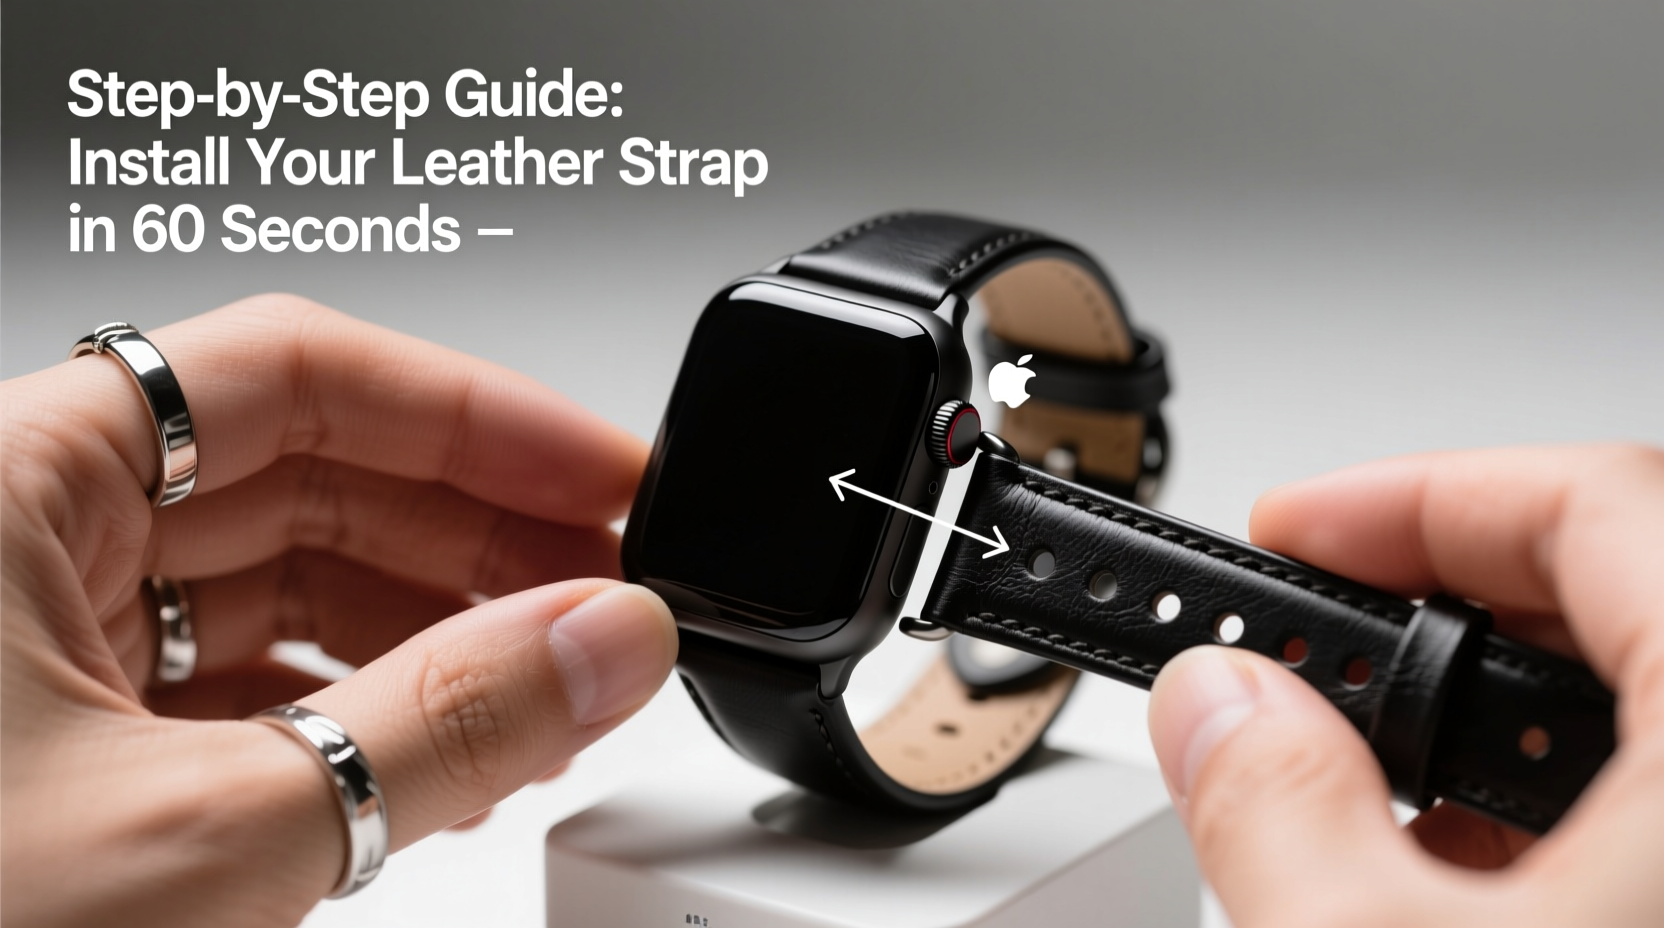
Step-by-Step Guide: Installing a Leather Strap Without Tools
You don’t need specialized equipment to change your iWatch band. In fact, Apple designed the system for tool-free changes. Follow this sequence for a smooth, damage-free installation:
- Power down your Apple Watch (optional but recommended to avoid accidental touches).
- Place the watch face-down on a soft, lint-free cloth or microfiber pad.
- Locate the release button on the current band near the case. It’s a small rectangular tab visible from the side.
- Press and hold the release while gently pulling the band away from the case. Repeat on the opposite side.
- Align the new leather strap’s connector with the lug opening. Ensure the curved end faces inward toward the watch body.
- Slide one end in until it clicks, then angle the other end and press firmly until it locks into place.
- Test both sides by lightly tugging the strap. There should be no wobbling or looseness.
Choosing the Right Leather Strap & Compatibility Tips
Not all leather straps are created equal. Material quality, thickness, and lug design affect both comfort and longevity. Before purchasing, confirm compatibility with your Apple Watch size—Series 1 through Series 9 and Ultra models vary slightly in case width.
| Apple Watch Model | Compatible Strap Sizes | Recommended Leather Thickness |
|---|---|---|
| 38mm / 40mm / 41mm | 14mm–18mm width | 3.5–4.0mm |
| 42mm / 44mm / 45mm | 18mm–22mm width | 4.0–4.5mm |
| Apple Watch Ultra | 22mm only | 4.5mm max |
Fully aniline leather offers the softest feel but requires more maintenance. Semi-aniline provides better stain resistance while retaining natural grain beauty. Avoid bonded leather—it may crack within months due to layered construction.
Common Mistakes to Avoid During Installation
Even experienced users make errors when rushing the process. These pitfalls can lead to damaged connectors, scratched cases, or loose fittings:
- Forcing the strap into place: Misalignment causes pressure on the lug, risking internal spring breakage.
- Using metal tools near the case: Tweezers or paperclips can slip and leave permanent marks.
- Ignoring moisture exposure: Leather degrades faster if worn while swimming or sweating heavily.
- Skipping break-in periods: New straps are stiff; wearing them tightly at first increases friction and wear.
Mini Case Study: Sarah’s First Luxury Strap Upgrade
Sarah, a marketing executive in Chicago, purchased a walnut-brown Horween leather strap for her 45mm Apple Watch Series 8. Excited to pair it with her business attire, she attempted installation immediately after unboxing. Without checking alignment, she pushed one end in backward and applied excessive force. The connector jammed, and the spring bar partially dislodged inside the lug.
After consulting Apple Support, she learned that gentle realignment—without tools—freed the mechanism. She restarted the process slowly, following the official removal steps. This time, the strap clicked smoothly into place. Over the next two weeks, she conditioned the leather weekly and noticed improved flexibility. Now, she rotates three leather straps seasonally and reports zero issues with durability or fit.
Checklist: Preparing for a Smooth Installation
Before beginning, gather what you need and verify conditions:
- ✅ Clean, dry workspace with soft surface protection
- ✅ Correctly sized leather strap for your iWatch model
- ✅ Assurance that connectors are clean and undamaged
- ✅ Watch powered off or locked to prevent screen activation
- ✅ Hands washed and dried (oils can transfer to leather)
- ✅ Patience—allow 3–5 minutes for careful handling
Caring for Your Leather Strap After Installation
Once installed, proper maintenance extends the life of your leather strap significantly. Exposure to sunlight, moisture, and skin oils accelerates aging. To preserve appearance and structural integrity:
- Remove the watch before showering, swimming, or intense workouts.
- Wipe the strap monthly with a damp cloth, then dry thoroughly.
- Apply a leather conditioner formulated for thin accessories every 6–8 weeks.
- Rotate straps regularly to reduce continuous stress on one piece.
Avoid storing your iWatch in direct sunlight or humid environments like bathrooms. Instead, keep it in a ventilated drawer or display stand away from heat sources.
Frequently Asked Questions
Can I install a third-party leather strap safely?
Yes, as long as the strap uses Apple-certified connectors or adheres to official dimensions. Reputable brands like Nomad, WristWrap, and Baltardo engineer their products to match OEM tolerances, ensuring secure attachment without compromising water resistance around the case.
Why does my leather strap feel tight at first?
Leather naturally molds to your wrist over time. During the first 3–5 wears, expect slight stiffness. Wear it for gradually increasing durations to allow gentle stretching without strain on stitching points.
How do I know if the strap is properly secured?
A fully engaged connector produces a distinct “click” and allows minimal lateral movement. If you hear rattling or see gaps between the lug and strap base, remove and reinsert it. Never wear the watch if the connection feels unstable.
Final Thoughts: Elevate Your iWatch Experience
Switching to a leather strap isn’t just about aesthetics—it’s a statement of personal style and attention to detail. When done correctly, installation takes under five minutes and enhances both comfort and confidence. By understanding your device’s mechanics, choosing quality materials, and applying mindful techniques, you protect your investment and enjoy a seamless upgrade experience.


 浙公网安备
33010002000092号
浙公网安备
33010002000092号 浙B2-20120091-4
Comments
No comments yet. Why don't you start the discussion?