
Floor trim—also known as baseboard or base molding—is more than just a finishing touch; it’s a critical element that ties a room together. When installed poorly, gaps, uneven seams, and crooked lines distract from an otherwise beautiful space. But when done right, trim enhances architectural detail, protects walls from damage, and gives interiors a polished, intentional look. Achieving a flawless installation doesn’t require expensive tools or years of experience—it demands precision, preparation, and the right techniques. Whether you’re upgrading your home or tackling a renovation project, these expert strategies will help you install floor trim with confidence and professionalism.
Choose the Right Trim Material and Profile
The first step toward a smooth installation is selecting the appropriate trim. Baseboards come in various materials: MDF (medium-density fiberboard), solid wood, PVC, and even hybrid composites. Each has its strengths:
- MDF: Affordable and paint-friendly, but prone to swelling if exposed to moisture.
- Solid Wood: Durable and sandable, ideal for high-end finishes, though more expensive.
-
- Composite: Combines durability with ease of installation, often used in modern builds.
Profile selection also matters. A simple 3-inch square edge works well in minimalist spaces, while taller crown-style baseboards add elegance to traditional rooms. Consider ceiling height and room size—taller trim can make low ceilings feel higher, but oversized profiles may overwhelm small spaces.
Prepare the Walls and Floor Thoroughly
Even the most skilled carpentry can’t compensate for poor prep work. Before installing trim, ensure the subfloor is clean, level, and free of debris. If laying new flooring, complete it before installing baseboards to allow for proper fit against the surface.
Check wall conditions. Patch any holes or dents in drywall and sand rough areas. Use a level to identify high or low spots along the base of the wall. Irregularities greater than 1/8 inch should be addressed with joint compound or shimming during installation.
Remove outlet and switch cover plates. You’ll reinstall them after trim is in place, ensuring they sit flush over the new molding. Protect adjacent surfaces with painter’s tape if working near freshly painted walls.
“Proper preparation accounts for 70% of a successful trim job. Measure twice, cut once, but prepare always.” — James Holloway, Master Carpenter & Renovation Contractor
Step-by-Step Guide to Professional Installation
Follow this proven sequence to achieve clean, gap-free results:
- Measure and mark layout: Use a laser level or chalk line to establish a consistent reference line 1/4 inch above the finished floor. This compensates for minor floor irregularities and ensures even alignment.
- Dry-fit each piece: Hold trim in place without nailing to check fit, especially around corners and obstacles.
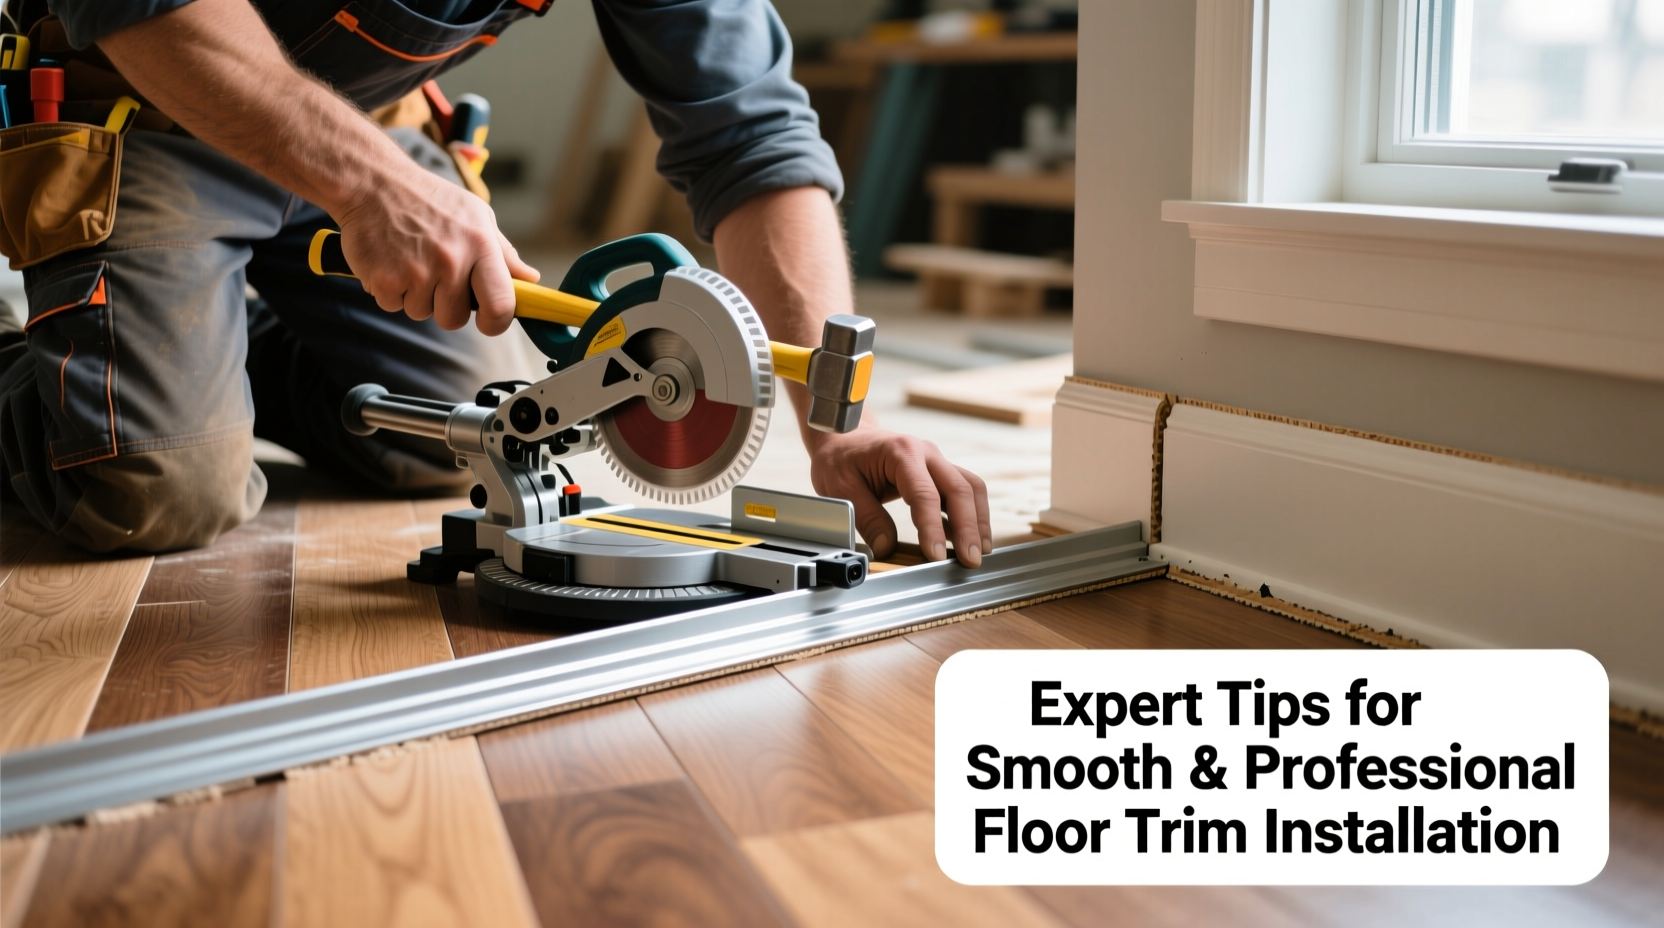
- Cut miters accurately: Use a power miter saw set precisely to 45 degrees for inside and outside corners. For inside corners, cut one piece with a 45° left mitre and the adjoining piece with a 45° right mitre.
- Nail strategically: Fasten with 18-gauge brad nails every 12–16 inches. Drive nails at a slight angle into wall studs (typically spaced 16” apart). Stagger nail placement so they’re not aligned vertically.
- Secure tight joints: For inside corners, use a corner clamp to press miters tightly together before nailing. For outside corners, consider using pre-made metal or plastic corner caps for durability.
- Fill and finish: Apply wood filler or acrylic caulk to nail holes and seams. Sand lightly once dry, then prime and paint or stain as needed.
Do’s and Don’ts of Floor Trim Installation
| Do | Don't |
|---|---|
| Use a coped joint for inside corners on uneven walls | Assume all corners are exactly 90 degrees |
| Pre-drill nail holes near ends to prevent splitting | Nail too close to the end of the trim without pilot holes |
| Apply painter’s caulk between trim and floor for seamless appearance | Leave visible gaps between trim and flooring |
| Work left to right around the room for consistent mitre direction | Alternate mitre directions, creating visual inconsistency |
| Check plumb and level frequently during installation | Assume the floor or wall is perfectly straight |
Real-World Example: Fixing a Problematic Bathroom Install
A homeowner attempted to install MDF baseboards in a half-bath with slightly bowed walls. Using only mitered inside corners, they ended up with visible gaps up to 1/4 inch wide. After consulting a contractor, they removed the affected sections and reinstalled using coped joints. By shaping the second piece of trim to follow the contour of the first, they achieved a seamless fit despite the wall imperfection. The final result looked factory-perfect, proving that technique often outweighs material quality.
Coping takes more time than mitering, but in real-world conditions—with imperfect walls—it delivers superior results. It’s a hallmark of professional craftsmanship.
Essential Checklist for Flawless Trim Work
- ☐ Measure room perimeter and order extra trim (10–15%)
- ☐ Inspect and repair wall base as needed
- ☐ Mark a level guideline above the floor
- ☐ Dry-fit all pieces before fastening
- ☐ Cut miters or cope joints with precision
- ☐ Nail into studs where possible, stagger other nails
- ☐ Seal gaps with paint-grade caulk
- ☐ Fill nail holes, sand, prime, and paint
- ☐ Reinstall outlet covers flush with trim surface
- ☐ Clean workspace and inspect final alignment
Frequently Asked Questions
Should I install trim before or after flooring?
Install trim after the flooring is laid. This allows the baseboard to rest directly on top of the finished floor, eliminating gaps and ensuring a clean transition. In cases of thick underlayment or floating floors that expand, leave the correct expansion gap and cover it with quarter-round molding if needed.
What’s better: coping or mitering inside corners?
Coping is generally superior for interior corners, especially in older homes with non-90-degree angles. A coped joint conforms to the wall’s actual shape, reducing the risk of gaps. Mitered joints look sharp on paper but often open up over time if walls aren’t perfectly square.
How do I handle outlets and switches?
Temporarily remove outlet and switch boxes. Install the trim first, then remount the electrical boxes so they sit flush with the front edge of the baseboard. Use adjustable-depth boxes if necessary to fine-tune positioning.
Final Touches and Long-Term Care
Once installed, trim requires minimal maintenance—but attention to detail now prevents problems later. Paint with a high-quality semi-gloss or satin finish for durability and easy cleaning. Inspect annually for gaps caused by house settling, and re-caulk if needed. Avoid excessive moisture exposure, especially with MDF or wood trims.
Well-installed floor trim subtly elevates a room’s aesthetic. It frames the space, protects the wall base, and reflects craftsmanship. With the right tools, patience, and adherence to best practices, anyone can achieve results that rival those of professional finish carpenters.


 浙公网安备
33010002000092号
浙公网安备
33010002000092号 浙B2-20120091-4
Comments
No comments yet. Why don't you start the discussion?