
The DJI Air 3 is a powerful mid-tier drone offering dual-camera versatility, extended flight time, and intelligent flight modes. While it excels out of the box, equipping it with thoughtful, budget-conscious accessories can dramatically improve safety, efficiency, and overall flying experience. Whether you're capturing cinematic footage or mapping terrain, the right add-ons make all the difference. This guide focuses on essential, high-value accessories that deliver reliability without breaking the bank.
Essential Protective Gear: Safeguarding Your Investment
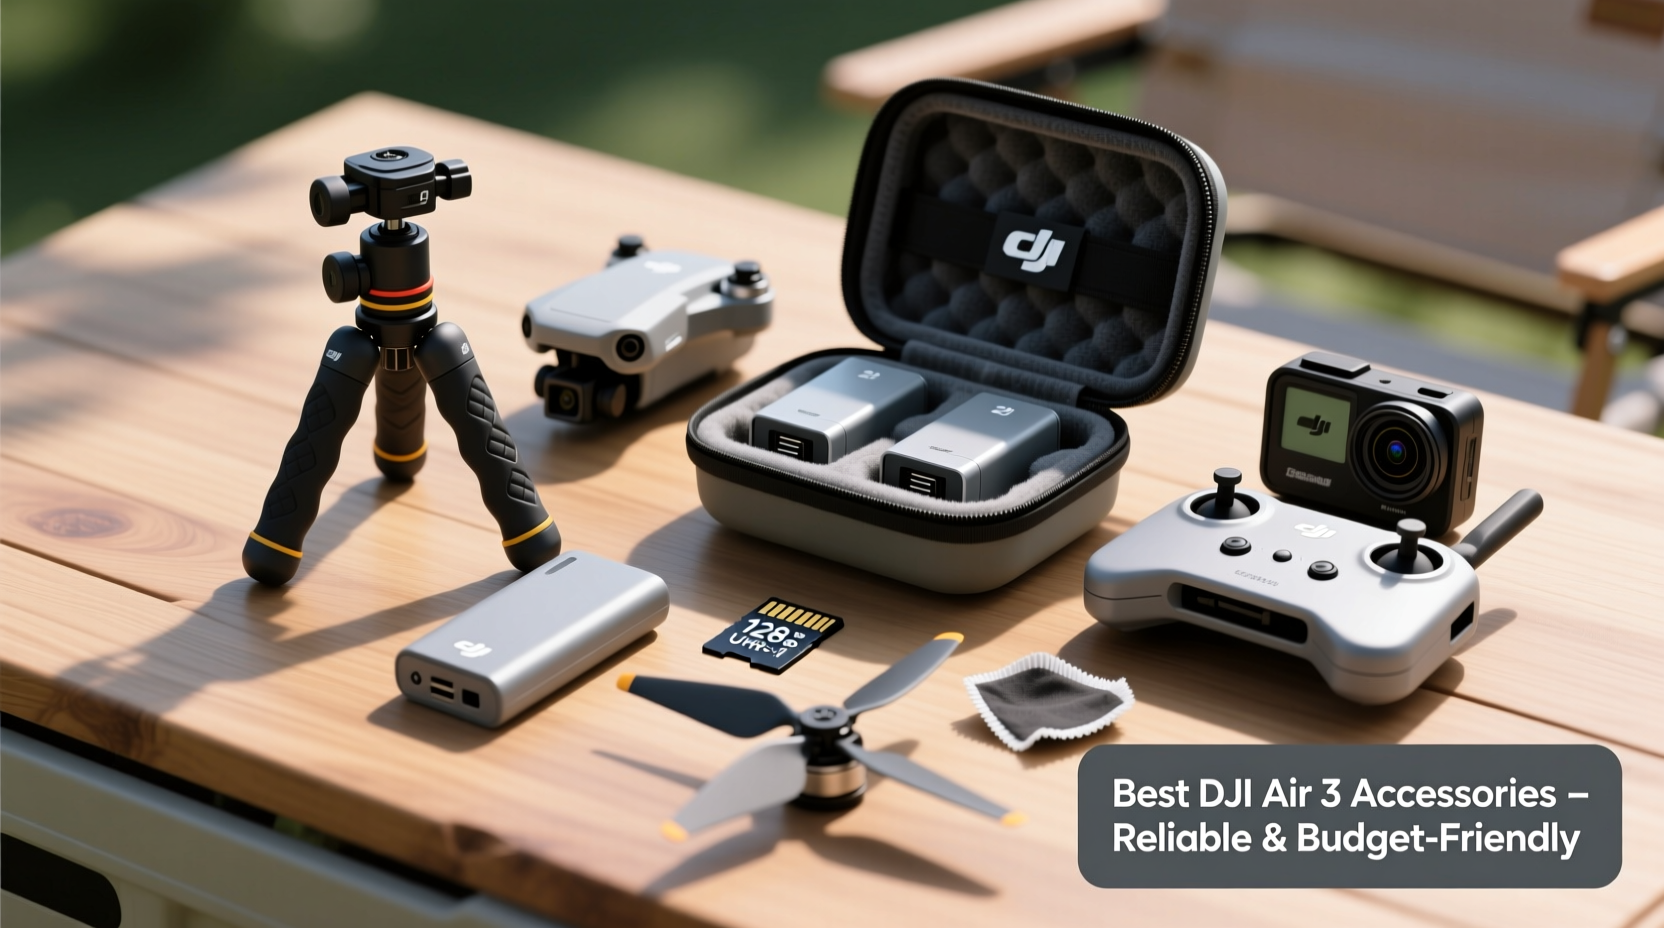
One of the most cost-effective strategies for drone ownership is preventing damage before it happens. The DJI Air 3’s advanced sensors and obstacle avoidance reduce risk, but physical protection remains crucial—especially during takeoff, landing, and windy conditions.
Propeller guards are often overlooked by experienced pilots, but they’re invaluable in tight environments like forests or urban shoots. A lightweight, well-designed guard set absorbs impact without affecting aerodynamics. Look for models made from flexible TPU plastic that snap on easily and don’t require tools.
Landing pads offer another layer of defense. They protect motors from dust, sand, and debris kicked up during launch and landing. Choose a foldable, weather-resistant pad with a non-slip base and built-in compass calibration markings. These pads also provide a stable surface on uneven ground and double as a visual reference point for takeoff alignment.
Battery and Power Management Solutions
No accessory impacts flight capability more than battery performance. The DJI Air 3 uses a 4250mAh LiPo battery offering up to 46 minutes of flight time under ideal conditions. However, real-world usage typically yields 30–38 minutes, depending on wind, temperature, and flight patterns.
To maximize operational uptime, invest in at least two additional batteries. Third-party batteries may seem cheaper, but they often lack proper voltage regulation and pose fire risks. Stick with DJI-branded or DJI-certified alternatives like those from GoolRC or Wasabi Power, which undergo rigorous testing.
A multi-battery charging hub is equally important. The standard charger handles one battery at a time, creating bottlenecks during back-to-back flights. A 4-port charging station cuts recharge cycles significantly and includes features like priority charging (charge one while topping up others) and auto-shutdown when full.
For field use, consider a portable power bank with PD (Power Delivery) output. A 20,000mAh unit can recharge your drone battery once and your remote twice, keeping you airborne longer during travel or remote shoots.
“Battery care is flight safety. Never leave LiPo batteries unattended while charging, and store them at 50% charge if unused for over a week.” — Carlos Mendez, UAV Safety Consultant
Storage and Transport: Keep Everything Organized
Disorganization leads to lost components, damaged props, and last-minute panic. A dedicated carrying case is not just convenience—it's operational insurance. Opt for a hard-shell case with custom-cut foam inserts that hold the drone, controller, three batteries, cables, and spare propellers securely.
Soft sling bags offer greater portability for casual users. Look for water-resistant materials, padded compartments, and exterior pockets for quick-access items like SD cards and filters. Brands like DLO and Moman offer affordable, well-designed options under $50.
Inside your bag, use small ziplock pouches to separate screws, tools, and adapters. Label each with tape for instant identification. This simple habit saves time and prevents cross-contamination of tiny parts.
| Accessory | Recommended Brand | Average Price | Key Benefit |
|---|---|---|---|
| Carrying Case | DLO Drone Shell | $45 | Impact-resistant, customizable interior |
| Charging Hub | DJI 4-Battery Charging Station | $89 | Simultaneous charging with status display |
| Propeller Guards | KWON Prop Guard Set | $22 | Lightweight, tool-free installation |
| Spare Props | DJI OEM Pack (4 pairs) | $39 | Perfect balance, no vibration |
| ND Filters | Hoya Nano Series Kit | $75 | Reduces glare, enhances cinematic motion blur |
Cinematic Enhancement: ND Filters and Camera Care
The DJI Air 3’s dual-camera system shines in daylight, but bright conditions can lead to overexposed footage and unnatural motion. Neutral Density (ND) filters solve this by reducing light entering the lens without altering color, allowing slower shutter speeds for smooth, film-like movement.
A basic ND filter kit (ND4, ND8, ND16, ND32) covers most lighting scenarios. For example, ND8 is ideal for partly cloudy days, while ND32 suits direct sunlight. High-quality glass filters with multi-coating minimize ghosting and flare—worth the extra $10 compared to cheap resin versions.
Always keep lens cleaning supplies on hand. A blower removes dust safely; a microfiber cloth gently wipes fingerprints. Avoid alcohol-based cleaners unless specified by DJI, as they can degrade anti-reflective coatings over time.
Real-World Scenario: A Weekend Photographer’s Setup
Jamal, a landscape photographer based in Colorado, uses his DJI Air 3 for weekend hikes and alpine shots. On a recent trip to Maroon Bells, he faced gusty winds and rocky terrain. His setup included a hard-shell case, three batteries, ND filters, a landing pad, and propeller guards.
During takeoff from a gravel patch, a sudden gust caused the drone to tilt slightly. The landing pad provided a stable base, and the propeller guards prevented blade contact with loose stones. Later, using an ND16 filter, he captured silky waterfall motion at noon—something impossible without controlled exposure.
With his portable power bank, he recharged two batteries at a ranger station using a USB-C outlet. By day’s end, he’d logged nearly two hours of total flight time across six sorties—all without equipment failure or data loss. “Spending $200 on smart accessories saved me from losing a $1,100 drone,” he said.
Step-by-Step Guide: Building Your Budget Accessory Kit
- Start with protection: Purchase a landing pad ($18) and propeller guards ($22).
- Add power capacity: Buy two extra batteries ($189/set) and a 4-port charging hub ($89).
- Ensure safe transport: Invest in a hard-shell case ($45) or durable sling bag ($35).
- Enhance visuals: Get an ND filter kit ($75) with at least four densities.
- Include maintenance tools: Pack a lens cleaning kit, ziplock bags, and spare screws.
- Total estimated cost: $373–$420—less than 40% of the drone’s price, with long-term value.
Frequently Asked Questions
Are third-party batteries safe for the DJI Air 3?
Only use DJI-branded or DJI-certified batteries. Many third-party options lack proper circuitry, leading to inconsistent discharge rates, overheating, or communication errors with the aircraft. Safety outweighs short-term savings.
Do I really need ND filters for casual flying?
If you fly mostly in shaded areas or at dusk, filters may be optional. But for daytime video, especially in sunny climates, ND filters are essential for professional-looking motion blur and exposure control.
How many spare batteries should I carry?
For serious missions, three batteries (including the one installed) allow for 1.5–2 hours of active flying time with cooling breaks. Casual users may suffice with one spare.
Final Thoughts and Next Steps
The DJI Air 3 is engineered for performance, but its true potential emerges when paired with practical, well-chosen accessories. Reliability doesn’t demand luxury—it demands foresight. From protecting fragile propellers to enabling cinematic footage with ND filters, each addition serves a purpose grounded in real-world utility.
You don’t need every gadget on the market. Focus on core needs: protection, power, portability, and image quality. Build your kit gradually, prioritizing items that prevent loss, extend flight time, and elevate results. Over time, these choices compound into safer flights, better footage, and longer equipment lifespan.


 浙公网安备
33010002000092号
浙公网安备
33010002000092号 浙B2-20120091-4
Comments
No comments yet. Why don't you start the discussion?