
Streaming high-intensity games from your gaming laptop puts immense pressure on its internal components. The combination of rendering graphics, encoding video in real time, and managing network traffic can push CPU and GPU temperatures into the danger zone. When your laptop starts throttling performance or shutting down unexpectedly mid-stream, it’s not just frustrating—it risks long-term hardware damage. The good news? Most overheating issues can be resolved without visiting a repair shop. With the right knowledge and tools, you can restore safe operating temperatures and extend your laptop’s lifespan.
Why Gaming Laptops Overheat During Streaming
Unlike regular gaming, live streaming adds an extra layer of computational demand: real-time video encoding. Whether you're using OBS Studio, Streamlabs, or built-in platform tools, your CPU or GPU must compress high-resolution gameplay footage into a streamable format—often at 60 frames per second. This process, known as encoding, consumes significant processing power and generates substantial heat.
Laptop designs prioritize portability over thermal efficiency. Limited airflow, compact heatsinks, and shared ventilation for multiple components create a perfect storm when both gaming and streaming run simultaneously. Dust buildup over time further restricts airflow, reducing cooling effectiveness by up to 40%, according to thermal engineers at Notebook Review Labs.
“Most thermal issues in gaming laptops stem from preventable causes like dust accumulation and poor ventilation—not hardware failure.” — Dr. Rajiv Mehta, Thermal Systems Engineer
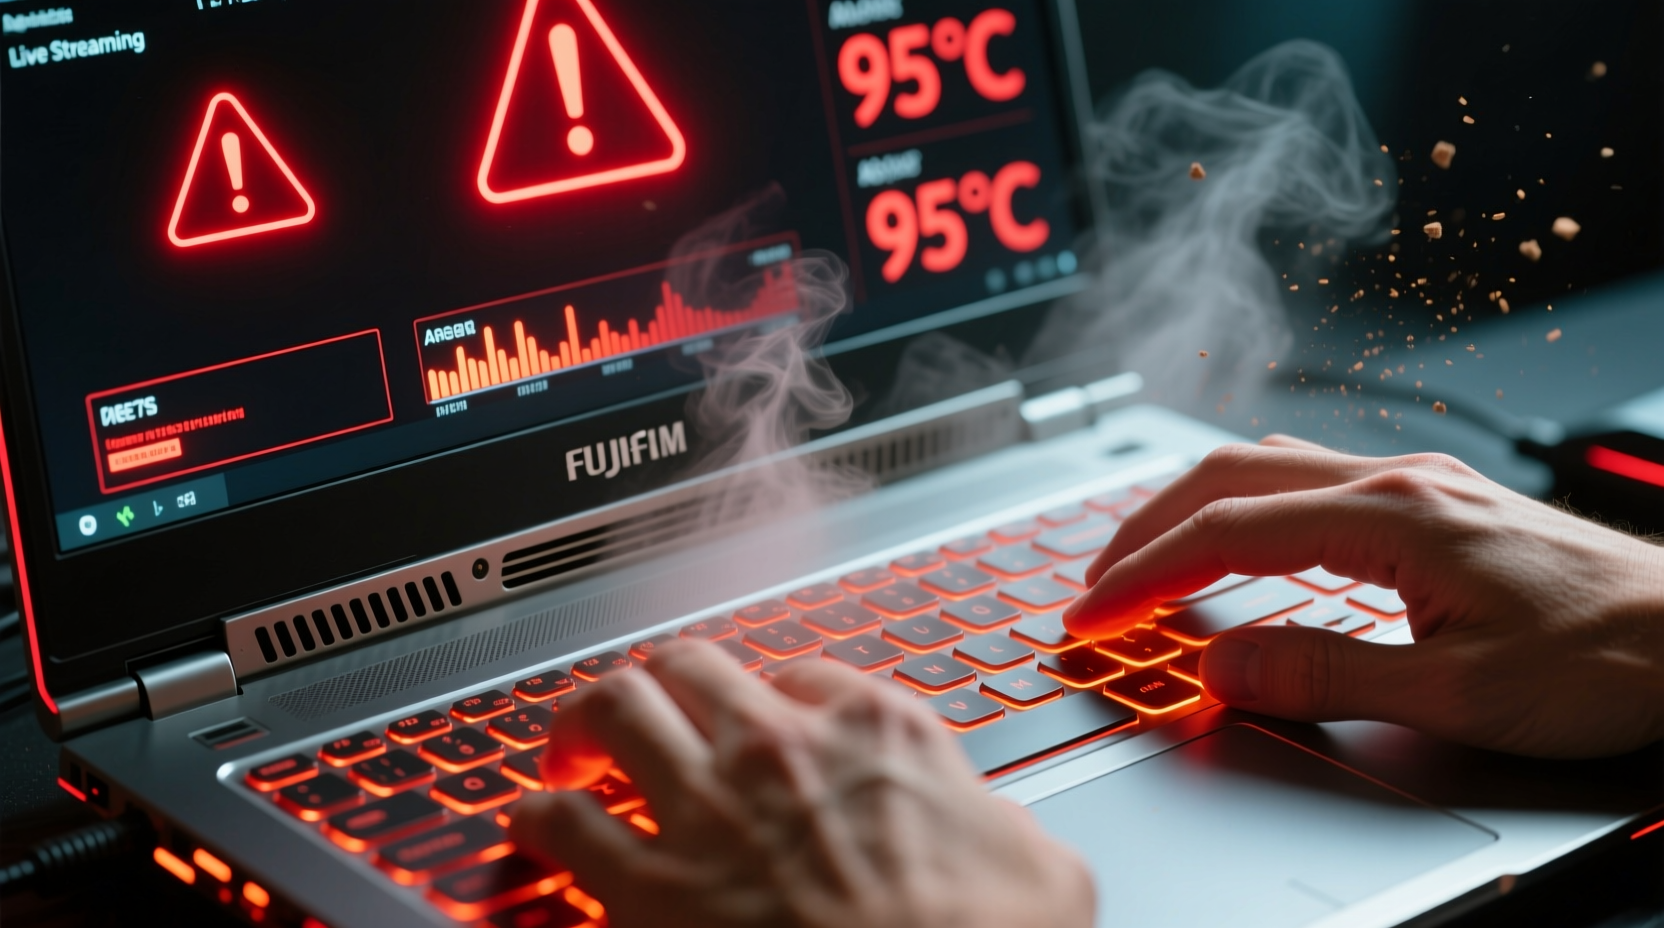
Step-by-Step Guide to Diagnose and Reduce Heat Buildup
Before applying fixes, confirm that overheating is the root cause. Use monitoring software to track component temperatures during streaming sessions.
- Install temperature monitoring tools: Use HWMonitor, Core Temp, or MSI Afterburner to observe CPU and GPU temps in real time.
- Baseline idle temperatures: Record readings when the system is off-load (below 45°C is ideal).
- Test under load: Launch a game and start streaming for 15 minutes. Note peak temperatures.
- Identify thresholds: Sustained temps above 90°C indicate critical overheating; above 95°C risks automatic shutdown.
- Check fan behavior: Listen for irregular noises or inconsistent speeds, which may point to mechanical issues.
If temperatures exceed safe limits, proceed with targeted interventions.
Practical Fixes You Can Do Yourself
You don’t need technical certification to address most overheating problems. These methods are accessible, effective, and widely used by experienced streamers.
1. Clean Internal Components
Dust acts as insulation around fans, heatsinks, and vents, trapping heat inside the chassis. Even moderate buildup can raise internal temps by 10–15°C.
To clean safely:
- Power off and unplug the laptop. Remove the battery if possible.
- Use compressed air to blow out vents and fan exhausts. Hold fans in place with a toothpick to prevent overspinning.
- For deeper cleaning, open the back panel (check manufacturer guides online). Focus on the CPU/GPU heatsink fins and fan blades.
- Wipe contacts gently with isopropyl alcohol and a lint-free cloth.
2. Replace Aged Thermal Paste
Thermal paste degrades over 18–24 months, losing its ability to transfer heat efficiently from the processor to the heatsink. Reapplying fresh paste can reduce CPU temps by 5–10°C.
Steps:
- Remove screws and back panel carefully.
- Unclip heatsink retaining brackets (note screw order).
- Scrape off old paste with a plastic card.
- Apply a pea-sized drop of high-quality paste (e.g., Arctic MX-4 or Thermal Grizzly).
- Reassemble securely and test.
3. Optimize Software Settings
Reduce strain on hardware through intelligent configuration:
- Switch from x264 software encoding to NVENC (NVIDIA) or AMF (AMD) if available—offloads work from CPU to GPU encoder.
- Lower resolution or bitrate if upload speed allows (e.g., 720p at 3000 kbps instead of 1080p at 6000 kbps).
- Cap frame rate to 30 or 60 FPS depending on game and audience needs.
- Disable unnecessary visual effects in-game (shadows, anti-aliasing).
4. Improve External Cooling
No amount of internal maintenance helps if your laptop sits on a soft surface like a bed or couch cushion. These block intake vents located on the bottom.
Solutions include:
- Use a hard, flat surface like a desk or lap desk.
- Invest in a cooling pad with adjustable fans aligned to intake zones.
- Elevate the rear slightly to enhance natural convection.
Do’s and Don’ts of Thermal Management
| Do | Don't |
|---|---|
| Clean vents every 3–6 months | Use sharp objects to remove dust |
| Apply correct amount of thermal paste | Over-tighten heatsink screws |
| Stream using hardware encoding | Run multiple encoders simultaneously |
| Keep room temperature below 25°C | Place laptop near direct sunlight or heaters |
| Update BIOS and drivers regularly | Ignore firmware updates that improve fan control |
Real Example: How One Streamer Fixed Chronic Shutdowns
Jamal, a Twitch streamer with a three-year-old ASUS ROG Zephyrus, noticed his laptop would crash during extended Valorant streams. Monitoring showed CPU temps hitting 98°C within 20 minutes. He tried lowering settings but saw no improvement.
After researching, he disassembled the unit and found thick layers of dust clogging the dual-fan system. He cleaned it thoroughly and reapplied thermal paste. He also switched his OBS settings from x264 to NVIDIA NVENC and reduced his stream resolution to 720p60.
The results were immediate: CPU temps stabilized at 78–82°C even after two-hour sessions. No more crashes. His viewer count grew due to consistent uptime, proving that basic maintenance directly impacts streaming success.
Essential Checklist Before Your Next Stream
- ✅ Clean air vents with compressed air
- ✅ Ensure laptop is on a hard, elevated surface
- ✅ Verify fans are spinning normally
- ✅ Confirm encoding method is set to hardware (NVENC/AMF)
- ✅ Lower in-game graphics settings if needed
- ✅ Monitor temps during first 10 minutes of stream
- ✅ Keep room cool and well-ventilated
Frequently Asked Questions
Can I damage my laptop by opening it to clean inside?
Not if done carefully. Most gaming laptops are designed for user-accessible panels. Avoid forcing clips or using metal tools near circuits. Follow teardown videos specific to your model on YouTube for guidance. If unsure, skip internal cleaning and focus on external vent maintenance.
How often should I replace thermal paste?
Every 18 to 24 months under heavy use (like daily streaming). Signs it’s time include rising idle temps, sudden throttling, or louder-than-normal fan noise during light tasks.
Is it safe to use a vacuum cleaner to remove dust?
No. Vacuums generate static electricity that can damage sensitive electronics. Always use canned air or a low-static brush. Hold the fan blades still while blowing air to prevent damage from overspinning.
Conclusion: Take Control of Your Laptop’s Temperature Today
Overheating doesn’t have to derail your streaming ambitions. Most thermal issues arise from simple, correctable causes—dust, degraded materials, suboptimal settings—that you can address at home. By adopting routine maintenance and smart configuration, you protect your investment and ensure smooth, uninterrupted broadcasts.
Start tonight: clean your vents, check your OBS settings, and monitor your next session. Small actions yield big improvements in stability and performance. Share your experience in the comments—your solution might help another streamer avoid a meltdown.


 浙公网安备
33010002000092号
浙公网安备
33010002000092号 浙B2-20120091-4
Comments
No comments yet. Why don't you start the discussion?