
Crystal stud earrings are timeless accessories—delicate, elegant, and capable of elevating even the simplest outfit. Whether they’re adorned with Swarovski crystals, cubic zirconia, or natural gemstones, their brilliance depends on proper care. Over time, oils from skin, dust, and everyday exposure can dull their shine. However, aggressive cleaning methods can scratch settings, loosen prongs, or cloud crystal surfaces. The key lies in using gentle yet effective techniques that preserve both beauty and integrity.
Cleaning your crystal studs isn’t just about aesthetics—it’s also about hygiene. Ear piercings are prone to irritation when exposed to built-up grime. A regular, thoughtful cleaning routine ensures comfort, clarity, and long-term wearability. This guide outlines safe, proven practices backed by jewelers and material specialists, helping you maintain sparkle without risking damage.
Why Gentle Cleaning Matters for Crystal Studs
Crystals, especially those set in fine metals like sterling silver, gold-plated brass, or white gold, are more vulnerable than they appear. While the stone itself may be hard, the setting is often delicate. Ultrasonic cleaners, steam devices, or harsh chemicals can weaken solder joints, corrode metal, or strip protective coatings. Even seemingly harmless household items like vinegar or baking soda can react negatively with certain alloys or porous stones.
Additionally, many modern crystal studs use adhesives to secure stones in place. Excessive soaking or abrasive scrubbing can compromise these bonds. Heat and sudden temperature changes are equally risky—going from hot water to cold air may cause microfractures in some synthetic crystals.
“Over-cleaning is just as harmful as under-cleaning. For crystal studs, less is more—consistency beats intensity.” — Lila Nguyen, Master Jeweler & Conservator at Heritage Jewelry Restoration
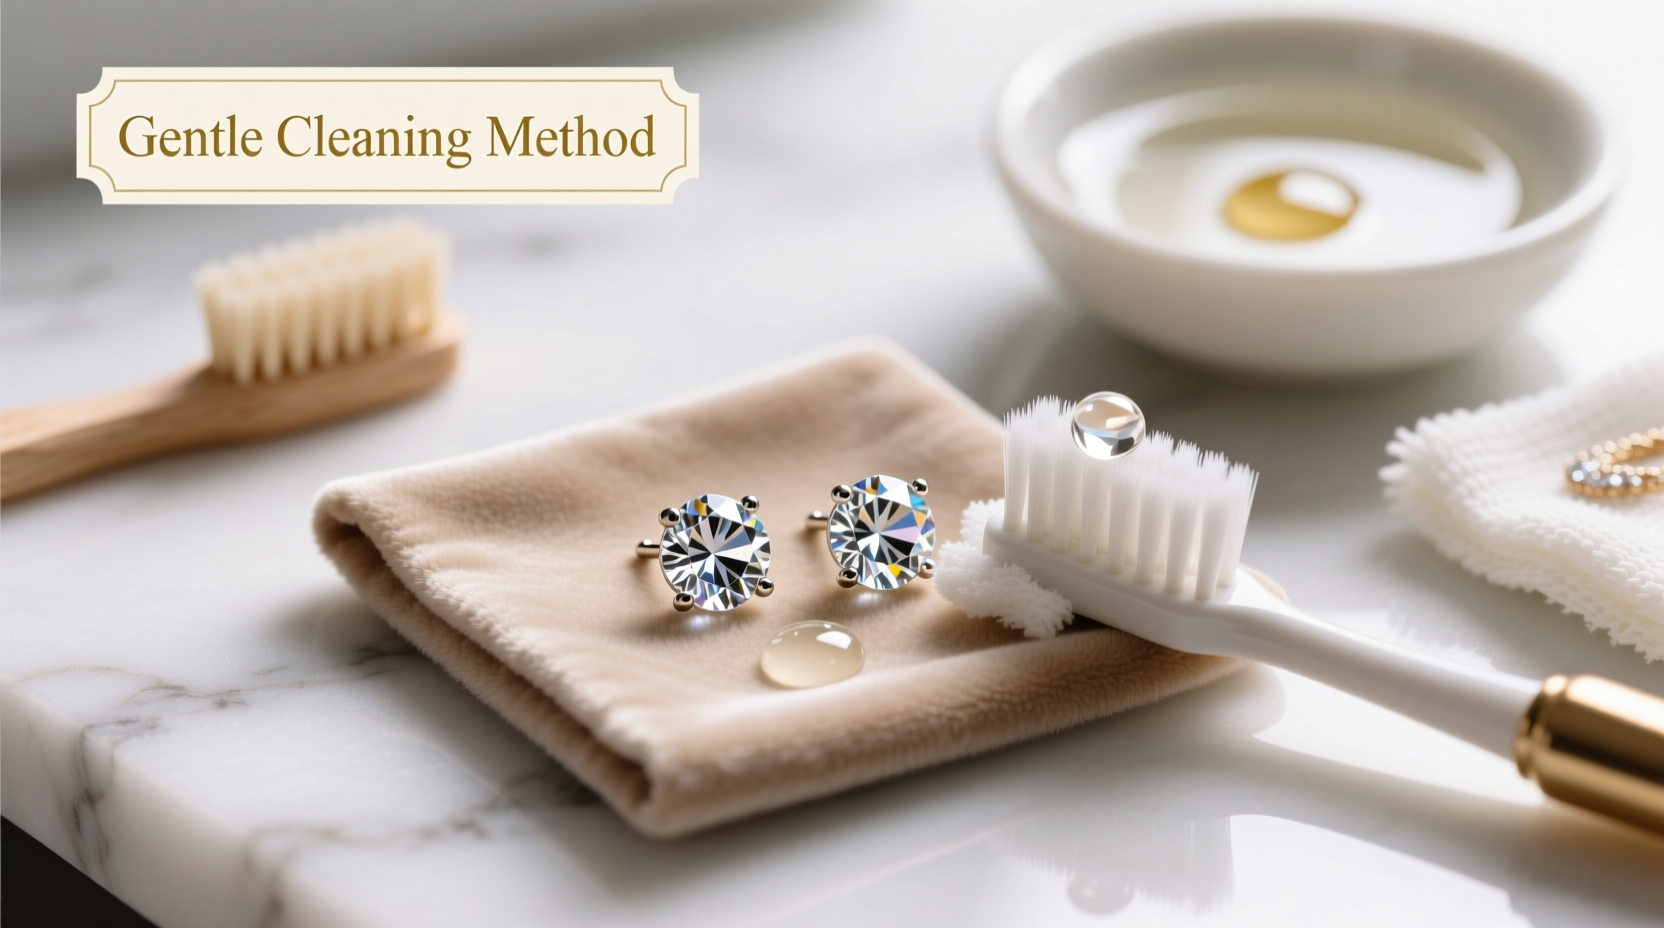
Step-by-Step: Safe Cleaning Process at Home
You don’t need professional tools to restore the luster of your earrings. With common household items and careful handling, you can achieve excellent results. Follow this timeline-based method for best outcomes:
- Remove earrings before showering, sleeping, or applying skincare products. Prevent buildup at the source.
- Inspect each earring closely. Use a magnifying glass if available to check for loose stones, tarnished backs, or debris trapped behind the setting.
- Prepare a mild cleaning solution. Mix one drop of pH-neutral dish soap (like Dawn Free & Clear) into a cup of lukewarm distilled water. Avoid tap water if it's hard, as mineral deposits can leave residue.
- Soak for 5–10 minutes. Place earrings in a small bowl lined with a soft cloth to prevent scratching. Do not exceed 10 minutes to avoid prolonged metal exposure.
- Use a soft-bristle toothbrush. Gently brush around the base of the crystal and post. Focus on crevices where oil accumulates. Never press down hard.
- Rinse thoroughly. Hold under a slow stream of lukewarm distilled water, ensuring no soap remains.
- Air-dry on a lint-free towel. Let sit undisturbed for 20–30 minutes. Do not rub or use tissue paper, which can snag fine wires.
- Buff lightly with a jewelry polishing cloth. Only on metal parts—never rub directly on the crystal unless specified by the manufacturer.
Do’s and Don’ts: Best Practices Summary
| Do | Don’t |
|---|---|
| Use distilled water to prevent mineral spotting | Soak earrings overnight or in hot water |
| Clean every 2–3 weeks with light maintenance | Use bleach, ammonia, or alcohol-based cleaners |
| Store in anti-tarnish pouches away from sunlight | Leave them on bathroom counters near toothpaste or lotions |
| Wipe gently after wearing with a microfiber cloth | Scrub with steel wool, nail brushes, or rough sponges |
| Check screw backs or butterfly clasps monthly for tightness | Use ultrasonic cleaners unless explicitly approved for your earring type |
Real Example: Recovering Heirloom Earrings Safely
Sarah inherited a pair of vintage rhinestone studs from her grandmother. Though beautiful, they appeared cloudy and had darkened posts. She initially considered taking them to a jeweler but wanted to try a home method first. Following the gentle soak-and-brush technique with distilled water and baby shampoo (a milder alternative to dish soap), she carefully cleaned each earring over two sessions. After drying completely, she noticed significant improvement—the crystals regained their fire, and the silver posts were visibly brighter. She avoided commercial dips, knowing they could strip the antique plating. Her success underscores how patience and precision outperform aggressive shortcuts.
Alternative Methods for Sensitive Materials
Not all crystal studs are created equal. Some materials require extra caution:
- Gold-plated earrings: Avoid any acidic solutions. Even lemon juice can dissolve the thin gold layer. Stick to dry wiping between wears.
- Pearl-accented crystal studs: These should never be submerged. Dampen a corner of a microfiber cloth slightly and wipe only the metal frame—never the pearl.
- Fashion jewelry with glue-set stones: Skip soaking entirely. Use a dry, soft brush (like a clean makeup brush) to remove surface dust.
For high-end brands like Swarovski, refer to official care guidelines. Their proprietary coatings (e.g., Aurora Borealis finish) can degrade with improper handling. Most recommend occasional cleaning with a damp cloth followed by immediate drying.
FAQ: Common Questions About Cleaning Crystal Studs
Can I use rubbing alcohol to disinfect my crystal stud earrings?
Only in extreme cases and never as a soak. Alcohol can erode adhesives and damage certain crystal finishes. If disinfection is necessary (e.g., after illness), dip a cotton swab in 70% isopropyl alcohol, apply briefly to the post only, and let air-dry completely before wearing. Avoid contact with the crystal face.
How often should I clean my crystal stud earrings?
Light surface wiping after every few wears is ideal. A full gentle wash every 2–3 weeks maintains hygiene and sparkle. Infrequently worn pairs should be cleaned before use, especially if stored for months.
What should I do if a crystal becomes loose?
Stop wearing the earring immediately. Attempting to clean a loose stone increases the risk of loss. Take it to a qualified jeweler for re-setting. Do not apply glue yourself—this can ruin the piece and complicate future repairs.
Conclusion: Care That Honors Craftsmanship
Your crystal stud earrings deserve more than occasional attention—they merit consistent, mindful care. By adopting gentle cleaning habits, you protect not just their appearance but their structural integrity. Every polish, rinse, and careful storage choice adds months—or years—to their lifespan. More than that, you honor the craftsmanship behind each piece, whether it’s a cherished gift or a personal indulgence.
Start today: gather your supplies, inspect your current collection, and implement a simple cleaning rhythm. Small actions, repeated over time, yield remarkable results.


 浙公网安备
33010002000092号
浙公网安备
33010002000092号 浙B2-20120091-4
Comments
No comments yet. Why don't you start the discussion?