
Detachable fake nail patches have become a go-to solution for achieving salon-quality manicures at home. They offer convenience, variety, and minimal commitment—perfect for those who want beautiful nails without the long-term upkeep. However, improper removal can lead to weakened natural nails, lifted cuticles, or even infections. The key lies in using techniques that are both gentle and effective, preserving the health of your nails while ensuring a clean, residue-free finish.
Unlike traditional acrylics or gels that require filing or soaking, nail patches are designed for easier application and removal. Yet many users still pull or peel them off aggressively, which defeats the purpose of their non-damaging design. With the right approach, you can safely remove these patches and maintain strong, healthy nails ready for your next style.
Why Proper Removal Matters
Natural nails are made of keratin and grow from the matrix beneath the cuticle. When subjected to forceful removal or harsh chemicals, they can become thin, brittle, or layered. Repeated trauma may also cause onycholysis—the separation of the nail plate from the nail bed—which increases the risk of bacterial or fungal infections.
Detachable nail patches typically adhere with a medical-grade adhesive designed to hold securely but release cleanly. Misunderstanding this balance leads many to use excessive force or acetone-based removers unnecessarily. The result? Damage that could have been entirely avoided.
“Nail health isn’t just about how they look today—it’s about sustaining strength over time. Gentle removal is as important as proper application.” — Dr. Lena Torres, Dermatologist & Nail Health Specialist
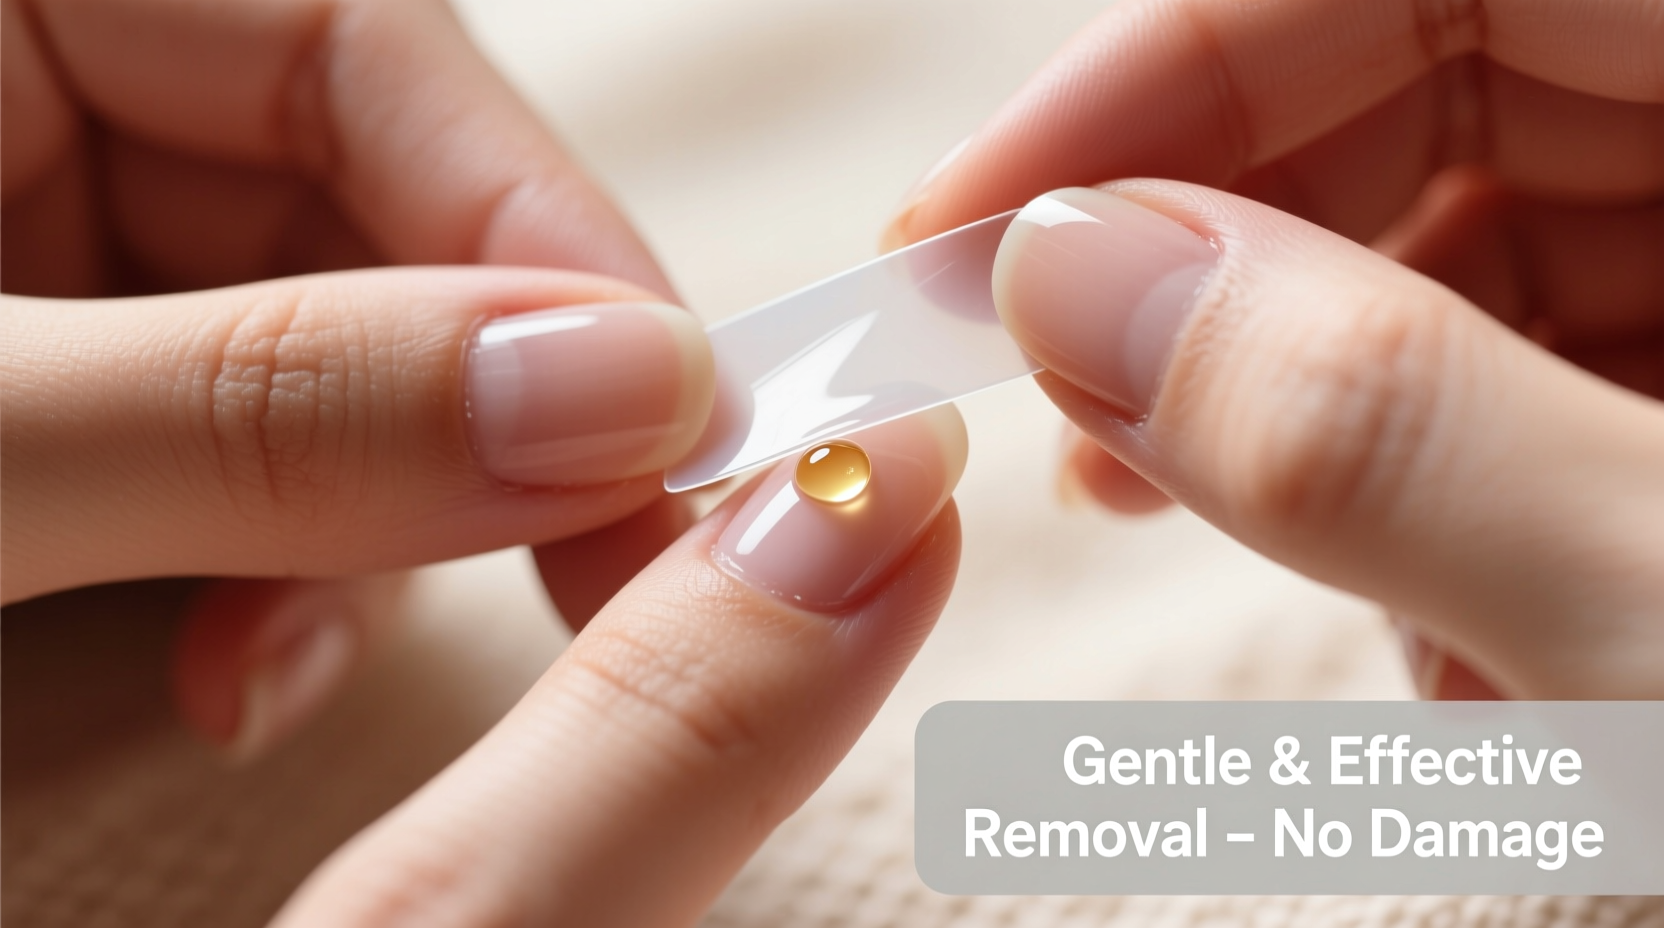
Step-by-Step Guide: Safe Removal Process
Follow this structured method to remove your nail patches without compromising nail integrity.
- Prepare Your Tools: Gather cotton pads, wooden cuticle sticks, warm soapy water, a soft towel, and optionally, a drop of oil (like jojoba or almond).
- Soak Hands for 5–10 Minutes: Submerge fingertips in warm, soapy water. This softens the adhesive and loosens the bond between the patch and natural nail.
- Gently Lift One Edge: Using the corner of a wooden stick, carefully lift a small edge of the patch. Do not pry or snap—let the warmth do the work.
- Slide, Don’t Pull: Once an edge lifts, slide the stick underneath and glide it across the surface to separate the patch gradually.
- Clean Residue if Present: If any sticky residue remains, dampen a cotton pad with a few drops of oil and gently wipe—never scrub.
- Moisturize Thoroughly: Finish by massaging cuticle oil or hand cream into each nail and surrounding skin.
Do’s and Don’ts of Nail Patch Removal
| Do | Don’t |
|---|---|
| Soak nails before removal | Peel off patches dry |
| Use wooden or silicone tools | Use metal cuticle pushers |
| Apply cuticle oil after removal | Skip post-care moisturizing |
| Remove within recommended wear time (7–10 days) | Leave patches on for weeks |
| Inspect nails for irritation afterward | Ignore redness or lifting |
Real Example: A Case of Overuse and Recovery
Sophia, a graphic designer from Portland, used nail patches weekly to match her outfits and client meetings. She loved the instant transformation but started noticing her nails felt thinner and peeled easily. After wearing one set for nearly two weeks (beyond the recommended period), she tried peeling them off quickly before a Zoom call. The result? Two nails lifted slightly at the tips, and her cuticles became inflamed.
She consulted a nail technician who advised her to stop all enhancements for four weeks, focus on hydration, and adopt a gentler removal routine. By soaking her nails, using oil, and allowing rest periods between applications, Sophia regained her nail strength within six weeks. Now, she removes patches every 8 days using the warm-water method and applies cuticle oil daily.
Alternative Methods Compared
While the warm-soap method is ideal, some users seek faster or alternative approaches. Here's how common techniques stack up:
- Warm Water Soak: Most recommended. Softens adhesive naturally. Takes 5–10 minutes. Zero damage when done correctly.
- Oil Application (Pre-Removal): Apply 2–3 drops of jojoba or olive oil around edges 10 minutes before soaking. Helps break down adhesion gently.
- Steam Method: Hold hands over a bowl of hot water (not boiling) for 3–5 minutes. Less messy than soaking; effective for sensitive skin.
- Acetone-Free Wipes: Not necessary for most patches. Can dry out skin if overused. Best reserved for stubborn residue.
- Peeling Off Dry: Strongly discouraged. Increases risk of top-layer nail peeling and micro-tears.
Frequently Asked Questions
Can I reuse nail patches after removal?
No, once removed, the adhesive loses its effectiveness and hygiene. Reusing patches can introduce bacteria and lead to poor adhesion or lifting.
My patch won’t budge after soaking—what should I do?
Extend the soak time by another 5 minutes. Avoid forcing it. If still stuck, apply a drop of oil under the edge and wait 2 minutes before trying again.
Are there hypoallergenic options for sensitive skin?
Yes. Look for patches labeled “medical-grade adhesive” or “dermatologist-tested.” Brands like KISS Sensitive and Dashing Diva offer low-irritant formulas suitable for delicate skin.
Essential Post-Removal Care Routine
After removing nail patches, your nails need recovery time. Even with gentle removal, minor dehydration can occur. Follow this mini-routine to restore moisture and resilience:
- Pat nails dry with a soft towel—do not rub.
- Apply a nourishing cuticle oil (containing vitamin E or biotin) to each nail base.
- Massage into the nail plate to encourage circulation.
- Wear gloves when doing dishes or cleaning to prevent exposure to detergents.
- Repeat oil application 2–3 times daily for 3–5 days post-removal.
“Healthy nails are hydrated nails. Oil isn’t optional—it’s preventive maintenance.” — Naomi Reed, Master Nail Technician & Educator
Conclusion
Removing detachable fake nail patches doesn’t have to mean sacrificing nail health. With patience and the right technique, you can enjoy stylish manicures while keeping your natural nails strong and intact. The secret lies in respecting the structure of your nails and working with—rather than against—the design of the product.
Start incorporating these gentle practices today: soak before removal, avoid force, hydrate after, and listen to your body. Small habits compound into lasting nail wellness. Whether you're a frequent user or occasional wearer, treating your nails with care ensures they stay beautiful—not just cosmetically, but fundamentally.


 浙公网安备
33010002000092号
浙公网安备
33010002000092号 浙B2-20120091-4
Comments
No comments yet. Why don't you start the discussion?