
Propagating succulents from leaves is one of the most rewarding and cost-effective ways to expand your indoor garden. These resilient plants store water in their thick, fleshy leaves, making them ideal candidates for propagation through leaf cuttings. Unlike more complex plant propagation methods, this process requires minimal tools and thrives on patience and consistency. Whether you're growing echeveria, sedum, or graptopetalum, a single healthy leaf can give rise to an entirely new plant. This guide walks you through every stage—from selecting the right leaf to transplanting your rooted baby succulent—with clear instructions, practical tips, and real-world insights to ensure success even if you’ve never tried it before.
Why Propagate Succulents from Leaves?
Succulents are naturally adapted to reproduce vegetatively, meaning they can grow new plants from parts of themselves. Leaf propagation takes advantage of this biological trait. It’s especially useful when you want to multiply a favorite plant without purchasing another or when helping a leggy succulent rejuvenate.
One major benefit of leaf propagation is scalability. A single mature rosette can produce dozens of leaves, each potentially becoming a new plant. Additionally, this method minimizes stress on the parent plant compared to stem cuttings, as only individual leaves are removed. Over time, you can build a thriving collection or share propagated plants with friends—making it both economical and sustainable.
Choosing the Right Succulent and Leaf
Not all succulents propagate equally well from leaves. Some species root easily and produce pups quickly, while others may take months or fail altogether. For beginners, it's best to start with varieties known for reliable leaf propagation.
Excellent choices include:
- Echeveria – Forms tight rosettes; leaves detach cleanly and often produce multiple offsets.
- Sedum morganianum (Burro’s Tail) – Long trailing stems with small, plump leaves that root readily.
- Graptopetalum paraguayense (Ghost Plant) – Pale, powdery leaves that callus quickly and sprout roots within weeks.
- Cotyledon orbiculata – Thick-leaved types that tolerate dry conditions during propagation.
Avoid attempting leaf propagation with:
– Haworthia and Gasteria: Better suited to offset division.
– Crassula ovata (Jade Plant): More successful via stem cuttings.
– Any succulent showing signs of disease, pests, or dehydration.
“Leaf propagation works because succulents have meristematic tissue in their leaves capable of forming roots and shoots under the right conditions.” — Dr. Lena Torres, Botanist & Horticultural Researcher
Step-by-Step Guide to Leaf Propagation
Success in leaf propagation depends less on speed and more on precision and timing. Follow these steps carefully to maximize your chances of healthy new growth.
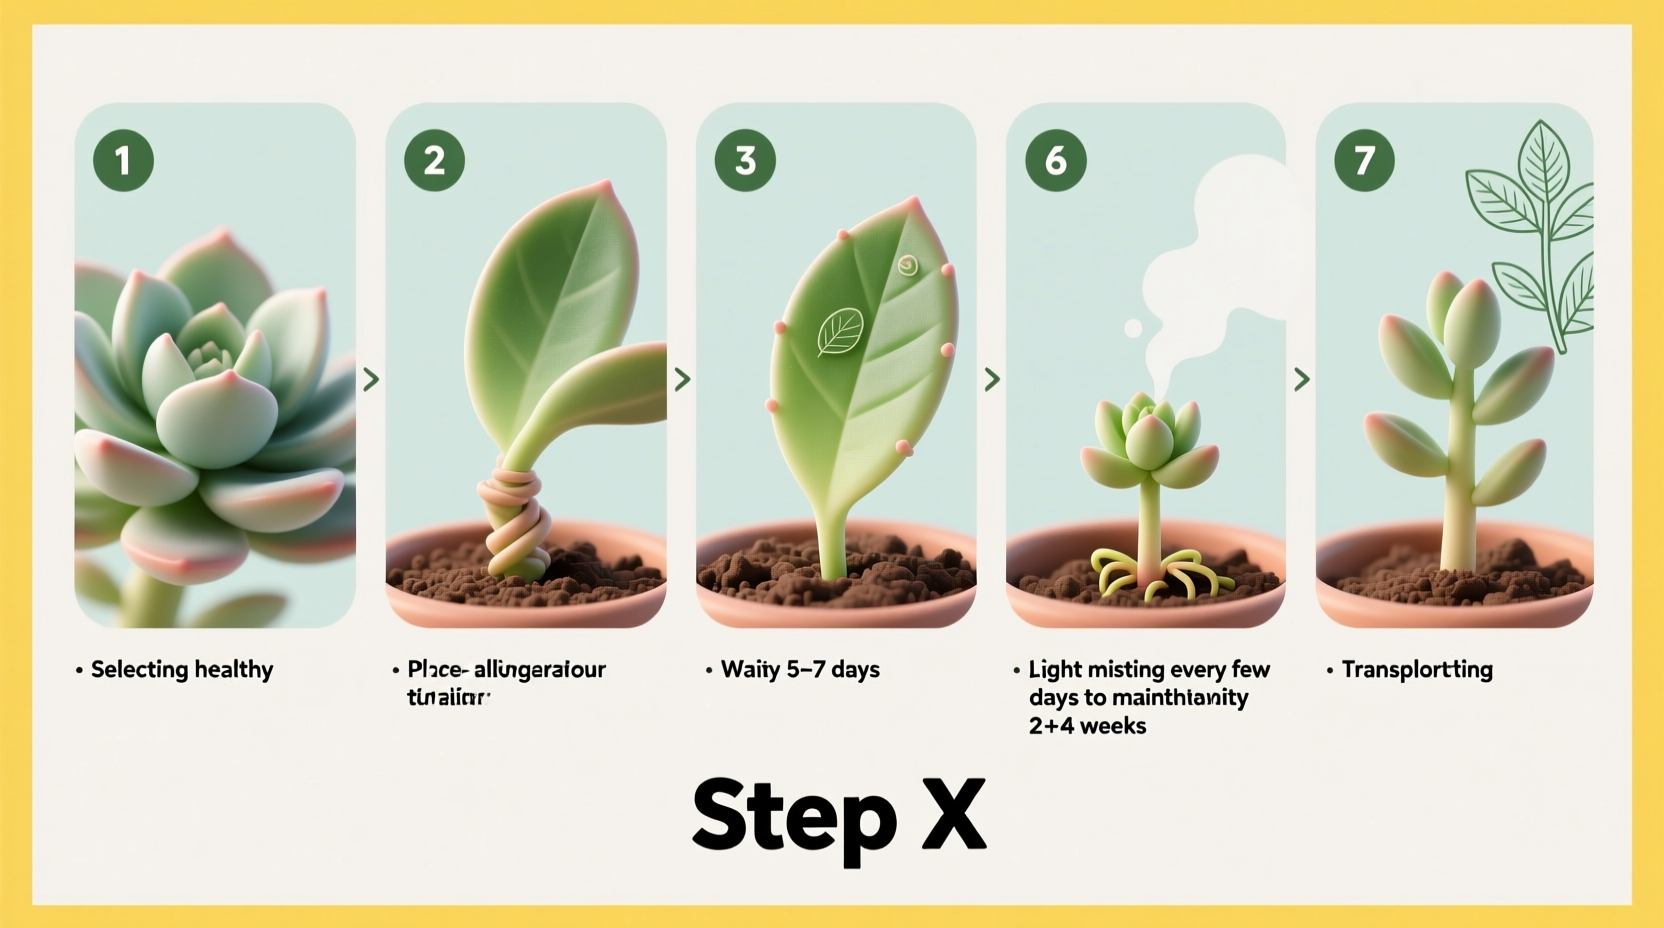
- Select Healthy Leaves: Gently wiggle mature outer leaves at the base of the plant until they snap off cleanly. Avoid tearing—intact leaves with intact nodes have the highest success rate.
- Let Leaves Callus Over: Place detached leaves on a dry surface out of direct sunlight for 3–7 days. A callus forms over the wound, preventing rot when placed on soil.
- Prepare the Growing Medium: Use a fast-draining mix such as cactus soil blended with perlite or pumice (50/50 ratio). Fill shallow trays or pots and lightly moisten the surface.
- Position Leaves Correctly: Lay callused leaves flat on top of the soil or rest them slightly against it so the cut end touches the medium. Do not bury them.
- Provide Ideal Conditions: Keep in bright, indirect light. Maintain temperatures between 65°F and 75°F (18°C–24°C). Avoid humidity extremes.
- Mist Sparingly: After 2–3 weeks, mist the soil lightly every 7–10 days if no condensation appears. Never soak the leaves directly.
- Wait for Roots and Pups: Tiny pink or white roots will emerge first, followed by miniature rosettes (pups) in 4–8 weeks depending on species and environment.
- Transplant Carefully: Once the mother leaf shrivels and the pup has several sets of leaves, gently transfer it to its own pot using the same well-draining mix.
| Stage | Timeline | What to Expect | Action Required |
|---|---|---|---|
| Callusing | 3–7 days | Drying of the broken end | Keep in dry, shaded area |
| Root Initiation | 2–4 weeks | Thin roots emerging from base | Light misting only when soil dries |
| Pup Formation | 4–8 weeks | Small green growth near base | Maintain consistent light |
| Transplant Ready | 8–12+ weeks | Mother leaf fully dried; pup has 3+ leaves | Move to individual pot |
Common Mistakes and How to Avoid Them
Many beginners encounter setbacks due to misunderstandings about moisture, timing, and environmental needs. Recognizing these pitfalls early can save weeks of waiting and disappointment.
- Overwatering during callusing: Moisture causes leaves to rot before rooting begins. Always wait for full callus formation.
- Using regular potting soil: Retains too much water. Stick to gritty, porous mixes designed for succulents.
- Impatience with misting: Spraying too frequently leads to fungal growth. Wait until the soil feels dry and there’s no visible moisture.
- Placing under intense sun: Direct midday sun burns delicate new tissue. Opt for east-facing windows or filtered light.
- Disturbing leaves too soon: Moving or touching propagating leaves halts root development. Let nature take its course.
Real Example: Sarah’s First Propagation Success
Sarah, a novice gardener in Portland, Oregon, inherited a large echeveria from her grandmother but noticed it was becoming leggy. Instead of discarding lower leaves as she pruned, she decided to try propagation after reading online tutorials.
She selected eight plump outer leaves, let them dry for five days on a kitchen counter, then arranged them on a tray filled with cactus mix. She placed the tray near a north-facing window and misted lightly every ten days. By week six, five leaves had developed fine roots. One produced two tiny rosettes.
“I couldn’t believe something so simple could create life,” Sarah said. “Now I have three baby echeverias growing strong, and I’ve started experimenting with sedums too.” Her experience highlights how accessible and fulfilling leaf propagation can be—even in cooler, cloudier climates.
Essential Checklist for Beginners
Follow this concise checklist to ensure nothing is missed during your propagation journey:
- ✅ Choose healthy, mature succulent leaves with clean breaks
- ✅ Allow leaves to callus for 3–7 days in a dry, shaded spot
- ✅ Use a well-draining soil mix (cactus soil + perlite)
- ✅ Position leaves on top of soil, cut side down or touching surface
- ✅ Provide bright, indirect light (no direct afternoon sun)
- ✅ Mist soil lightly every 7–10 days once roots appear
- ✅ Wait until pups are established and mother leaf dries before transplanting
- ✅ Transfer to individual pots with drainage holes using succulent-specific soil
Frequently Asked Questions
Can I propagate any succulent from a leaf?
No. While many common succulents like echeveria and graptopetalum respond well, some genera such as haworthia or agave rarely form viable plants from leaves alone. Stem cuttings or offsets work better for those types.
How long does it take for a leaf to produce a new plant?
Most successful propagations show roots in 2–4 weeks and pups in 4–8 weeks. Full establishment typically takes 8–12 weeks. Cooler temperatures or low light may extend this timeline.
Why did my leaf turn brown and mushy?
This usually indicates rot caused by excess moisture or lack of callusing. If the leaf becomes soft or blackens shortly after placement, it likely absorbed too much water before developing protective tissue. Ensure future leaves fully callus and use drier conditions.
Final Tips for Long-Term Success
Patience is the most important tool in leaf propagation. Unlike seeds, which follow predictable germination schedules, leaf propagation relies on internal reserves and environmental cues that vary widely between specimens.
To improve outcomes, maintain consistency in lighting and watering. Rotate trays occasionally for even exposure. And remember: not every leaf will succeed. Even experienced growers see 40–70% success rates depending on species and season. Treat failures as learning opportunities rather than setbacks.
Spring and early summer are generally the best times to propagate, as succulents enter active growth phases. However, with stable indoor conditions, year-round propagation is possible.
“The beauty of succulent propagation lies in its simplicity. You’re not forcing growth—you’re creating space for it to happen.” — Marcus Reed, Urban Succulent Grower & Educator
Conclusion
Learning how to propagate succulents from leaves opens up a world of gardening possibilities. With just a few healthy leaves, basic supplies, and attentive care, you can transform one modest plant into a lush display. The process teaches mindfulness, reinforces understanding of plant biology, and delivers tangible joy when the first tiny rosette emerges.
Start small. Pick one robust leaf from a plant you already love. Follow the steps outlined here, track your progress, and celebrate each milestone—even the invisible ones beneath the soil. Before long, you’ll find yourself sharing baby succulents with friends, filling shelves with new varieties, and gaining confidence in your green thumb.


 浙公网安备
33010002000092号
浙公网安备
33010002000092号 浙B2-20120091-4
Comments
No comments yet. Why don't you start the discussion?