
When your HDMI port stops working, it can disrupt everything from movie nights to critical work presentations. The issue might seem technical or intimidating, but most HDMI failures stem from simple, fixable problems. Whether you're dealing with a blank screen, flickering display, or no signal message, understanding the root causes and knowing how to systematically troubleshoot them can save time, money, and frustration.
HDMI (High-Definition Multimedia Interface) is the standard for transmitting high-quality audio and video between devices. But like any technology, it’s vulnerable to wear, misconfiguration, and hardware faults. This guide walks through the most frequent reasons HDMI ports fail, offers a structured approach to diagnosing and fixing them, and provides real-world insights to help you restore functionality quickly.
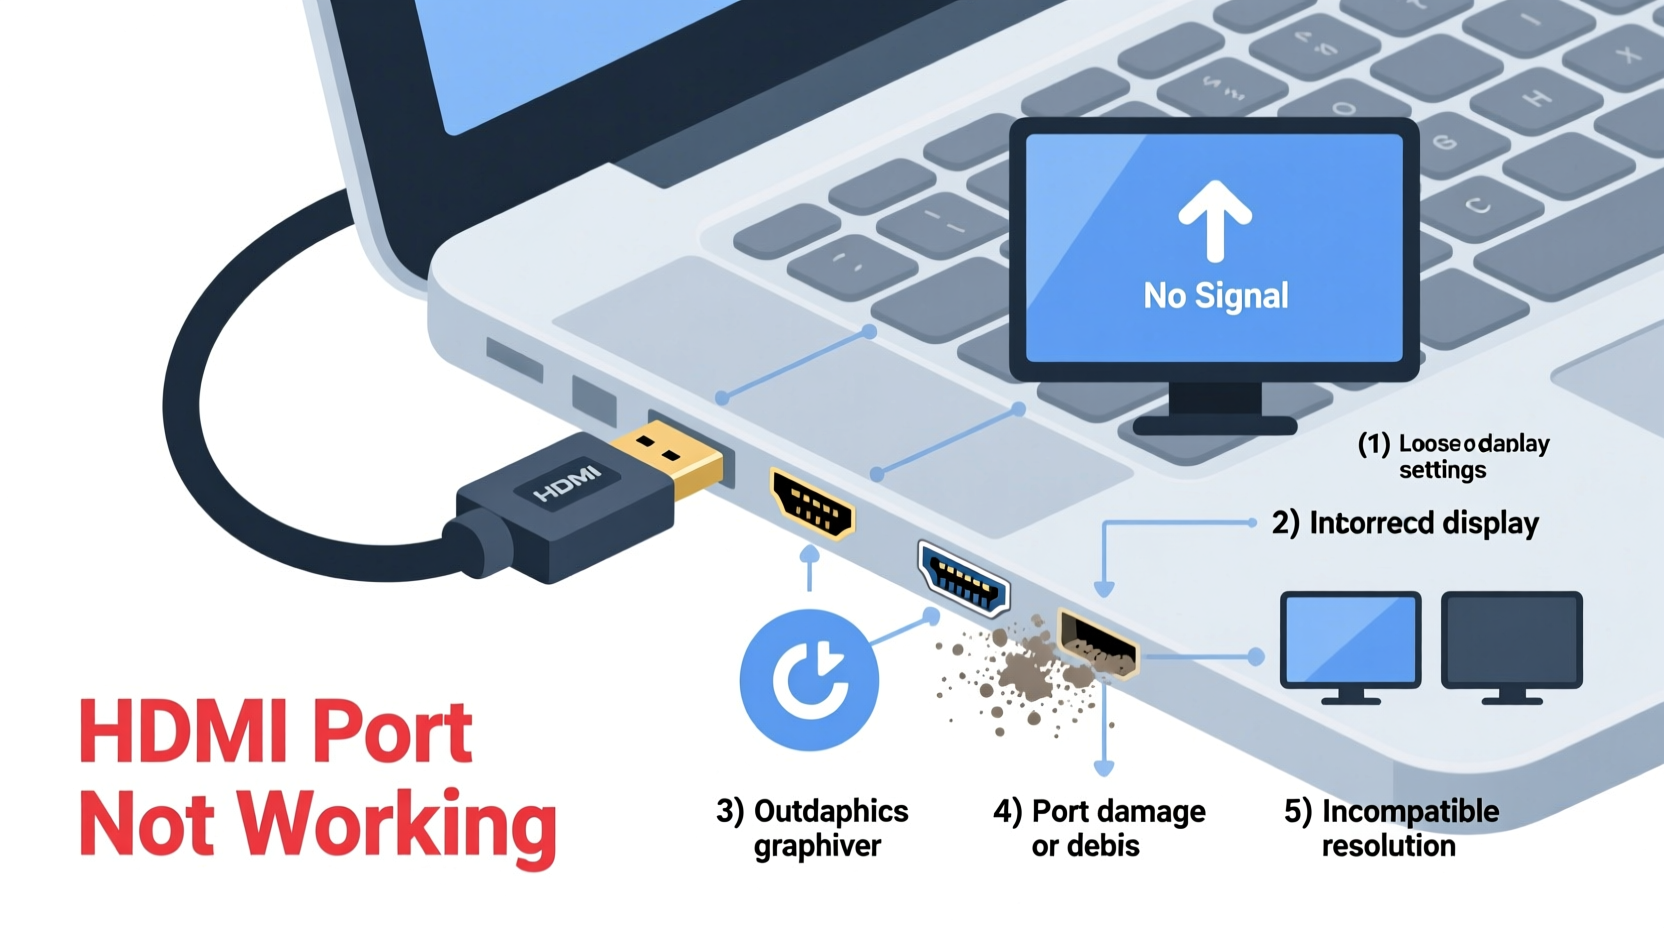
Common Causes of HDMI Port Failure
Before jumping into fixes, it's essential to understand what could be going wrong. HDMI issues rarely come from a single source—problems can originate in the cable, port, device settings, or even power supply.
- Damaged or faulty HDMI cable: Frayed wires, bent pins, or poor shielding can interrupt signal transmission.
- Loose or improperly seated connection: A cable that isn’t fully plugged in may cause intermittent or no signal.
- Dirty or obstructed HDMI port: Dust, lint, or debris can block electrical contact.
- Hardware damage: Physical impact or repeated plugging/unplugging can bend internal pins or break solder joints.
- Outdated firmware or drivers: Especially on computers and gaming consoles, software updates are often needed for HDMI compatibility.
- Incorrect input/source selection: The display device may be set to the wrong input channel.
- Power delivery issues: Some devices require stable power to activate HDMI output.
- Incompatible resolution or refresh rate: Mismatched settings between source and display can prevent handshake.
Step-by-Step Troubleshooting Guide
A methodical approach ensures you don’t overlook simple fixes while chasing complex ones. Follow this sequence to isolate and resolve the problem efficiently.
- Check the basics: Ensure both devices are powered on and the correct input is selected on the display (e.g., “HDMI 1”).
- Inspect the cable: Look for visible damage. Try wiggling the ends gently—if the image flickers, the cable is likely faulty.
- Swap the cable: Use a different HDMI cable known to work with another setup.
- Try a different HDMI port: If your TV or monitor has multiple HDMI inputs, switch ports to see if the issue follows the port or stays with the device.
- Test the source device: Connect the same device (e.g., laptop, console) to a different display using the same cable.
- Test the display device: Connect a different source (like a Blu-ray player) to the same HDMI port.
- Clean the HDMI port: Use compressed air or a soft brush to remove dust. Avoid metal tools that could damage pins.
- Restart all devices: Power cycle the source, display, and any intermediate devices (like AV receivers).
- Update firmware/drivers: Check for updates on computers, TVs, and gaming consoles.
- Adjust display settings: On computers, press Win + P to toggle projection modes. On other devices, verify resolution and refresh rate compatibility.
Troubleshooting Table: Do’s and Don’ts
| Action | Do | Don’t |
|---|---|---|
| Cable Handling | Use certified HDMI cables; store them loosely coiled | Bend sharply or yank from the plug |
| Port Maintenance | Clean with compressed air or soft brush | Insert metal objects or use liquid cleaners |
| Device Setup | Match resolution/refresh rate to display specs | Assume auto-detection always works |
| Firmware & Drivers | Regularly check for updates | Ignore system update notifications |
| Testing | Isolate variables one at a time | Change multiple things at once |
Real-World Example: Fixing a Laptop HDMI Issue
A graphic designer named Jordan couldn't project their MacBook Pro to an external monitor via HDMI. The TV showed “No Signal” despite the cable being securely connected. Following the troubleshooting steps, they first tried a different HDMI cable—no change. They then connected the same laptop to a friend’s TV, which worked perfectly. That ruled out the laptop’s HDMI output as the culprit.
The issue was isolated to the TV. Upon checking the input settings, they discovered the HDMI port was disabled in the TV’s menu (a feature some models have to manage unused ports). Enabling it restored the connection immediately. In this case, the problem wasn’t hardware—it was a hidden software setting.
This scenario highlights why testing across multiple devices is crucial. What appears to be a broken port might just be a configuration oversight.
Expert Insight: When Hardware Fails
“Physical damage to HDMI ports is more common than people realize. Repeated stress from thick cables or improper insertion can crack internal traces on the circuit board. In many cases, especially with laptops and streaming sticks, professional micro-soldering repair is possible—but only if the board isn’t compromised.” — Raj Mehta, Electronics Repair Specialist with 12 years of field experience
According to Mehta, about 30% of HDMI port repairs he sees involve bent or broken internal pins due to forceful insertion. He emphasizes gentle handling and using right-angle adapters for tight spaces to reduce strain.
Tips for Preventing Future HDMI Issues
Prevention is often easier and cheaper than repair. These habits can extend the life of your HDMI connections:
- Label your HDMI cables by purpose (e.g., “Gaming Console,” “Laptop”) to avoid mismatched setups.
- Avoid routing cables where they can be stepped on or pinched by furniture.
- Invest in HDMI cable protectors or strain relief sleeves to prevent fraying at the connectors.
- Turn off devices before connecting or disconnecting HDMI cables to avoid electrical surges.
- For frequently swapped devices, consider an HDMI switcher instead of repeatedly plugging into the same port.
Frequently Asked Questions
Why does my HDMI work sometimes but not consistently?
Intermittent HDMI issues are typically caused by a loose connection, failing cable, or port corrosion. Try securing the cable firmly and cleaning the port. If the problem persists, replace the cable or inspect the port for internal damage.
Can a software update fix a non-working HDMI port?
Yes. Firmware or driver updates can resolve compatibility issues, especially after operating system upgrades or when connecting to newer displays. For example, Windows updates occasionally include GPU driver improvements that restore HDMI functionality.
Is it worth repairing a damaged HDMI port?
It depends on the device. On high-end laptops or professional equipment, repair costs ($50–$150) may be justified. On budget devices or older models, replacement is often more economical. Consult a certified technician for a cost-benefit assessment.
Final Checklist: HDMI Troubleshooting at a Glance
- ✅ Verify both devices are powered on.
- ✅ Confirm the correct HDMI input is selected.
- ✅ Test with a different, known-working HDMI cable.
- ✅ Try a different HDMI port on the display.
- ✅ Connect the source device to another display.
- ✅ Clean the HDMI port gently with compressed air.
- ✅ Restart all connected devices.
- ✅ Check for firmware or driver updates.
- ✅ Adjust resolution and refresh rate settings.
- ✅ Inspect for physical damage to the port or cable.
Conclusion: Take Control of Your HDMI Connection
HDMI port issues are common but rarely insurmountable. With a clear diagnostic process, awareness of common pitfalls, and a few preventive habits, you can maintain reliable audiovisual connections across all your devices. Don’t assume a dead port means a dead device—most problems have simple solutions. Apply these steps methodically, document what changes work, and keep spare cables on hand for quick swaps.


 浙公网安备
33010002000092号
浙公网安备
33010002000092号 浙B2-20120091-4
Comments
No comments yet. Why don't you start the discussion?