
Waking up to bouncy, defined waves without exposing your hair to damaging heat sounds too good to be true—yet it’s entirely possible. The sock method, a decades-old heatless curling technique, has resurged in popularity thanks to its simplicity and effectiveness. Unlike curling irons or hot rollers that can weaken strands over time, this method uses only fabric socks and gentle tension to create long-lasting texture. It’s ideal for all hair types, especially those seeking low-maintenance routines that prioritize hair health.
The appeal lies not just in the results but in the process: no electricity, no frizz-inducing tools, and minimal effort. With proper preparation and a little patience, you can transform straight or slightly wavy hair into romantic, beachy curls by morning. This guide walks you through every step of the sock method, shares pro tips, compares alternatives, and answers common concerns so you can decide if it’s right for your hair journey.
Why Choose Heatless Curls?
Heat styling may deliver instant gratification, but repeated exposure to high temperatures leads to dryness, split ends, and breakage. According to trichologist Dr. Shab Reslan, “Even modern ceramic tools emit enough heat to disrupt the hydrogen bonds in hair, leading to cumulative structural damage.” Over time, this compromises elasticity and shine.
Heatless methods like the sock curl technique preserve moisture and cuticle integrity. They rely on mechanical shaping rather than thermal manipulation, making them safer for frequent use. Additionally, they’re travel-friendly, cost-effective, and environmentally sustainable—no plug-in required.
“Sleep-styled techniques like the sock method are excellent for maintaining curl pattern longevity while reducing reliance on tools.” — Dr. Monique Daniels, Hair Wellness Consultant
How the Sock Method Works
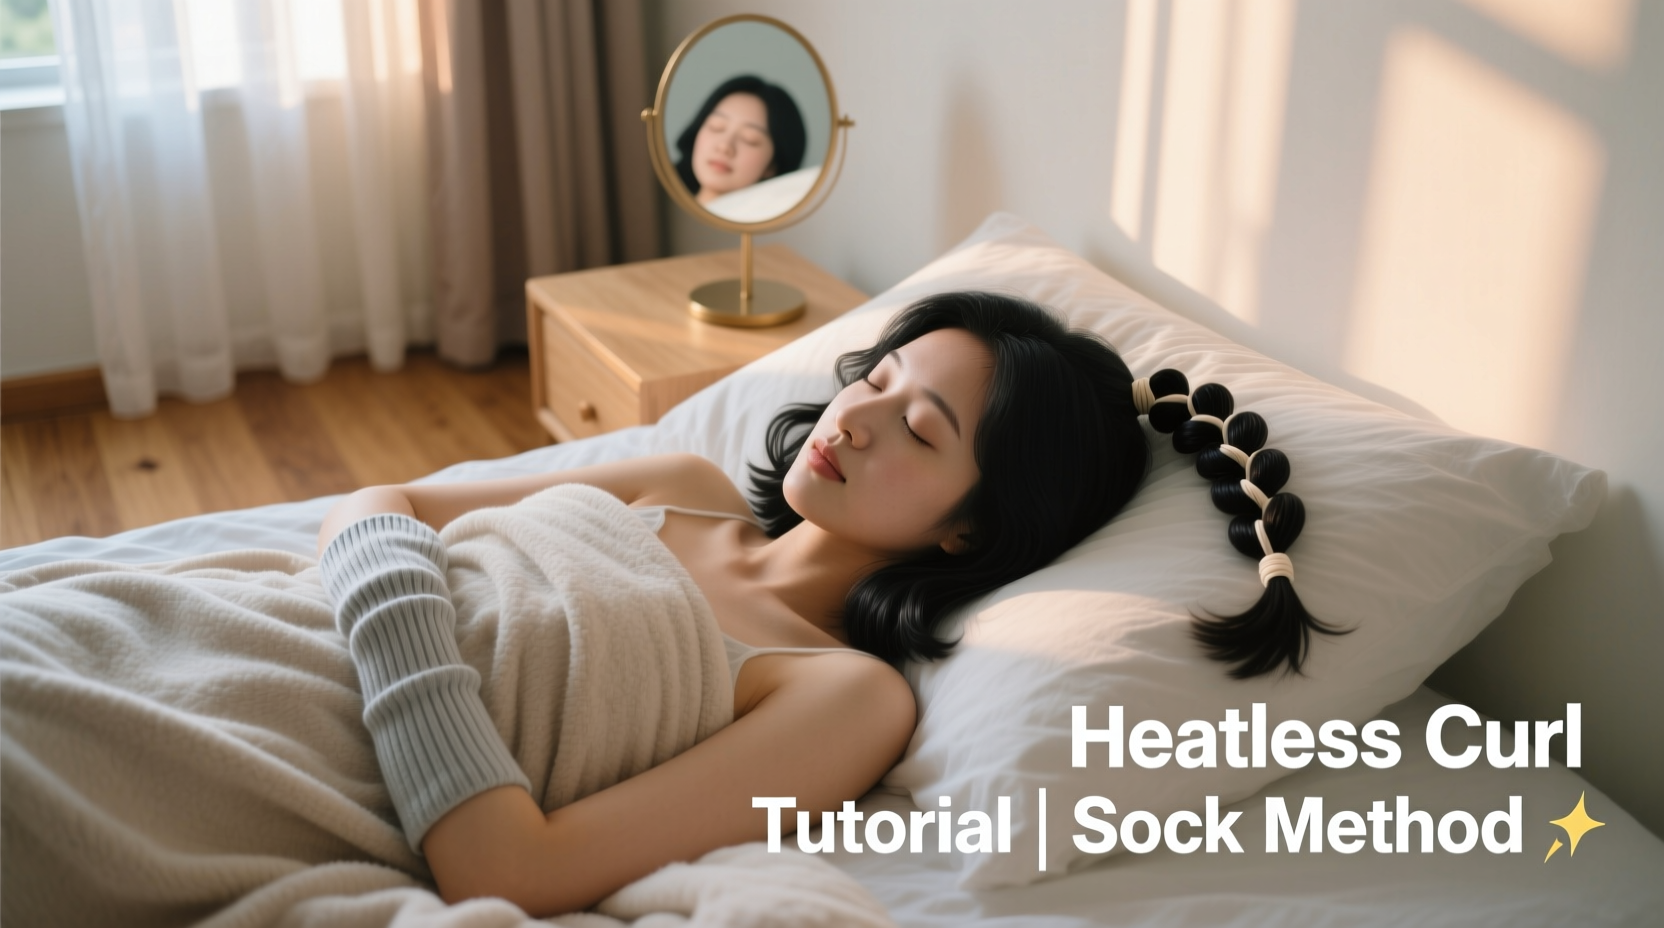
The principle behind the sock method is simple: damp hair is wrapped around a soft, flexible base (a rolled-up sock) and left to dry overnight. As the hair dries in this coiled position, it sets into a curl. Once unwound in the morning, the result is soft, spiral-shaped waves with volume at the roots and bounce throughout.
This works best on second-day hair or freshly washed, towel-dried locks. The slight moisture level allows the hair to mold into shape without becoming brittle. Unlike clips or pins, socks provide cushioned support that minimizes creasing and tension on the scalp.
Step-by-Step Guide to Overnight Sock Curls
Follow this detailed timeline to maximize success with the sock method. Plan for about 20–30 minutes of prep before bed.
- Wash and condition your hair earlier in the day or right before bed. Focus conditioner on mid-lengths to ends to prevent weighing down roots.
- Towel-dry gently until hair is about 70–80% dry. Avoid vigorous rubbing; instead, press out excess water with a microfiber towel or cotton T-shirt.
- Apply a curl-enhancing product such as mousse, light gel, or leave-in conditioner. Distribute evenly using fingers or a wide-tooth comb. This helps hold the curl and reduces frizz.
- Part your hair down the middle or choose a side part based on your preferred wave direction.
- Prepare your sock: Cut the foot off a clean cotton sock. Roll the circular tube from one end until you have a tight donut shape with a hollow center.
- Begin curling: Take a 1–2 inch section of hair near your temple. Place the rolled sock at the root and pull your hair through the center, then roll the sock downward toward the ends. Repeat until all sections are secured.
- Secure each roll with a soft scrunchie or pin if needed. Ensure rolls lie flat against your head to avoid flattening during sleep.
- Sleep comfortably: Use a silk pillowcase to reduce friction. If necessary, loosely cover hair with a satin bonnet for extra protection.
- In the morning, carefully unravel each sock curl. Do not brush immediately—use fingers to gently separate waves.
- Finish with a light oil or serum on ends to enhance shine and tame flyaways. Avoid heavy products that weigh down curls.
Troubleshooting Common Issues
- Curls fall flat? Your hair might have been too dry during application. Aim for damp, not soaking wet.
- Creases or kinks? The sock material may be too thick. Try thinner cotton or seamless options.
- Not holding shape? Add more product or try braiding small sections before wrapping for tighter definition.
Comparison: Sock Method vs. Other Heatless Techniques
While the sock method is effective, it’s not the only heatless option. Here’s how it stacks up against popular alternatives:
| Method | Best For | Time Required | Durability | Comfort Level |
|---|---|---|---|---|
| Sock Method | Medium to long hair, loose waves | 20–30 min setup | 12–24 hours | High (soft fabric) |
| Braids | All lengths, tighter waves | 15–25 min | 8–16 hours | Moderate (can pull) |
| Flexi Rods | Volume, uniform curls | 30+ min | 24+ hours | Low (rigid rods) |
| Twist & Pin | Short to medium hair | 10–20 min | 6–12 hours | High |
| Headband Curlers | Front layers, face-framing waves | 5–10 min | 8–12 hours | Very High |
The sock method strikes a balance between ease, comfort, and lasting results—especially beneficial for those with shoulder-length or longer hair looking for effortless volume.
Real Example: A Week of Sock Curls
Maya, a 29-year-old teacher with wavy, shoulder-length hair, decided to test the sock method for seven consecutive nights. Her goal was to reduce her reliance on a flat iron, which she’d used daily for years despite increasing dryness.
She started by washing her hair every other day, applying a lightweight mousse, and rolling two socks—one on each side of her part. The first night yielded inconsistent results: some curls were tight, others limp. After adjusting her dampness level and using smaller sections, by night three, she achieved soft, uniform waves that lasted through school hours and parent meetings.
By day seven, Maya noticed improved texture—her hair felt thicker and less prone to frizz. “I didn’t believe something so simple could work,” she said. “Now I only reach for heat when I need sleekness for formal events.”
Her biggest takeaway? Consistency matters. One-off attempts rarely deliver perfection. But with minor tweaks, the method became a reliable part of her routine.
Pro Tips for Best Results
- Section evenly: Divide hair into four quadrants for balanced curl distribution.
- Avoid large sections: Thicker strands produce looser, less defined waves. Stick to 1–2 inch widths.
- Roll tightly but gently: The sock should hug the scalp without pulling or causing discomfort.
- Let curls set: After removing the socks, flip your head upside down and shake gently to loosen, then let sit for 5–10 minutes before touching further.
- Refresh next day: Spritz with a mix of water and sea salt spray to revive waves without re-wrapping.
Frequently Asked Questions
Can I use the sock method on short hair?
Absolutely. While best suited for medium to long lengths, those with chin-length bobs can adapt the technique by focusing on the lower half of the hair. Smaller socks or modified rolls (using shorter strips) help accommodate shorter strands.
Will this work on straight hair?
Yes. Even pin-straight hair can hold a curl when shaped while damp and allowed to dry in place. Results vary based on hair texture and product use, but most users see noticeable waves after a few tries.
Is it safe for curly or coily hair types?
It depends on the curl pattern. For Type 3 curls, the sock method enhances natural spirals. For Type 4 hair, it may stretch coils into looser waves rather than creating new curl formation. Always assess your hair’s response and adjust tension accordingly.
Essential Checklist Before You Begin
Use this checklist to ensure success each time you try the sock method:
- ✅ Wash and condition hair (or refresh second-day hair with a mist)
- ✅ Towel-dry to 70–80% dryness
- ✅ Apply curl-defining product (mousse, gel, or cream)
- ✅ Cut and roll two clean cotton socks
- ✅ Section hair into manageable parts
- ✅ Wrap each section around a sock roll, securing at the end
- ✅ Sleep on a silk/satin surface for reduced friction
- ✅ In the morning, gently unravel curls and finger-fluff
- ✅ Finish with a light serum or oil on ends
Final Thoughts and Call to Action
The sock method isn’t just a nostalgic hack—it’s a viable, science-backed approach to healthier, more resilient hair. By shifting away from daily heat exposure and embracing overnight styling, you give your strands a chance to recover, retain moisture, and develop natural movement.
Like any new routine, it takes practice. Your first attempt might not yield salon-perfect waves, but refinement comes with understanding your hair’s unique needs. Whether you’re growing out a heat-damaged phase, simplifying your mornings, or exploring natural texture, the sock method offers a gentle, rewarding path forward.


 浙公网安备
33010002000092号
浙公网安备
33010002000092号 浙B2-20120091-4
Comments
No comments yet. Why don't you start the discussion?