
If your morning shower has turned into a cold shock or your dishwasher is struggling to clean greasy dishes, the issue likely lies with your hot water heater. A sudden loss of hot water is more than an inconvenience—it disrupts daily routines and can signal deeper problems. The good news? Many common issues have straightforward fixes you can perform without calling a plumber right away. Understanding how to troubleshoot your water heater empowers you to act quickly, save money, and potentially prevent minor glitches from turning into major failures.
Check the Power Source and Reset Functions
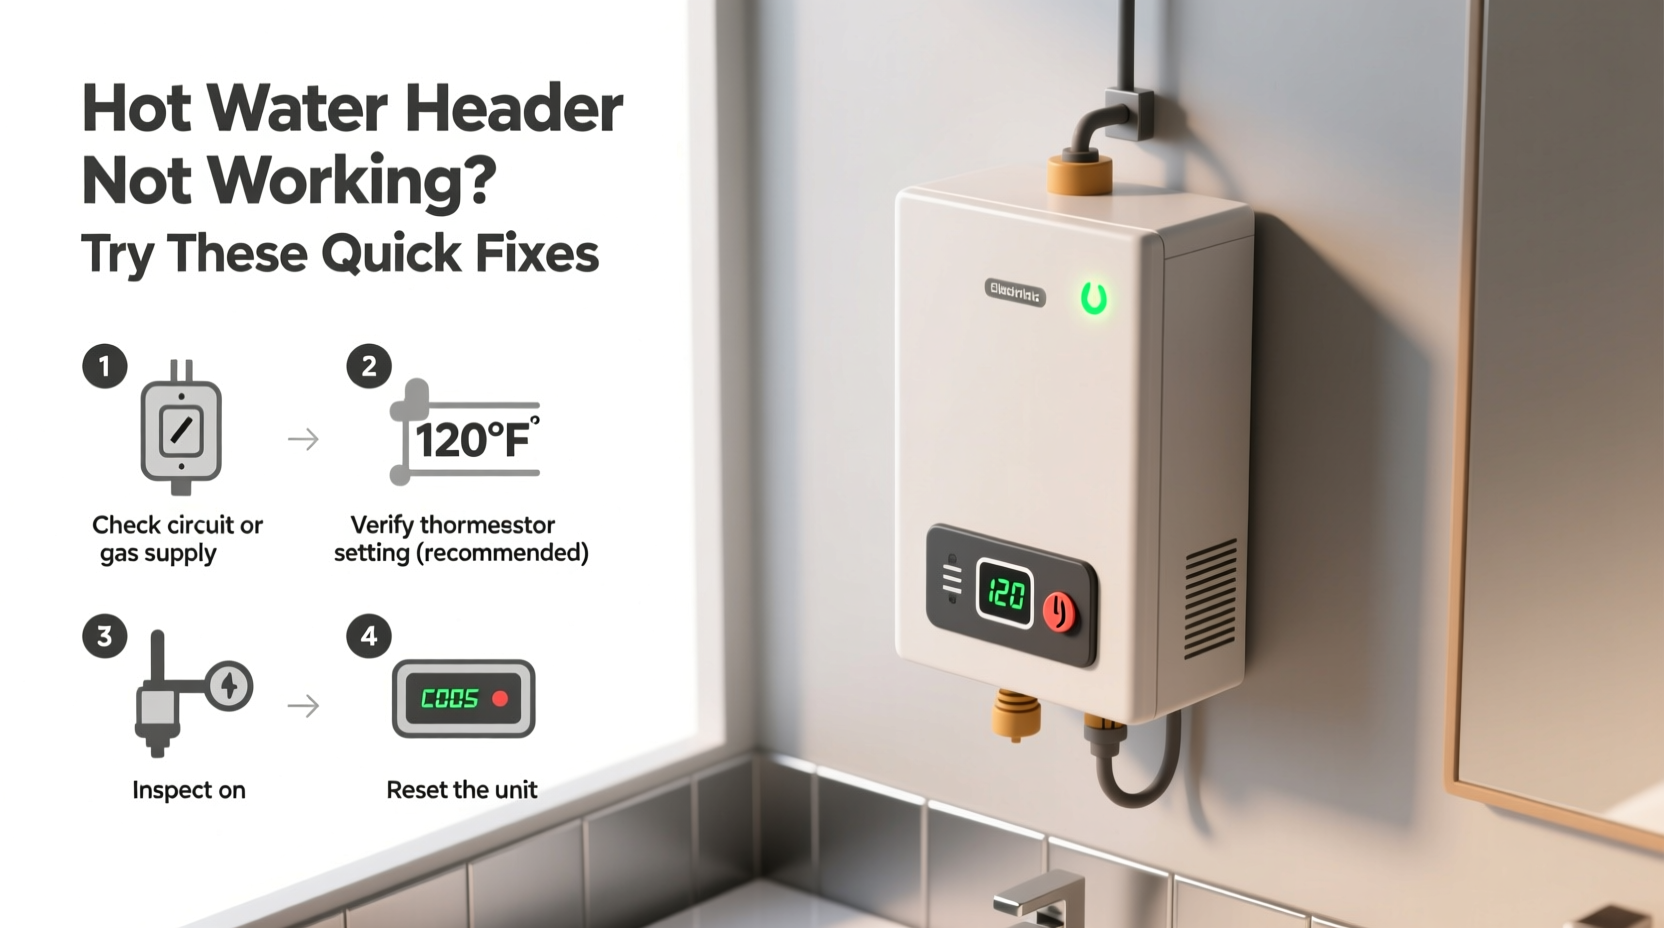
Before diving into complex diagnostics, start with the basics. Electric and gas water heaters rely on different power sources, but both can fail due to simple electrical interruptions.
For electric models, locate the circuit breaker panel and check if the breaker labeled “water heater” has tripped. If it has, switch it fully off and then back on. This resets the system and may restore function. Avoid repeated resetting—if the breaker trips again immediately, there’s likely a short circuit or internal fault requiring professional attention.
Gas water heaters often have a resettable thermostat located near the gas control valve. Look for a red button labeled “reset.” Press it only if the pilot light is out and other checks confirm it’s safe. Note: Never attempt this if you smell gas—evacuate and call emergency services.
Inspect the Pilot Light and Ignition System
If you have a gas water heater, the pilot light is critical. It’s a small flame that ignites the main burner when hot water is needed. If the pilot is out, no heating occurs.
To check the pilot light, remove the access panel at the bottom of the unit. Look through the viewing window for a steady blue flame. If it’s flickering, yellow, or absent, relighting may solve the issue.
- Turn the gas control knob to “Pilot.”
- Press and hold the knob down while igniting the pilot using the built-in spark button or a long lighter.
- Continue holding for 30–60 seconds after ignition to warm the thermocouple.
- Release and turn the knob to “On.”
A faulty thermocouple—a safety device that senses the pilot flame—can shut off gas even if the pilot lights. If the flame goes out shortly after releasing the knob, the thermocouple may need replacement.
Test the Thermostat and Heating Elements (Electric Models)
Electric water heaters use one or two thermostats and heating elements to warm the water. If either fails, hot water output drops or disappears entirely.
First, ensure the thermostat isn’t set too low. Most manufacturers recommend 120°F (49°C) as a safe and efficient setting. Use a thermometer at a nearby faucet to verify actual water temperature.
If the temperature is significantly lower, test the upper and lower thermostats with a multimeter for continuity. Also inspect the heating elements for corrosion or scaling. Burned-out elements won’t heat water, even if power is present.
Replacing a heating element is a manageable DIY task for those comfortable with electrical systems. Shut off power, drain the tank slightly, disconnect wiring, and unscrew the old element. Install the new one with a sealing washer and restore connections.
| Symptom | Possible Cause | Quick Fix |
|---|---|---|
| No hot water | Tripped breaker or blown fuse | Reset breaker or replace fuse |
| Warm but not hot water | Thermostat set too low | Adjust to 120°F |
| Pilot won’t stay lit | Faulty thermocouple | Clean or replace thermocouple |
| Water smells like rotten eggs | Bacterial growth in tank | Flush tank and replace anode rod |
| Leaking base | Loose drain valve or tank corrosion | Tighten or replace valve; assess tank integrity |
Flush the Tank to Remove Sediment Buildup
Over time, minerals in hard water settle at the bottom of the tank, forming sediment. This layer insulates the heating element from the water, reducing efficiency and causing overheating or strange noises like popping or rumbling.
Flushing the tank annually prevents this. Here’s how:
- Turn off the power (electric) or gas supply (gas model).
- Shut off the cold water inlet valve.
- Attach a garden hose to the drain valve at the base and run it to a floor drain or outside.
- Open a hot water faucet in the house to allow air into the system.
- Open the drain valve and let water flow until clear.
- Close the valve, remove the hose, refill the tank, then restore power or gas.
This process removes scale and restores heating efficiency. In areas with hard water, consider installing a water softener to extend the life of your heater and plumbing fixtures.
“Sediment buildup is one of the top reasons homeowners see reduced hot water output. Annual flushing can add years to a water heater’s lifespan.” — Mark Reynolds, Licensed Plumber and HVAC Technician
Check for Faulty Valves and Pressure Issues
The temperature and pressure relief (T&P) valve is a critical safety component. It releases excess pressure to prevent tank explosions. If it’s leaking or stuck, it could indicate high water pressure or a failing thermostat.
To test, lift the lever briefly and let it snap back. You should hear water discharge into the overflow pipe and then stop. If it continues to leak, replace the valve immediately. Do not operate the heater with a malfunctioning T&P valve.
Also inspect the cold water inlet and drain valves. A loose connection or worn gasket can cause slow leaks. Tighten fittings carefully—overtightening may crack the valve.
Mini Case Study: The Weekend Cold Water Crisis
Sarah noticed her showers were lukewarm on a Saturday morning. She checked the circuit breaker—fine. The thermostat was set correctly. Remembering a technician mentioning sediment issues last year, she decided to flush the tank. After draining about five gallons, the water turned from cloudy brown to clear. Once refilled, the heater restored full hot water capacity. The fix took under an hour and cost nothing but a garden hose rental. Sarah now schedules annual flushes every fall.
Troubleshooting Checklist
- ✅ Check circuit breaker or fuse box for tripped switches
- ✅ Verify gas supply is on and pilot light is lit (gas models)
- ✅ Test thermostat settings and adjust if necessary
- ✅ Inspect for unusual noises or leaks around the base
- ✅ Flush the tank to remove sediment buildup
- ✅ Test the T&P valve for proper operation
- ✅ Examine heating elements (electric) or thermocouple (gas) for damage
- ✅ Confirm cold water supply valve is fully open
Frequently Asked Questions
Why is my water heater making popping sounds?
Popping or rumbling noises usually indicate sediment buildup on the tank bottom. As water heats, bubbles get trapped under the sediment layer and burst violently. Flushing the tank resolves this in most cases.
How long should a water heater last?
Most standard tank water heaters last 8–12 years with regular maintenance. Tankless units can last 15–20 years. Age, water quality, and usage patterns affect longevity. If your unit is over 10 years old and showing multiple issues, replacement may be more cost-effective than repairs.
Can I repair a leaking water heater myself?
Minor leaks from the drain valve or T&P valve can often be fixed by tightening or replacing the component. However, leaks from the tank itself indicate corrosion and require full replacement. Never attempt to weld or patch a pressurized water tank.
Take Action Before the Problem Worsens
A non-functioning water heater doesn’t always mean costly repairs or immediate replacement. By methodically checking power sources, fuel supply, thermostat settings, and mechanical components, you can often restore service with minimal effort. Regular maintenance—not just emergency fixes—keeps your system running efficiently and extends its service life. Don’t wait for total failure. Apply these troubleshooting steps today, and ensure your home stays comfortable with reliable hot water tomorrow.


 浙公网安备
33010002000092号
浙公网安备
33010002000092号 浙B2-20120091-4
Comments
No comments yet. Why don't you start the discussion?