
Heirloom ornaments carry more than festive cheer—they carry memory. A delicate glass ball from a grandmother’s tree, a hand-painted wooden angel from the 1950s, or a tin star from a wartime Christmas all hold emotional weight far beyond their physical form. Yet time takes its toll. One of the most common failures? The loss or breakage of tiny, fragile hanging hardware. Rather than relegate these treasures to a shadow box or shelf, modern makers now have a powerful solution: 3D printing.
Replacing missing hooks isn’t just about restoring function—it’s about preserving legacy. With a 3D printer, basic design software, and careful attention to detail, you can recreate nearly invisible, perfectly sized hooks that blend seamlessly with vintage craftsmanship. This guide walks through the entire process, from assessment to final installation, ensuring your family’s holiday icons remain part of the living tradition.
Assessing the Ornament and Design Requirements
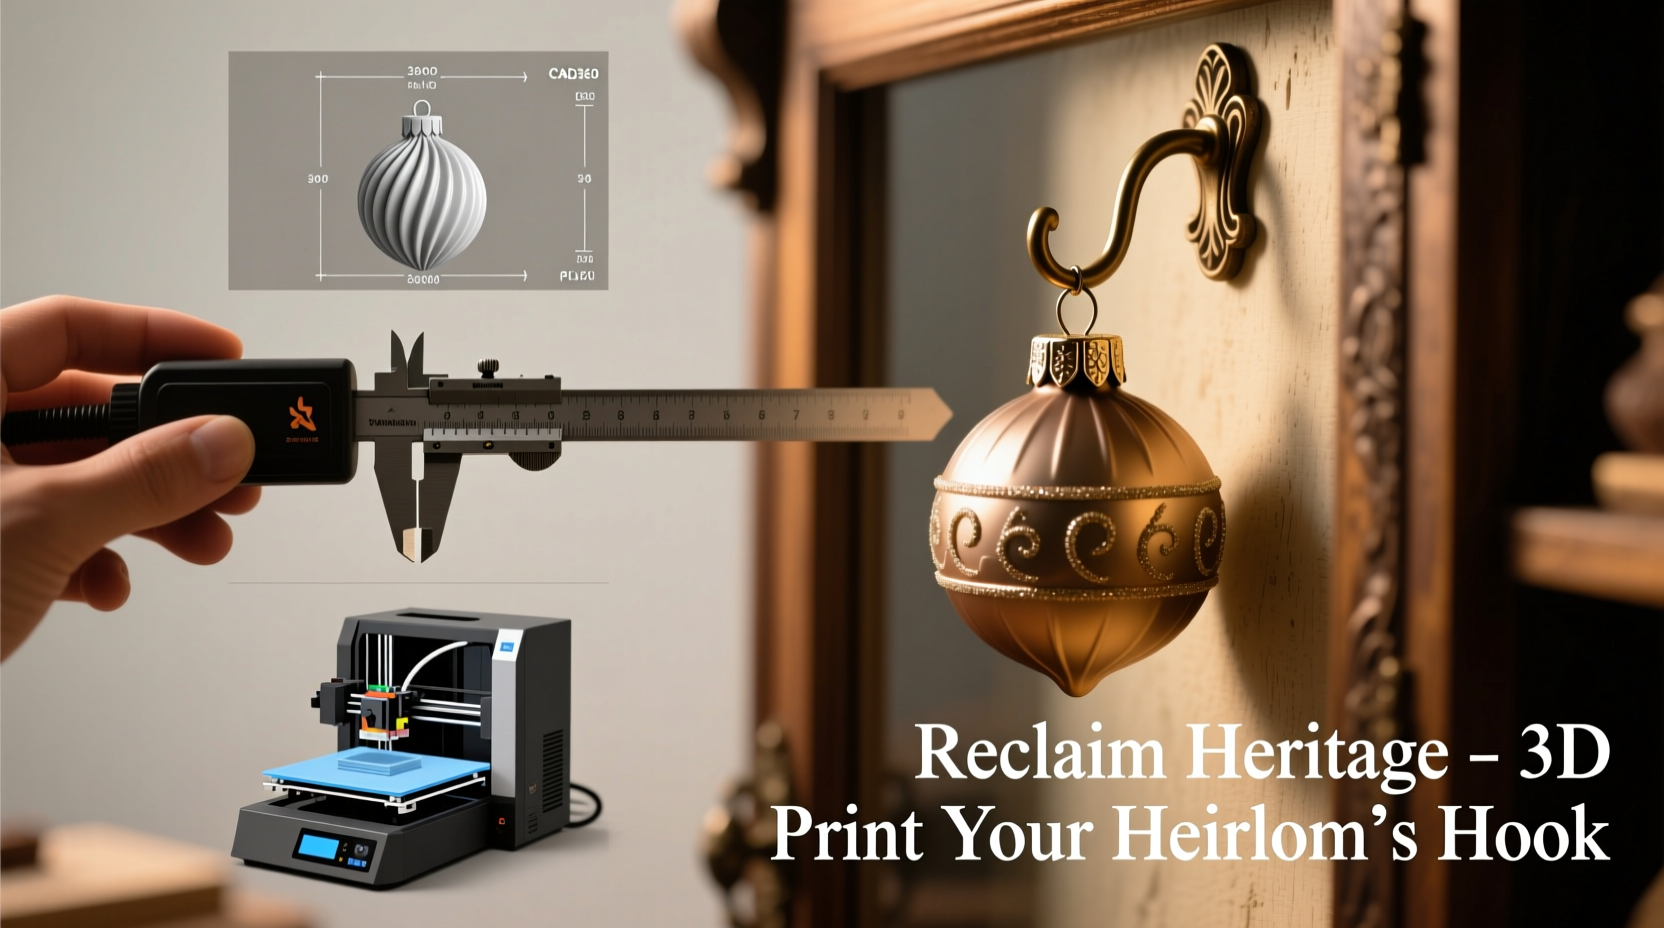
Before touching any digital tools, begin with close observation. Each heirloom is unique in size, material, weight distribution, and attachment method. The hook must support the ornament without stress, avoid scratching delicate surfaces, and maintain visual subtlety.
Start by measuring the ornament’s hanging point. Use calipers to determine:
- The diameter of the existing loop (if partially intact)
- The thickness of the material at the top (glass, wood, metal, etc.)
- The distance between anchor points (e.g., two drilled holes for a wire)
- The overall weight of the ornament (use a precision scale)
For example, a blown-glass bauble may weigh only 15 grams but has a fragile neck prone to chipping. A wooden sled might be heavier—up to 80 grams—but sturdier at the hanging point. These differences dictate both the hook’s geometry and material choice during printing.
Designing the Replacement Hook in CAD Software
The heart of this restoration lies in accurate digital modeling. You don’t need advanced engineering skills, but familiarity with beginner-friendly CAD tools like Tinkercad, Fusion 360, or Blender is essential.
Begin by sketching the hook’s path. Most traditional ornament hooks follow one of three patterns:
- S-Curve: Two opposing arcs forming a soft “S,” ideal for single-point suspension on glass ornaments.
- Horseshoe Loop: A U-shaped wire bent into a loop, commonly used on wooden or ceramic pieces with dual anchor holes.
- Twisted Wire Spiral: Found on mid-century European ornaments, where a thin wire is coiled through a central hole.
In your chosen software, create a base shape using cylinders or splines. For an S-curve hook, model two tangent arcs with a consistent wire diameter—typically between 0.8 mm and 1.5 mm depending on the original. Ensure smooth transitions between curves to prevent stress concentrations during use.
Include small retention features if needed. For instance, a tiny flared end or undercut can prevent slippage through a widened hole. But be cautious—over-engineering risks damaging the antique surface.
“Precision matters not just for fit, but for respect. A well-made replacement disappears into the object’s history.” — Dr. Lena Petrov, Conservator of Decorative Arts, New England Museum Alliance
Step-by-Step Guide: From Measurement to Print
Follow this sequence to produce a functional, faithful replacement:
- Document the Original: If any fragment remains, scan it with a phone app like Microsoft 3D Scan or capture precise measurements. Note color and finish for visual blending.
- Create a Digital Model: In Tinkercad, use the “Shape Generators” script or build manually with tube shapes. Export as .STL.
- Scale Accurately: Import the .STL into slicing software (e.g., PrusaSlicer or Ultimaker Cura). Verify dimensions match your caliper readings within 0.1 mm tolerance.
- Select Filament: Use flexible PLA or PETG for lightweight ornaments needing slight give. For heavier pieces, consider ABS or reinforced nylon—but ensure ventilation.
- Adjust Print Settings: Use 100% infill for strength, 0.2 mm layer height, and a brim for adhesion. Print orientation should align the hook’s long axis flat on the bed to maximize structural integrity.
- Test Fit and Refine: After printing, gently insert the hook. If too tight, reduce diameter by 0.1–0.2 mm in software and reprint. If too loose, add micro-flanges or switch to a slightly stiffer filament.
- Finish Smoothly: Lightly sand contact points with 400-grit paper. For a metallic look, apply cold silver paint with a fine brush or use conductive filament.
Material and Method Comparison
Choosing the right combination of filament and design affects both durability and aesthetics. The table below compares common options:
| Filament Type | Best For | Pros | Cons |
|---|---|---|---|
| PLA | Lightweight glass, plastic, or paper ornaments | Easy to print, biodegradable, low warping | Brittle under stress; degrades in heat |
| PETG | Medium-weight wood or ceramic ornaments | Durable, slightly flexible, heat-resistant | Can string during printing; requires clean nozzle |
| ABS | Heavy or frequently handled ornaments | Strong, impact-resistant, can be sanded/polished | Emits fumes; warps without enclosure |
| TPU (Flexible) | Ornaments requiring spring-like tension | High flexibility, shock-absorbing | Difficult to print precisely; may stretch over time |
A Real Example: Restoring a 1947 Czech Glass Bauble
Maria Thompson of Pittsburgh inherited a set of hand-blown Czech glass ornaments from her great-aunt. One red teardrop-shaped bauble had lost its brass hook entirely, leaving only a sharp-edged hole. Fearing further cracking, she avoided DIY wire fixes.
Using a digital caliper, she measured the hole diameter at 1.3 mm and estimated the ornament’s weight at 18 grams. She modeled an S-curve hook in Tinkercad with a 1.1 mm shaft diameter to allow for gentle friction fit. After three iterations—adjusting curvature to prevent tilting—she settled on a PETG print with a polished tip.
The final hook slid smoothly into place, held securely, and was nearly invisible once hung. “It looks like it was always there,” Maria said. “And now my daughter can hang it when she’s older.”
Checklist: 3D Printing Ornament Hook Success
Use this checklist before starting your project:
- ✅ Measure the hanging point diameter and ornament weight
- ✅ Photograph the ornament from multiple angles
- ✅ Choose appropriate CAD software and familiarize yourself with basic tools
- ✅ Select filament based on weight and environmental exposure
- ✅ Print a prototype in PLA for fit testing
- ✅ Sand or paint the final hook for visual harmony
- ✅ Perform a gentle stress test before permanent installation
Frequently Asked Questions
Can I wash or polish a 3D-printed hook after installation?
No. Once installed, avoid cleaning agents or water near the connection point. Moisture can degrade adhesion over time, especially with PLA. Clean only the ornament body, keeping the hook area dry.
Will sunlight damage the printed hook over time?
Prolonged UV exposure can embrittle most plastics. If the ornament hangs in direct sunlight, use UV-resistant PETG or coat the hook with a clear acrylic sealer. Alternatively, rotate ornaments seasonally to minimize degradation.
What if I don’t own a 3D printer?
You don’t need one. Many public libraries, makerspaces, and universities offer free or low-cost access to 3D printers. Alternatively, upload your .STL file to online services like Sculpteo, Hubs, or MakeXYZ for professional printing and delivery.
Conclusion: Honoring the Past with Modern Tools
Preserving heirloom ornaments isn’t about freezing them in time—it’s about enabling their continued presence in evolving family traditions. 3D printing offers a bridge between generations: the craftsmanship of the past supported by the precision of today.
Every successfully replaced hook is a quiet act of care. It says: *This object matters. Its story isn’t finished.* Whether you’re mending a single treasured piece or rebuilding an entire collection’s hardware, the effort honors more than the ornament. It honors the hands that first held it, and the ones that will hold it next.


 浙公网安备
33010002000092号
浙公网安备
33010002000092号 浙B2-20120091-4
Comments
No comments yet. Why don't you start the discussion?