
Selecting the right tissue box may seem straightforward—until you bring one home and realize it’s too wide for your nightstand, too short to hide the tissues, or doesn’t align with your decor. The key to avoiding these frustrations lies in accurate measurement. Whether you're replacing an existing box, shopping for a decorative cover, or custom-building a recessed holder, precise dimensions are essential. This guide walks you through every stage of measuring for the ideal tissue box fit, ensuring functionality, aesthetics, and convenience.
Why Accurate Measurement Matters
A tissue box that doesn’t fit properly can lead to more than just visual clutter. An oversized container might tip over or block access to other items on your surface, while an undersized one leaves tissues exposed, leading to dust accumulation or accidental spills. In high-traffic areas like living rooms or offices, a poorly sized box disrupts flow and usability.
Additionally, many people invest in stylish tissue box covers made from wood, ceramic, or fabric. These decorative pieces often have limited internal clearance. Without correct measurements, you risk purchasing a cover that can't accommodate standard tissue packs—or worse, one that forces you to fold or compress tissues unnaturally.
“Precision in measuring ensures both aesthetic harmony and daily practicality. A well-fitted tissue box disappears into the environment while remaining effortlessly functional.” — Clara Nguyen, Interior Organization Specialist
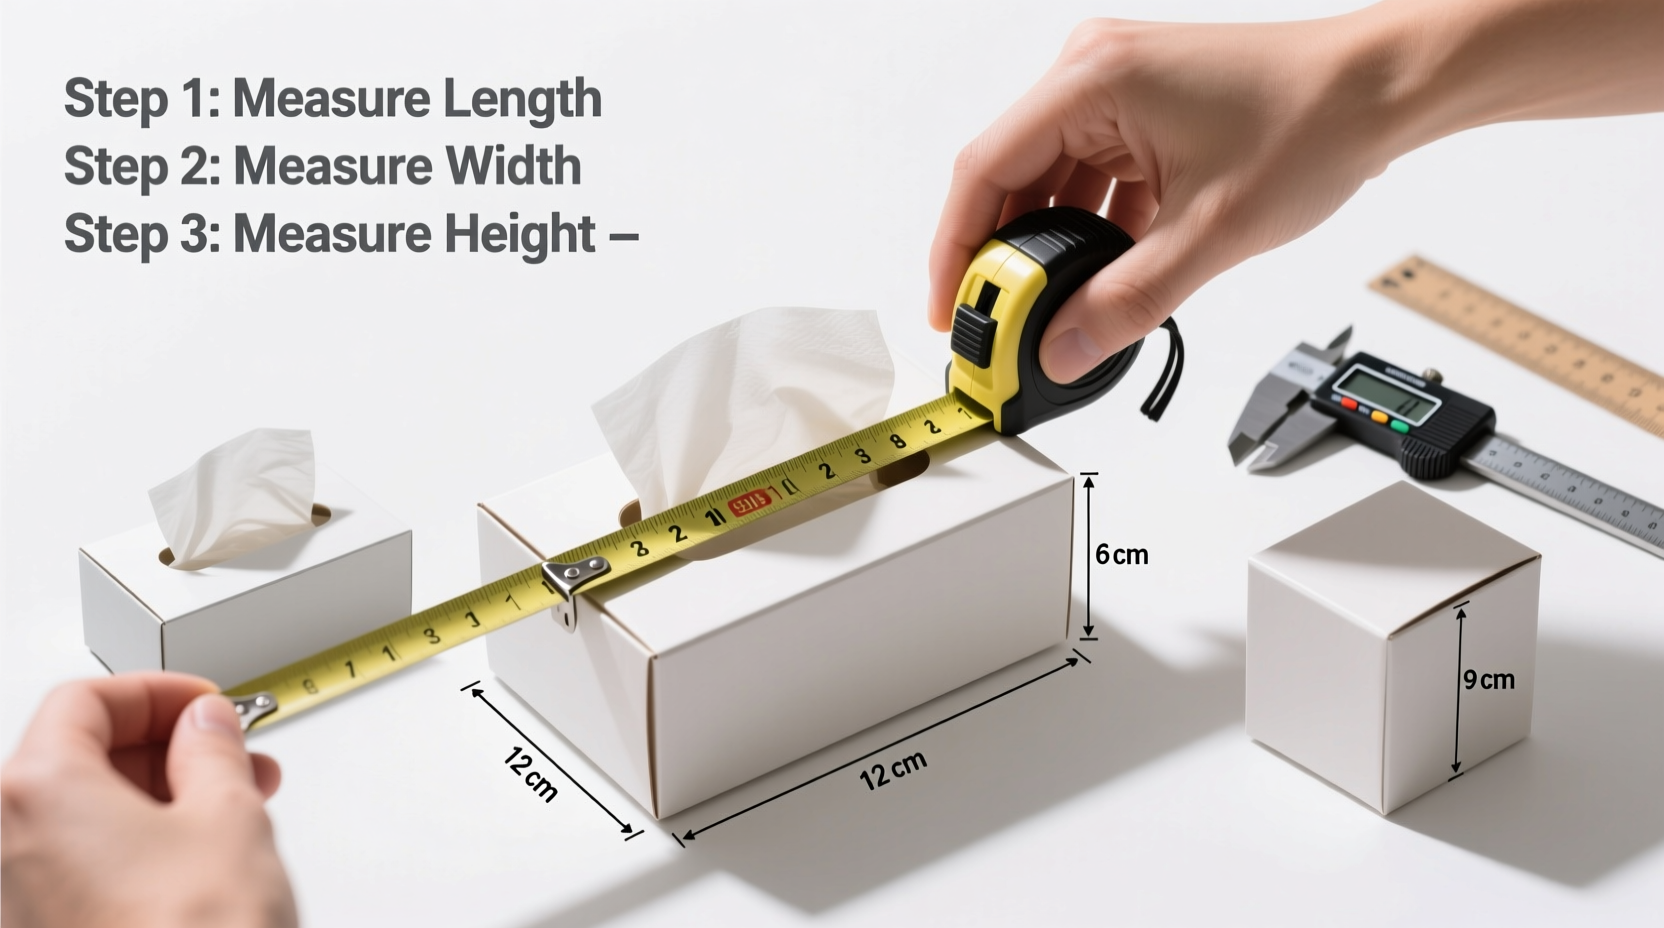
Step-by-Step Guide to Measuring Your Tissue Box
To determine the perfect size, follow this detailed process using simple tools: a ruler or tape measure, paper, and pen. Accuracy down to the 1/8 inch makes a significant difference, especially when dealing with tight spaces or custom enclosures.
- Gather your tools: Use a rigid ruler or flexible tape measure. Digital calipers offer even greater precision if available.
- Use a full pack of tissues: Measure an unopened, full tissue box. Partially used boxes may sag or compress, giving inaccurate results.
- Measure length (front to back): Place the box on a flat surface. Measure from the front edge (where tissues are pulled) to the back edge. Standard ranges from 4.5 to 6 inches.
- Measure width (side to side): Take the distance across the shorter sides. Most boxes range between 4.75 and 5.5 inches.
- Measure height (bottom to top): From base to top opening. Heights typically fall between 4.25 and 5.75 inches, depending on brand and ply count.
- Record all three dimensions: Note them as L × W × H (e.g., 5.25\" × 5\" × 5.5\").
- Check lid clearance (if applicable): If using a cover with a hinged or sliding lid, add 0.25–0.5 inches to the height to allow smooth operation.
Accounting for Space Constraints and Placement
The tissue box itself is only part of the equation. You must also evaluate the space where it will reside. A perfectly measured box is useless if it doesn’t fit on your shelf, under your coffee table, or within a built-in nook.
Begin by identifying the designated location. Then assess:
- Available depth (front-to-back clearance)
- Width limits (especially important on narrow nightstands)
- Vertical headroom (crucial near walls, shelves, or lamps)
- Accessibility (ensure there's room to pull tissues without obstruction)
For example, placing a tissue box on a crowded bathroom counter requires leaving at least 1 inch of clearance around the unit for easy access. In vehicles or RVs, secure placement demands snug but non-binding fits to prevent sliding during motion.
Real Example: The Living Room Shelf Dilemma
Sarah purchased a beautiful woven wicker tissue cover online, excited to elevate her living room decor. Upon arrival, she discovered the interior was only 5.1 inches wide—yet her family’s preferred brand measured 5.4 inches across. The box wouldn’t fit. After returning the cover, Sarah re-measured both the product listing specs and her tissues, realizing the retailer had listed approximate “fits most” dimensions instead of exact internal measurements. She now always measures first and checks seller-provided interior dimensions before buying.
Do’s and Don’ts When Measuring for Tissue Boxes
| Do’s | Don’ts |
|---|---|
| Measure your actual tissue brand and model | Assume all \"standard\" boxes are the same size |
| Add ¼ inch to each dimension when selecting a cover | Purchase a cover without checking internal capacity |
| Double-check measurements before ordering custom pieces | Measure a half-empty or crushed box |
| Consider lid swing or slide direction in tight spaces | Ignore vertical clearance near wall-mounted units |
| Use consistent units (inches or centimeters) | Rely solely on memory or estimates |
Choosing the Right Replacement or Cover Based on Measurements
Once you have accurate dimensions, use them strategically when shopping. Here’s how to apply your data:
- Replacement Boxes: Match L×W×H exactly or confirm compatibility with your current dispenser.
- Decorative Covers: Look for internal cavity specs. If not listed, contact the seller directly.
- Custom Builds: Provide your measurements plus a 0.3-inch tolerance for material thickness and ease of insertion/removal.
Some premium covers feature adjustable inserts or elastic corners to accommodate slight variations. While convenient, they’re not foolproof—especially with thicker quilted tissues or jumbo packs.
Checklist: Pre-Purchase Verification
- ✅ I have measured my current tissue box (length, width, height)
- ✅ I’ve noted the brand and type of tissues I use
- ✅ I’ve checked the available space where the box will go
- ✅ I’ve confirmed the internal dimensions of any cover or case
- ✅ I’ve allowed extra space for lids, decor, or frequent access
Frequently Asked Questions
Are all standard tissue boxes the same size?
No. While many fall within a similar range (approximately 5\" x 5\" x 5\"), sizes vary by brand, ply count, and packaging. Always measure your specific box rather than assuming universality.
Can I use a tissue box cover designed for a different brand?
You can—if the internal dimensions match or exceed your tissue box’s measurements. However, some covers are molded precisely to one brand (like Kleenex Soft Pack), so verify compatibility before purchase.
What should I do if my ideal cover is slightly too small?
Do not force the box in. This can damage the cover or crush tissues, making dispensing difficult. Instead, consider switching to a slimmer tissue brand or opting for an open-top design that bypasses tight fits.
Final Thoughts and Next Steps
Accurate measurement transforms a mundane task into a lasting solution. By taking just five minutes to record the true dimensions of your tissue box and its intended space, you avoid repeated returns, wasted money, and design mismatches. Whether upgrading your home’s aesthetic or optimizing workspace functionality, precision ensures everything works as smoothly as it looks.
Now that you know how to measure correctly, take action today. Pull out your ruler, grab your favorite tissue pack, and log those numbers. Keep them saved in your phone or kitchen drawer for future reference. The next time you shop—online or in-store—you’ll make a confident, informed choice.


 浙公网安备
33010002000092号
浙公网安备
33010002000092号 浙B2-20120091-4
Comments
No comments yet. Why don't you start the discussion?