
Choosing the right tissue size for your box isn’t just about convenience—it affects functionality, aesthetics, and even cost-efficiency. A poorly fitting tissue can be frustrating: too small, and it slips out of reach; too large, and it jams or bunches inside. Whether you're replacing a cover, buying refills in bulk, or designing custom packaging, accurate measurement is essential. This guide walks through every step of measuring your tissue box with precision, helping you achieve the ideal fit every time.
Why Accurate Measurement Matters
A tissue box may seem like a simple household item, but its design relies on tight tolerances. Manufacturers produce tissues to match standard box dimensions, but variations exist between brands, styles (facial, bathroom, pocket), and regions. Using mismatched tissues leads to wasted product, poor dispensing, and unnecessary replacement costs.
For example, oversized tissues can crumple inside the dispenser, making them difficult to pull out cleanly. Undersized tissues may not align with the opening, requiring frequent readjustment. In commercial settings like offices or clinics, these inefficiencies multiply across dozens of boxes, increasing both expense and environmental impact.
Tools You’ll Need for Precision
Accurate measurement doesn’t require professional tools, but using the right ones ensures consistency. Here’s what to gather before starting:
- Ruler or tape measure – Preferably metric and imperial for flexibility.
- Flat surface – To stabilize the box during measurement.
- Notebook or digital device – To record dimensions immediately.
- Pencil or marker – For marking reference points if needed.
Avoid using flexible rulers or worn tape measures that may stretch over time. Metal rulers provide the most reliable results, especially when measuring smaller increments.
Step-by-Step Guide to Measuring Your Tissue Box
Follow this detailed process to capture all necessary dimensions. Perform each step carefully to avoid cumulative errors.
- Empty the box completely. Remove any remaining tissues and flatten the interior if possible. A full or compressed box will distort measurements.
- Place the box on a flat, level surface. Ensure no warping or tilting affects alignment.
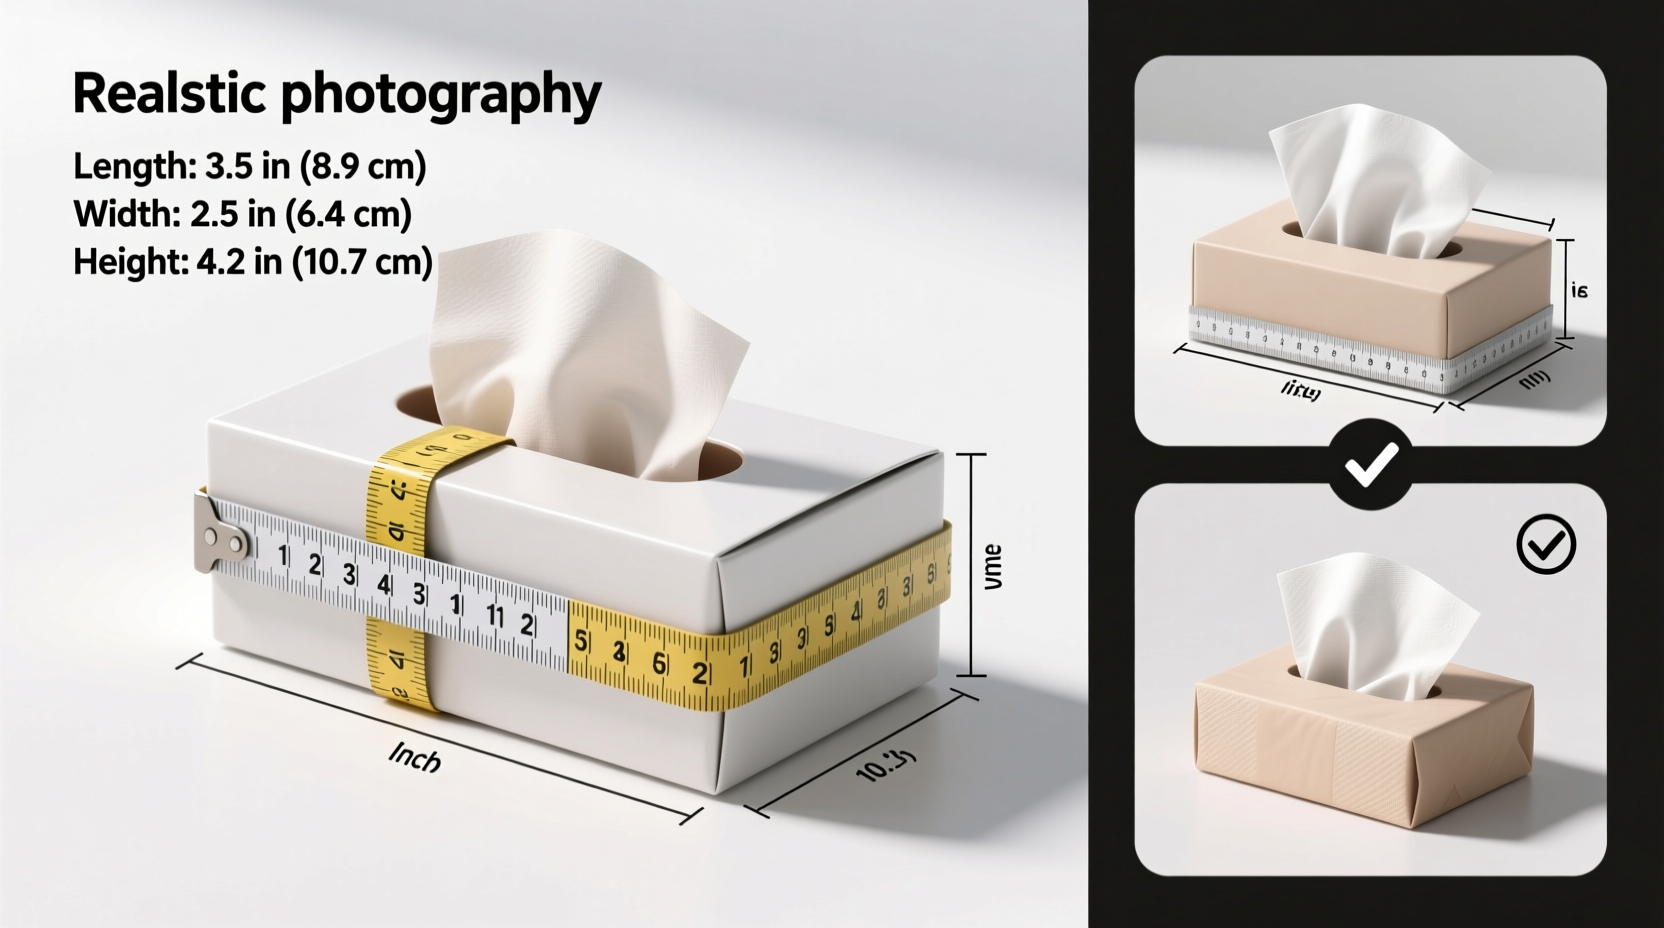
- Measure the length. This is the longest horizontal dimension from front to back. Place the ruler flush against the base and extend it from the rear edge to the front edge. Record the value in millimeters and inches.
- Measure the width. This runs side-to-side across the top opening. Measure from the inner left edge to the inner right edge at the widest point.
- Measure the height. From the bottom interior surface to the top rim. Do this on all four corners—some boxes taper slightly.
- Check the dispensing aperture. Measure both the length and width of the hole where tissues emerge. Note whether it’s centered, offset, or oval-shaped.
- Record thickness of the cardboard walls. Use calipers or subtract internal dimensions from external ones to determine wall thickness, which affects fit tolerance.
Repeat each measurement twice to confirm accuracy. If values differ by more than 1–2 mm, re-measure to identify inconsistencies.
Understanding Internal vs. External Dimensions
It’s crucial to distinguish between internal cavity size (where tissues sit) and external box size (used for cover fitting). Most tissue refill packs are designed to match internal volume, while decorative sleeves or cases rely on external dimensions.
| Dimension Type | Purpose | Used For |
|---|---|---|
| Internal Length/Width/Height | Space available for tissues | Selecting correct tissue refills |
| External Length/Width/Height | Overall footprint of the box | Fitting into holders, shelves, or custom covers |
| Aperture Size | Opening where tissue dispenses | Ensuring smooth pull-through without tearing |
Common Pitfalls and How to Avoid Them
Even experienced users make mistakes when measuring tissue boxes. Awareness of common errors improves accuracy significantly.
- Measuring over tissue residue – Leftover glue or fibers can add false thickness. Clean the interior first.
- Using external dimensions for refill selection – Leads to choosing tissues that are too large or loose.
- Ignoring aperture shape – Oval or rounded openings may not accommodate square-cut tissues properly.
- Assuming uniformity across brands – Kleenex, Puffs, and store brands vary subtly in cavity size despite similar labeling.
“Most customer complaints about ‘shrunken’ tissues come from misreading internal versus external specs. The tissue didn’t change—the box did.” — Daniel Reeves, Packaging Engineer at EcoNest Home Goods
Real Example: Solving a Persistent Dispensing Issue
Sarah, an office manager in Portland, noticed employees frequently complained about tissues getting stuck in dispensers. She switched brands multiple times, assuming quality was the issue. After measuring one of the empty boxes, she discovered the internal width was 108 mm, while the new refill pack was designed for 114 mm. The 6 mm gap allowed tissues to shift sideways, jamming the exit.
By returning to the original brand and confirming future orders matched exact internal dimensions, Sarah reduced complaints by 90% and cut annual supply costs due to less waste. Her takeaway? “Never trust the label—measure it yourself.”
Checklist: Ensuring Perfect Tissue Fit Every Time
✅ Measurement Checklist:
- Box is completely empty and clean
- Length measured internally (front to back)
- Width measured internally (side to side)
- Height recorded from base to top rim
- Dispensing aperture dimensions noted
- All values double-checked
- Measurements stored digitally or labeled on box
Frequently Asked Questions
Can I use kitchen or craft paper as a substitute if I can’t find the right size?
You can, but only temporarily. Generic sheets often lack the softness, strength, and folding pattern of purpose-made tissues. They also may not feed smoothly through the aperture and could damage the box over time.
Do recycled tissue boxes differ in sizing?
Sometimes. While most adhere to industry standards, eco-friendly brands may use slightly different molds to reduce material usage. Always verify dimensions, especially if switching from conventional to sustainable options.
What should I do if my tissue box is warped or damaged?
If the structure is compromised, measurements won’t reflect true capacity. Replace the box first, then remeasure. Storing boxes in humid areas (like bathrooms) accelerates warping—opt for dry, ventilated spaces.
Final Thoughts: Precision Pays Off
Measuring your tissue box correctly takes less than five minutes but delivers lasting benefits. It prevents frustration, reduces waste, and ensures seamless integration into homes, offices, and public spaces. Whether you're managing household supplies or overseeing facility logistics, taking control of your measurements empowers smarter decisions.


 浙公网安备
33010002000092号
浙公网安备
33010002000092号 浙B2-20120091-4
Comments
No comments yet. Why don't you start the discussion?