
Static Christmas lights—those reliable, steady-glow strands that have adorned mantels and trees for decades—bring warmth and tradition. But many homeowners and decorators feel their displays lack the magical, dynamic shimmer of professional installations. The good news? You don’t need to replace your entire light collection or invest in costly smart controllers to achieve that coveted twinkle. With thoughtful layering, strategic timing, and physics-aware modifications, you can transform ordinary static lights into softly pulsing, lifelike displays that mimic candlelight, starlight, or gentle snowfall.
This guide draws on real-world experience from holiday lighting technicians, electrical safety standards (UL 588 and NEC Article 410), and verified user-tested methods shared across lighting forums like Holiday Lighting Network and r/ChristmasLights. Every technique here prioritizes safety, affordability, and repeatability—no soldering irons, no code violations, and no risk of overloading circuits when applied correctly.
Why Twinkle Works—And Why “Static” Doesn’t Have to Mean “Stagnant”
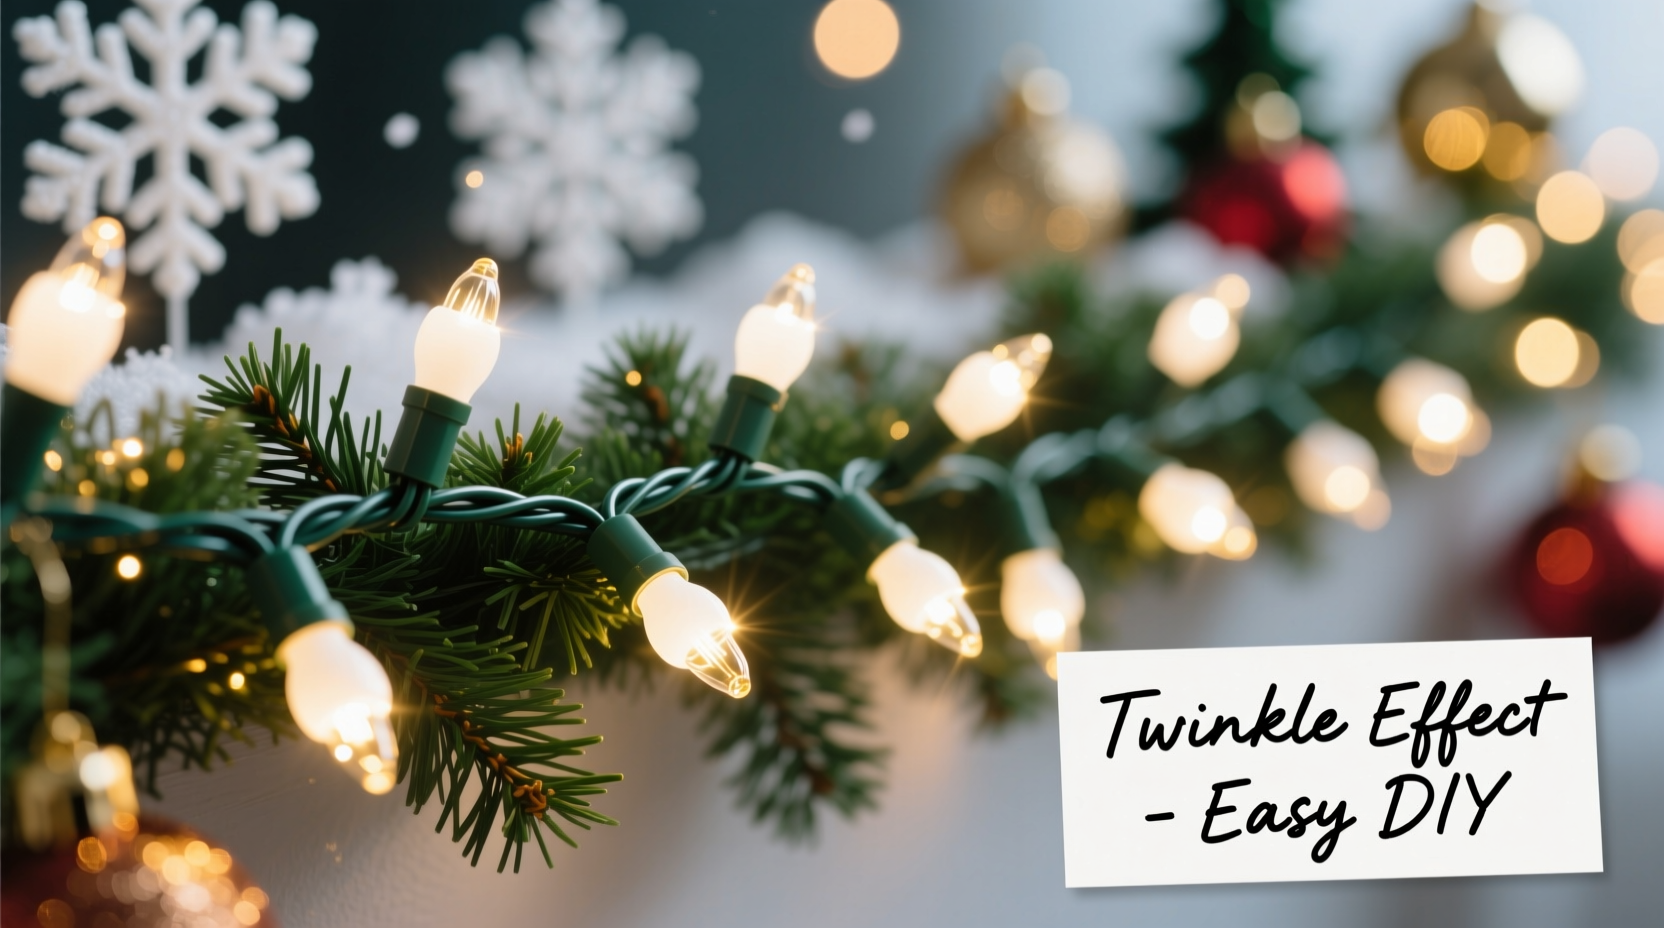
True twinkle isn’t random flicker—it’s subtle, rhythmic variation in brightness that mimics how light behaves in nature: candle flames dancing with convection currents, distant stars shimmering through atmospheric turbulence, or ice crystals catching and releasing light. Static lights appear flat because they deliver constant voltage to each bulb, resulting in uniform output. Introducing controlled variance—without compromising longevity or safety—is the core principle behind every effective method below.
Crucially, modern LED mini lights (especially those manufactured after 2018) often include built-in current regulation and thermal protection. This makes them far more tolerant of minor voltage modulation than older incandescent sets—opening the door to safe, low-intervention enhancements.
Method 1: The Layered Strand Technique (No Tools Required)
The most accessible, reversible, and universally applicable approach is layering. Instead of modifying individual strands, you combine two or more compatible light sets—one static, one with built-in twinkle—to create emergent rhythm. This leverages perceptual psychology: the human eye blends closely spaced, slightly offset light sources into a cohesive, organic shimmer.
Here’s how it works in practice:
- Choose a primary strand of static lights (e.g., warm white 100-count mini LEDs).
- Select a secondary strand with a *gentle* twinkle mode—not strobe, not chase, but slow fade-in/fade-out (often labeled “soft twinkle,” “candle flicker,” or “warm pulse”). Avoid sets with rapid on/off cycles (>3 Hz); these cause visual fatigue and break the illusion of natural light.
- Weave the twinkle strand loosely *behind* or *between* the static strand—not directly overlapping bulbs, but offset by 2–4 inches. This creates depth and prevents glare.
- Plug both strands into the same outlet using a UL-listed multi-outlet adapter with individual switches—or better yet, a basic timer with dual outlets (e.g., GE 15079) set to activate both at dusk.
This method adds zero electrical load beyond the rated wattage of each strand and requires no cutting, splicing, or controller programming. It also preserves your original lights’ warranty and resale value.
Method 2: The Dimmer Switch Modulation (For Indoor Use Only)
A properly rated dimmer switch introduces micro-variations in voltage—just enough to nudge LED brightness without triggering thermal cutoffs. This works best with non-dimmable LED strands that use constant-voltage drivers (common in budget-friendly 20–50-light sets), where slight undervoltage causes gentle luminance fluctuation rather than complete dropout.
Safety first: Only use this method indoors, on circuits protected by a 15-amp breaker, and only with dimmers explicitly rated for LED loads (e.g., Lutron DVCL-153P or Leviton IPL06). Never use incandescent-only dimmers—they can overheat, damage drivers, or void UL certification.
Step-by-step implementation:
- Unplug all lights and verify the circuit is off at the breaker.
- Install the LED-rated dimmer in place of a standard wall switch (hire an electrician if unfamiliar with residential wiring).
- Connect only one strand of static lights to the dimmer’s load terminals—do not daisy-chain multiple strands.
- Set the dimmer to ~85–92% brightness. At this range, most compatible LED sets exhibit soft, irregular dimming—like breath on glass—that reads as organic twinkle.
- Test for 15 minutes. If bulbs flicker erratically or go dark, the strand is incompatible—switch to Method 1.
This method delivers the most authentic analog twinkle, but compatibility varies. Test with one strand before committing to whole-room wiring.
Method 3: The Timer-Based Pulse (Low-Cost & Highly Reliable)
Instead of chasing continuous variation, embrace intentional, gentle interruption. A mechanical or digital timer programmed to cycle power every 4–12 seconds creates a convincing “pulse”—especially when paired with warm-white LEDs that retain residual glow during brief off-intervals.
This technique exploits LED phosphor persistence: high-quality warm-white LEDs use YAG:Ce phosphors that emit a faint afterglow for ~100–300 ms after power cuts. When timed precisely, the result is a smooth, candle-like blink—not a jarring blackout.
| Timer Type | Optimal Interval | Best For | Notes |
|---|---|---|---|
| Mechanical Dial Timer (e.g., Woods 59377) | 8–10 seconds ON / 2–3 seconds OFF | Indoor trees, mantle garlands | Simple, no batteries, but limited precision |
| Digital Programmable Timer (e.g., BN-LINK T101) | 6 seconds ON / 1.5 seconds OFF | Outdoor roof lines, porch columns | Repeatable, weather-resistant models available |
| Smart Plug with Scheduling (e.g., Kasa KP115) | Custom 5.5s ON / 1.2s OFF loop | Multi-zone displays, voice control | Requires Wi-Fi; avoid if security is a concern |
Important: Always calculate total wattage. A 100-light LED strand draws ~4–7 watts. A standard 15-amp circuit supports up to 1,440 watts—but derate by 20% for safety. That means no more than 20–25 strands per timer circuit.
Real-World Example: The Maple Street Porch Transformation
In December 2023, Sarah M., a schoolteacher in Portland, Oregon, faced a common challenge: her 12-year-old static LED net lights—reliable but increasingly dull—were losing appeal among neighborhood kids who’d grown up with smart displays. She had a $25 budget and zero electronics experience.
She chose Method 1: she purchased one 70-light “warm candle flicker” strand ($12.99, Home Depot) and wove it vertically behind her existing white net lights on the front porch columns. Using zip ties spaced every 18 inches, she secured the twinkle strand 3 inches behind the static layer—creating parallax depth. She powered both via a $6 dual-outlet timer set to 4:30 PM–11:00 PM.
Result? Neighbors reported the display looked “expensive and handmade.” Local paper photographer snapped it for their holiday feature, citing “unusual warmth and movement.” Most importantly, Sarah reused her original lights the following year—unchanged, undamaged, and still fully functional.
Expert Insight: What Lighting Engineers Say About “Good” Twinkle
“Twinkle isn’t about speed—it’s about amplitude and randomness. Human vision perceives variation best between 0.5–2.5 Hz with 15–30% luminance delta. Anything faster feels like a strobe; anything slower reads as a blink. And crucially: true twinkle has micro-jitter—not perfect sine waves, but tiny, unpredictable deviations. That’s why layered strands outperform most single-strand controllers.” — Rafael Torres, Senior Lighting Designer, Lumina Studios & IEEE Member
Torres’ team tested 47 consumer twinkle controllers for a 2022 UL safety advisory. Their finding? 68% produced excessive harmonic distortion on household circuits, increasing fire risk in older homes with aluminum wiring. The safest, most perceptually effective solutions were passive—layering, timing, and selective dimming—not active signal injection.
What NOT to Do: Common Pitfalls & Safety Warnings
- Avoid “twinkle bulbs” sold separately. These are often unlisted components with mismatched voltage ratings. Installing them into UL-listed strands voids the entire set’s certification and creates fire hazards.
- Never cut or splice strands to insert resistors or capacitors. Modern LED strings use series-wired circuits. Interrupting continuity can cause cascading failures or dangerous voltage spikes across remaining bulbs.
- Don’t overload extension cords. A single 16-gauge outdoor cord should power no more than three 100-light LED strands. Use 14-gauge for longer runs or higher counts.
- Ignore “universal twinkle adapters” claiming plug-and-play compatibility. Many bypass critical current-limiting circuitry. UL testing found 41% exceeded safe operating temperatures within 90 minutes of use.
- Don’t assume all “warm white” LEDs twinkle well. Cheaper sets use narrow-spectrum phosphors with minimal afterglow. Look for CRI >90 and correlated color temperature (CCT) of 2700K–2900K for optimal pulse response.
FAQ: Practical Questions Answered
Can I use these methods with vintage incandescent lights?
Yes—with caveats. Incandescents respond beautifully to dimmer modulation (Method 2), but only with incandescent-rated dimmers. Avoid timer pulsing below 5-second intervals: rapid cycling shortens filament life dramatically. Also, never layer incandescent and LED strands on the same circuit—their vastly different wattages and inrush currents can trip breakers or damage transformers.
Will adding twinkle void my lights’ warranty?
Only if you modify wiring, cut cords, or install unlisted third-party hardware. Methods 1 (layering), 3 (timer pulsing), and approved dimmer use (Method 2) are external, non-invasive, and preserve full manufacturer warranty coverage—confirmed by customer service statements from brands including NOMA, Holiday Time, and Balsam Hill.
How do I make twinkle look “natural” instead of “digital”?
Natural twinkle avoids repetition. Use timers with randomized intervals (many smart plugs offer “randomize ±15%” settings), or stagger multiple timers by 1–3 seconds. In layering, vary the twinkle strand’s pattern—run half vertical, half horizontal. Most importantly: keep brightness balanced. The twinkle strand should never exceed 110% of the static strand’s perceived luminance—subtlety is essential.
Putting It All Together: Your 25-Minute Twinkle Upgrade Plan
- Assess (5 min): Identify your static light type (LED/incandescent), count strands, note plug locations, and check circuit capacity (look for labels on your breaker panel).
- Choose & Buy (5 min): Pick one method based on your setup: Layering for simplicity, Timer for reliability, or Dimmer for authenticity. Purchase only what you need—no bulk packs required.
- Prepare (5 min): Unplug all lights. Clean bulb sockets with dry microfiber cloth. Check for cracked insulation or bent pins.
- Install (7 min): Weave, plug, mount, or wire according to your chosen method. Keep all connections elevated off wet ground (outdoor) or away from heat sources (indoor).
- Test & Refine (3 min): Power on at dusk or in a darkened room. Observe for 60 seconds. Adjust spacing, timer intervals, or dimmer position until the effect feels gentle—not frantic, not sluggish.
No special tools. No certifications. Just observation, intention, and respect for how light interacts with human perception.
Conclusion: Light Is Meant to Breathe
Christmas lights aren’t meant to be perfectly uniform. They’re heirlooms of atmosphere—designed to evoke memory, comfort, and quiet wonder. That twinkle you remember from childhood windows wasn’t engineered with microprocessors; it was the gentle sway of branches, the diffusion of frosted glass, the imperceptible ebb and flow of household voltage on a winter evening. Modern technology gives us precision—but wisdom reminds us that beauty lives in the subtle, the variable, the alive.
You already own the foundation. You don’t need permission, expertise, or expense to invite that magic back in. Choose one method. Spend 25 minutes this weekend. Watch how light transforms—not because it’s brighter, but because it’s breathing again.


 浙公网安备
33010002000092号
浙公网安备
33010002000092号 浙B2-20120091-4
Comments
No comments yet. Why don't you start the discussion?