
Applying false eyelashes can elevate your makeup look from simple to stunning—but too often, the process ends in frustration. Glue smears on eyelids, lashes shift mid-blink, or irritation sets in minutes after application. The issue isn’t the lashes themselves; it’s the method. With the right preparation, tools, and technique, you can achieve seamless, comfortable, long-lasting falsies that stay put without a single blink-induced wobble or messy adhesive trail.
The key lies in precision, patience, and understanding both your eye shape and the behavior of lash adhesives. Whether you’re a beginner or someone who’s struggled with falsies for years, refining your approach can transform the experience from chaotic to effortless.
Choose the Right Lashes and Adhesive
Not all lashes are created equal—and neither are adhesives. Selecting compatible materials is the foundation of a clean, stable application.
For beginners, opt for lightweight, strip lashes with a flexible band. Thicker, dramatic styles may look impressive, but they’re harder to control and more likely to cause discomfort or misalignment. Look for lashes labeled “natural” or “feathered” for everyday wear and easier handling.
Adhesive choice is equally critical. Clear glue dries transparent and is ideal if you're worried about visible residue. Black glue, however, can double as eyeliner, helping to mask the band and blend seamlessly with winged liner. However, black glue tends to be thicker and takes longer to set—increasing the risk of smudging if applied incorrectly.
Recommended Adhesive Features
- Dries matte (not shiny)
- Medium viscosity—not too runny, not too thick
- Flexible hold (allows slight movement without breaking)
- Available in small-tube packaging for precise control
Prepare Your Eyes and Tools
Skin condition and pre-application habits dramatically affect how well lashes adhere and how comfortable they feel. Skipping prep leads to slippage, glue migration, and uneven bonding.
Begin by removing any oils, moisturizers, or leftover makeup from your eyelids. Even a trace of concealer or serum creates a barrier that prevents adhesive from gripping the skin. Use an oil-free micellar water or gentle cleanser on a cotton pad, wiping downward from brow bone to lash line.
Next, curl your natural lashes and apply a light coat of mascara. This helps your real lashes interlock with the falsies, creating a unified look and reducing the visibility of gaps. Avoid heavy or waterproof mascara—it clumps and makes lash alignment difficult.
Before applying glue, isolate your tools: tweezers, lash applicator, mirror (preferably magnifying), and a lint-free applicator like a toothpick or bobby pin for adjusting glue spots. Having everything within reach minimizes blinking and fumbling once the adhesive is active.
“Prep is half the battle. Clean, dry lids ensure maximum adhesion and prevent last-minute glue slides.” — Lena Tran, Professional Makeup Artist & Lash Educator
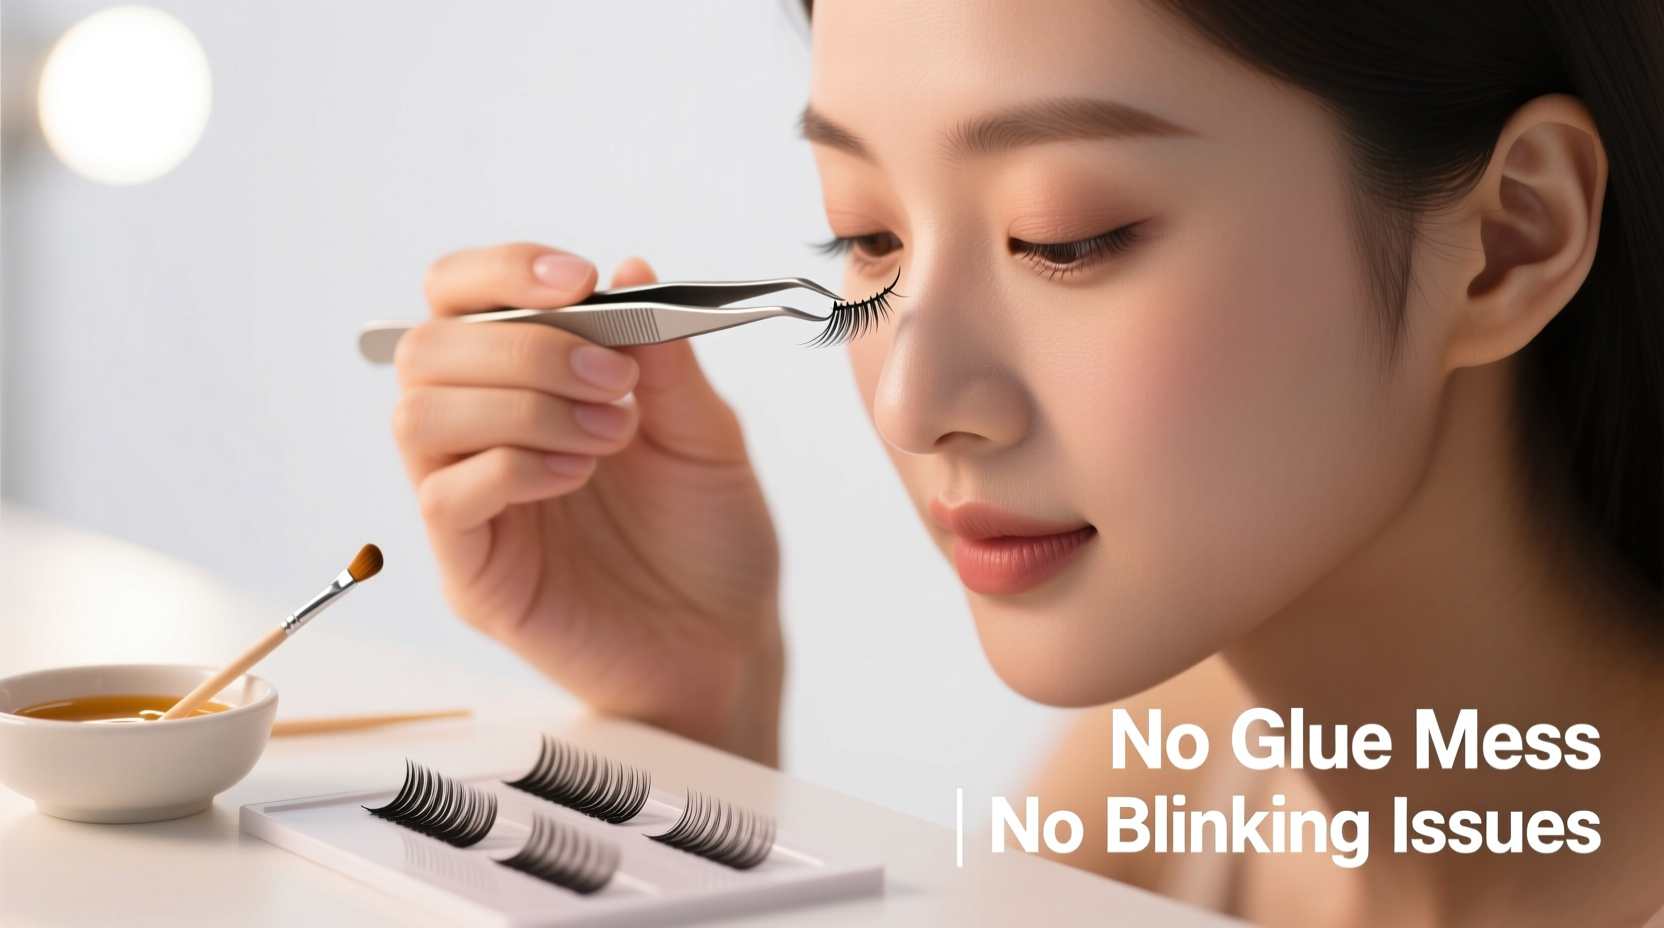
Step-by-Step Application Process
Success hinges on timing, placement, and controlled movements. Follow this timeline for a mess-free, blink-stable result.
- Trim the lashes to fit your eye shape. Hold the strip against your lash line starting from the inner corner. Mark where the outer edge ends, then snip with small scissors. A lash that extends past your natural lid will lift at the end and irritate the outer eye.
- Shape the band. Gently bend the lash strip into a C-curve by rolling it between your fingers. This mimics the natural curve of your eyelid and ensures even contact from corner to corner.
- Apply a thin, even layer of glue to the band. Squeeze a rice-grain-sized drop onto the back of your hand. Using a toothpick or the tip of the glue nozzle, spread a micro-thin line along the entire band. Focus extra glue only on the center and outer third—these areas tend to lift first.
- Wait 30–45 seconds. This is crucial. Fresh glue is slippery. Letting it become tacky creates instant grip upon contact. Blinking during this wait is fine—just avoid touching your eyes.
- Position with precision. Look down into a mirror placed on a flat surface. Use tweezers or an applicator to place the center of the lash strip first, aligning it with your pupil. Press gently. Then secure the inner corner, followed by the outer tail. Don’t rush—the first 5 seconds of contact determine stability.
- Press and seal. Close your eyes and use a clean fingertip or the handle of a spoolie to press the band firmly along the lash line for 10–15 seconds. This bonds the adhesive through minor movement and warmth.
- Check and correct. Open your eyes slowly. If there’s a gap or bubble, use a toothpick to nudge the band into place. Dab excess glue with a pointed cotton swab dipped in micellar water.
Avoid Common Mistakes: Do’s and Don’ts
Even experienced users fall into traps that lead to glue buildup or discomfort. This table outlines frequent errors and their solutions.
| Do’s | Don’ts |
|---|---|
| Use a thin, even layer of glue | Don’t flood the band with excess adhesive |
| Wait until glue is tacky before applying | Don’t apply immediately after gluing |
| Store lashes in their case after cleaning | Don’t leave lashes exposed to dust or moisture |
| Use a magnifying mirror for precision | Don’t rely solely on phone screen reflection |
| Replace glue every 3–6 months | Don’t use dried-out or stringy adhesive |
One of the most overlooked mistakes? Applying lashes while standing over a sink or sink mirror. The angle distorts depth perception, making it hard to judge distance. Sit at a table with the mirror flat in front of you for a true overhead view.
Real-World Example: From Frustration to Flawless
Sophia, a 28-year-old graphic designer, had given up on falsies after multiple failed attempts. She’d always ended up with glue stuck to her eyelid, and her eyes would water within minutes. After researching techniques, she changed three things: she started using a tacky-latex-free glue, began applying lashes before eyeshadow, and switched to a magnifying desktop mirror.
Her breakthrough came when she realized she was applying too much glue—especially near the inner corners. By reducing the amount and waiting 40 seconds before placement, her lashes stayed put for 12 hours without shifting. Now, she wears them weekly and even applies individual clusters for events. “It wasn’t the lashes,” she said. “It was the method I was missing.”
Maintain Comfort and Longevity Throughout the Day
Once applied, your goal is comfort and stability. Blinking shouldn’t dislodge lashes—if it does, the bond wasn’t secure or the weight distribution is off.
If you feel a tug or flutter when blinking, gently press the lifting area again with a fingertip. You can also use a clean spoolie to lightly brush your natural lashes upward into the falsies, reinforcing the blend.
To extend wear time, avoid touching your eyes and steer clear of oily skincare products near the lash line. At the end of the day, remove lashes carefully by loosening the band with a cotton swab dipped in oil-free makeup remover. Peel slowly from the outer corner inward.
Clean reusable lashes by swiping the band with a bit of remover on a cotton bud. Let them air-dry in their case overnight. Proper care allows a single pair to last 15–20 uses.
Frequently Asked Questions
Why do my false lashes keep lifting when I blink?
Lifting usually occurs due to insufficient adhesive tackiness or improper placement. Ensure the glue is no longer wet-shiny before applying. Also, check that the lash band follows your natural lash line curvature—gaps at the corners are common lift points.
Can I use eyelash glue on sensitive skin?
Yes, but choose a hypoallergenic, latex-free formula. Always patch-test behind your ear or on your inner arm before using near your eyes. If redness or itching occurs, discontinue use.
How do I fix glue smudges without ruining my makeup?
Let the glue dry completely, then gently roll a pointed cotton swab over the smudge. If it’s stubborn, dampen the tip with micellar water and dab—never rub. Conceal any remaining marks with a tiny brush and skin-toned product.
Final Checklist: Apply Lashes Like a Pro
Before each application, run through this checklist to eliminate errors before they happen:
- ✅ Eyes are clean, dry, and free of oils
- ✅ Lashes are trimmed to fit your eye length
- ✅ Band is pre-shaped to match your lid curve
- ✅ Glue is fresh and applied in a thin, even layer
- ✅ Glue has been allowed to become tacky (30–45 sec wait)
- ✅ Mirror is positioned for optimal visibility
- ✅ Tools (tweezers, swabs, toothpick) are ready
- ✅ Final press is done with gentle, even pressure
Conclusion: Elevate Your Lash Game with Confidence
Applying fake eyelashes without glue mess or blinking issues isn’t about luck—it’s about mastering a repeatable process. From selecting the right materials to perfecting the timing of adhesive activation, every detail contributes to a seamless finish. Once you internalize these steps, what once felt like a high-maintenance ordeal becomes a quick, reliable part of your routine.
False lashes should enhance your expression, not distract from it. When applied correctly, they move naturally with your eyes, survive a full day of wear, and draw compliments—not questions about what went wrong. Take the time to practice, refine your technique, and trust the process. The results are worth it.


 浙公网安备
33010002000092号
浙公网安备
33010002000092号 浙B2-20120091-4
Comments
No comments yet. Why don't you start the discussion?