
Applying false eyelashes can be intimidating, especially when your hands naturally tremble. For many beginners—particularly those managing conditions like essential tremor, anxiety, or fatigue—the process feels more like a high-stakes balancing act than a beauty routine. But shaky hands don’t have to mean smudged glue or misaligned lashes. With the right tools, techniques, and mindset, you can achieve a polished, fluttery look without frustration. This guide breaks down a practical, stress-free method tailored specifically for those who struggle with hand stability.
Why Shaky Hands Make Lash Application Challenging
False eyelashes require precision. The margin for error is slim: a millimeter off-center can make lashes appear crooked or uneven. When your hands shake, even slightly, it magnifies small movements, making it difficult to align the lash band precisely along your natural lash line. Additionally, the act of holding tweezers while reaching toward your eye can trigger a natural flinch response, leading to accidental pokes or glue mishaps.
According to Dr. Lena Patel, a neurologist specializing in movement disorders, “Fine motor tasks like applying makeup can become disproportionately difficult with even mild tremors. The key isn’t strength—it’s stability and support.” This insight underscores why traditional lash application advice often falls short for those with less control over their hand movements.
Essential Tools for a Steady Application
The right tools reduce reliance on perfect hand control. Instead of fighting your physiology, choose products designed to simplify the process and minimize wobble.
| Tool | Recommended Type | Why It Helps with Shaky Hands |
|---|---|---|
| Adhesive | Quick-dry lash glue with a fine applicator tip | Reduces drying time and allows for more precise placement |
| Tweezers | Flat-tipped or magnetic lash applicator | Provides better grip and reduces slippage compared to pointed tweezers |
| Lashes | Shorter, wispy styles with flexible bands | Easier to position and blend; flexible bands conform to natural lash line |
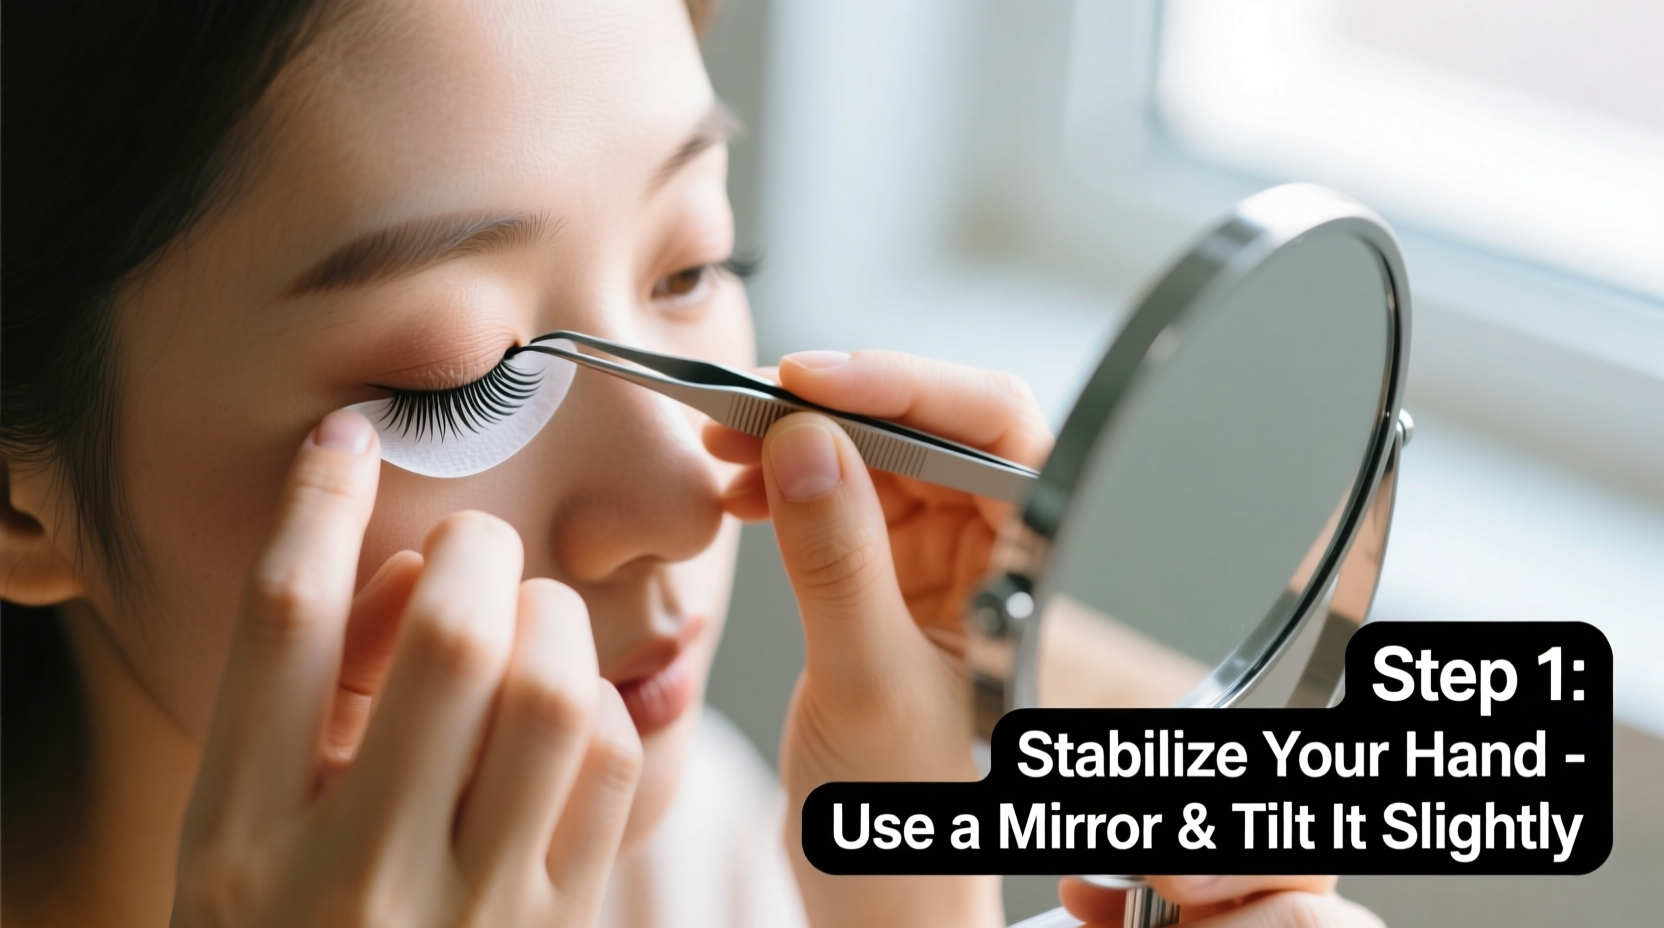
| Mirror | Magnifying mirror with adjustable neck | Allows you to keep your head still while bringing the mirror closer |
| Support Tool | Makeup stabilizing spoon or bridge tool | Braces your hand against your face for steadier control |
Step-by-Step Method for Applying Lashes with Shaky Hands
This method prioritizes stability, repetition, and incremental progress. Rather than trying to place the entire lash at once, break the process into manageable stages.
- Prepare Your Workspace
Set up in a well-lit area with your mirror at eye level. Sit in a chair with armrests so you can rest your elbows. This creates a stable base for your arms, minimizing hand tremors caused by unsupported limbs. - Trim Lashes to Fit (Optional but Recommended)
Even if the lashes are labeled \"one size,\" trim them to match the length of your natural lash line. Start from the outer corner and snip small sections. A proper fit means less adjustment during application, reducing the need for last-minute corrections that amplify shakiness. - Apply Glue Strategically
Squeeze a small dot of glue onto the back of your hand. Using a toothpick, apply a thin layer only to the inner third, middle, and outer third of the lash band. Avoid coating the entire band—this gives you time to adjust positioning without the glue setting too fast. - Let the Glue Get Tacky
Wait 30–45 seconds. This is crucial. Fresh glue is slippery; tacky glue grips better. Set a timer if needed. During this time, close your eyes and take two deep breaths to calm your nerves and steady your hands. - Use the Two-Point Placement Technique
Instead of placing the entire lash at once, anchor the center first. Open your eyes just enough to see the mirror reflection of your lash line. Use flat-tipped tweezers to gently press the middle of the lash band directly onto the center of your natural lash line. Hold for 3 seconds. This central point becomes your alignment guide. - Secure the Inner Corner
With the center fixed, shift focus to the inner edge. Gently nudge the inner portion into place using the side of the tweezers or your fingertip. If your hands shake, brace your elbow on the table and use your knuckle to lightly press the mirror forward, keeping your head still. - Adjust the Outer Edge
Finally, secure the outer end. You may not need tweezers here—sometimes, a light touch with your ring finger is more controlled. Align it with the outer edge of your eye, following the natural upward curve. - Blend and Finish
Once both lashes are on, use a clean spoolie or lash comb to blend your natural lashes with the falsies. Apply one coat of mascara to seal the look. Avoid heavy tugging—if something feels off, wait until removal time to reassess.
Real Example: Sarah’s First Successful Application
Sarah, a 34-year-old teacher with mild essential tremor, had given up on false lashes after multiple failed attempts. “I’d get halfway through and my hand would jerk, and the lash would stick to my eyebrow or my cheek,” she said. After learning the two-point technique and switching to a flexible, wispy style, she tried again—this time resting her elbow on her bathroom counter and using a magnifying mirror clipped to the edge.
“I focused only on the center first. Once that was down, the rest felt doable. I used my pinky to stabilize my hand against my cheek. It took eight minutes, but they were straight—and stayed on all night.” Sarah now uses this method weekly before events and says it’s transformed her confidence.
Checklist: False Lash Application for Shaky Hands
- ✅ Sit at a table with armrests or a firm surface to rest elbows
- ✅ Use a magnifying mirror at eye level
- ✅ Choose flexible, lightweight lashes with a soft band
- ✅ Apply glue only to three points: inner, middle, outer
- ✅ Wait 30–45 seconds for glue to become tacky
- ✅ Anchor the center of the lash first
- ✅ Use your non-dominant hand to gently pull the outer corner of your eye taut
- ✅ Brace your wrist or hand against your face or a spoon tool
- ✅ Breathe steadily and work slowly—no rush
- ✅ Practice on days when you feel calmer to build muscle memory
“The secret to mastering delicate beauty tasks with tremors isn’t perfection—it’s adaptation. Find your points of contact, slow down, and let consistency build confidence.” — Mia Tran, Professional Makeup Artist & Disability Inclusion Advocate
Common Mistakes to Avoid
Even with the right tools, small errors can derail your efforts. Here’s what to watch for:
- Using too much glue: Excess adhesive spreads and causes slipping. Less is more.
- Trying to fix placement after glue sets: Once the bond forms, repositioning usually results in clumping or tearing. If it’s way off, remove and restart.
- Applying with wide-open eyes: This strains facial muscles and increases micro-tremors. Keep your eyes slightly narrowed or use one eye at a time with the other closed.
- Skipping the tacky wait time: Wet glue = sliding lashes. Patience improves accuracy.
- Using stiff, thick bands: These are harder to mold and require more precise handling—avoid as a beginner.
Alternative Methods for Extra Stability
If tweezers still feel unstable, consider these adaptive approaches:
Magnetic Eyeliner and Lashes
No glue, no shaking-related mess. Magnetic lashes snap into place using magnetized liner. Apply the liner carefully (same steady setup), then lower the lash so magnets align. Some users report easier control since there’s no waiting for tackiness and no risk of glue smearing.
Finger Application
Forget tweezers altogether. Use your ring finger—typically the steadiest due to its connection to the pinky—to press the lash into place. Dip the fingertip in glue or use pre-glued strips. This method reduces tool dependency and leverages natural hand mechanics.
The Spoon Trick
Place a clean, rounded teaspoon handle between your teeth. The spoon’s bowl rests gently under your eye, acting as a physical guide for your hand. Rest your fingers on the spoon while placing lashes. It limits range of motion and dampens tremors.
FAQ
Can I apply false lashes if I have Parkinson’s or severe tremors?
Yes, though it may require adaptive tools. Many people use magnetic lashes, eyelash extensions, or seek help from a professional. Occupational therapists also recommend weighted makeup brushes or stabilizing cuffs to improve control.
What kind of false lashes are best for beginners with shaky hands?
Choose shorter, wispy styles with thin, flexible cotton or silk bands. Avoid dramatic, dense lashes or rigid plastic bands—they’re harder to position accurately and less forgiving of minor misalignment.
How long does it take to get good at applying lashes with shaky hands?
With consistent practice—about 5–10 minutes, 2–3 times per week—most beginners see improvement within 2–4 weeks. Focus on progress, not perfection. Even one successful application builds confidence.
Final Thoughts and Encouragement
Mastering false eyelashes with shaky hands isn’t about eliminating tremors—it’s about working with your body, not against it. The techniques outlined here shift the focus from precision to stability, from speed to strategy. You don’t need rock-steady hands to enjoy the drama and depth that falsies bring. You just need the right approach.
Every expert was once a beginner fumbling with glue and tweezers. What separates success from frustration isn’t talent—it’s persistence and smart adjustments. Try the two-point method. Use the checklist. Be kind to yourself when it doesn’t go perfectly. Each attempt strengthens your muscle memory and confidence.


 浙公网安备
33010002000092号
浙公网安备
33010002000092号 浙B2-20120091-4
Comments
No comments yet. Why don't you start the discussion?