
Applying false eyelashes should enhance your look, not create a sticky mess. Too often, the process leaves behind glue residue along the lash line—visible under bright light, irritating sensitive eyes, and difficult to remove without tugging at delicate skin. For those seeking a cleaner, more precise method, especially when traditional tools like fingers or applicators feel clumsy, mastering the technique of applying falsies with tweezers alone can be transformative. This approach offers superior control, minimizes contact with adhesive, and significantly reduces the risk of leftover glue buildup. With the right tools, preparation, and precision, you can achieve salon-quality results at home—without residue, redness, or reapplication.
The Problem with Traditional Lash Application
Most tutorials recommend using fingers or plastic applicators to press false lashes into place after applying glue. However, these methods often lead to excess adhesive spreading beyond the band, smudging onto the eyelid, or hardening in tiny clumps along the lash line. Fingers lack precision, and plastic tools can slip, forcing users to adjust the lashes multiple times—each adjustment adding more glue and increasing the chance of residue. Even experienced makeup wearers struggle with this issue, particularly when working with strip lashes that require exact alignment.
Tweezers, when used correctly, eliminate much of this guesswork. Their fine tips allow for millimeter-level placement, reducing the need for post-application corrections. Because you’re not pressing down with broad surfaces, less pressure is applied to the glue itself, preventing it from squeezing out from beneath the lash band. This controlled touch is the first step toward achieving a clean, residue-free finish.
Essential Tools and Preparation
Success begins before the first lash is lifted. Using only tweezers demands meticulous preparation, as there’s little room for error once the adhesive is activated. Here’s what you’ll need:
- Precision tweezers – Preferably stainless steel with a fine, pointed tip for maximum control.
- High-quality false lashes – Opt for lightweight synthetic or silk fibers with thin, flexible bands. Thicker bands trap more glue and are harder to align cleanly.
- Lash adhesive – Choose a latex-free, quick-dry formula in a small tube. These dry faster and produce less seepage.
- Mirror – A magnifying mirror with at least 5x zoom helps spot micro-movements and alignment issues.
- Cotton swabs and micellar water – For immediate correction if needed, though the goal is to avoid needing them.
Before starting, ensure your natural lashes and eyelids are completely clean and free of oils or moisturizers. Any residue creates a barrier that weakens adhesive bond, prompting users to apply more glue—which increases the risk of overflow. Wash your face and gently wipe the lash line with a cotton pad dampened with micellar water. Let the area dry fully.
Pre-Fit Your Lashes
Hold the false lash strip against your lash line with tweezers to check length. If the outer edge extends past your natural eye contour, trim it with small scissors from the outer end—not the center—to maintain the lash’s shape. Then, lightly press the band along your lash line (without glue) to see where it naturally sits. This “dry run” helps identify any gaps or lifting points before adhesive is involved.
“Precision tools change everything in beauty routines. Tweezers give you surgical control over placement, which directly reduces glue manipulation and residue.” — Lena Park, Professional Makeup Artist & Beauty Educator
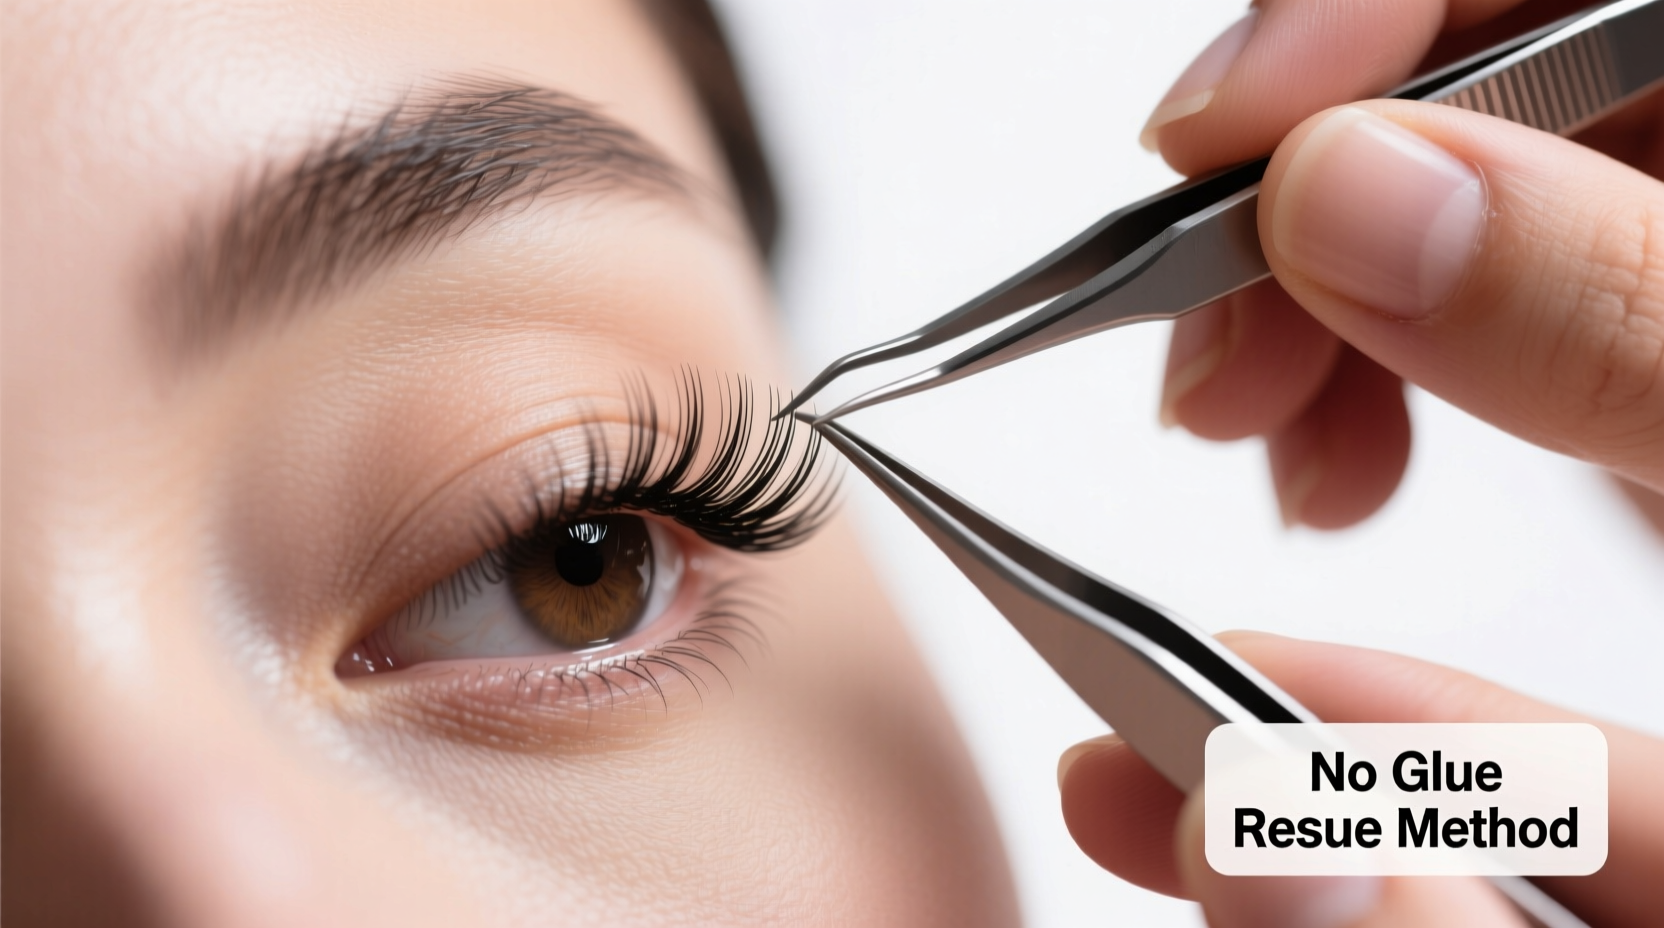
Step-by-Step: Applying False Lashes with Tweezers Only
This technique relies on minimal glue usage and strategic bonding points rather than full-band saturation. Follow this sequence carefully:
- Apply a pea-sized drop of glue to a flat surface – Squeeze a tiny amount of adhesive onto the back of your hand or a palette. Dipping the lash band directly into the tube leads to over-application.
- Use tweezers to lift the lash by the center of the band – Grip the middle section gently but firmly. Avoid touching the fibers.
- Dip only the ends and center of the band into the glue – Touch three points: left end, center, right end. Each should pick up a rice-grain-sized amount. Do not drag the entire band through the glue.
- Wait 30–45 seconds for the adhesive to become tacky – This is critical. Fresh glue is too liquid and will smear. Tacky glue bonds instantly on contact, reducing adjustment needs.
- Position the lash starting at the center – Using the tweezers, place the center of the lash band directly on top of your natural lash line, just above the roots. Press and hold for 3 seconds. The tweezers’ pressure should be firm but brief.
- Secure the inner corner – Without releasing the center, shift the tweezer tip to the inner third of the lash and press it down. Hold for 2 seconds.
- Finish with the outer corner – Move to the outer edge and press it flush with your lash line. If the lash lifts slightly at the end, use the very tip of the tweezers to nudge it into place without adding more glue.
- Repeat for the other eye – Work one eye at a time to maintain focus and consistency.
Do not attempt to reposition the lash once placed. If it’s misaligned, remove it immediately with tweezers, wipe off old glue with a cotton swab, and start again. Reapplying glue over dried residue increases bulk and visibility.
Why This Minimizes Residue
By applying glue only at key anchor points and allowing it to become tacky, you create instant adhesion where it’s most needed—corners and center—while avoiding excess along the band. Since tweezers allow for exact placement in one motion, there’s no repeated pressing or shifting that forces glue out from underneath. Additionally, because your fingers never touch the adhesive, contamination and uneven spread are eliminated.
Common Mistakes and How to Avoid Them
Even with tweezers, improper technique can still result in residue. Below are frequent errors and their solutions:
| Mistake | Why It Causes Residue | Solution |
|---|---|---|
| Using too much glue | Excess squeezes out when pressed, hardening on skin | Apply glue to only 3 points; use a toothpick to remove excess |
| Applying lashes too soon after gluing | Wet glue spreads easily and takes longer to set | Wait 30–45 seconds until glue is tacky |
| Adjusting position after initial placement | Dragging the lash breaks the seal and redistributes glue | Place in one motion; if wrong, remove and restart |
| Gripping the lash fibers instead of the band | Oils from tweezers or poor grip cause instability | Always hold the band near the base, avoiding the fibers |
| Not trimming lashes to fit | Overhang prevents flush contact, creating gaps filled with glue | Measure and trim before gluing |
Real-World Example: A Client’s Breakthrough
A client of mine, Sarah, had avoided false lashes for years due to persistent glue flaking throughout the day. She’d tried every brand and tool, always ending up with tiny white specks along her lash line by mid-afternoon. During a consultation, I noticed she was using a thick adhesive and pressing the entire band down with her fingers, which smeared glue outward.
We switched to a precision tweezer-only method with a quick-dry, latex-free glue. I guided her through the three-point application and emphasized the wait time for tackiness. On her first try, she successfully applied both lashes in under four minutes—with zero visible residue. Two weeks later, she reported wearing them to a wedding without needing touch-ups. “I finally feel confident,” she said. “No more picking at little glue bits all night.”
Post-Application Care and Removal
To preserve your skin and prevent future residue buildup, proper removal is just as important as application. Never pull lashes off directly. Instead:
- Soak a cotton pad with oil-free micellar water.
- Hold it against the lash line for 30 seconds to dissolve the adhesive.
- Use tweezers to gently lift one end of the band and slide it off horizontally.
- Wipe away any remaining glue with a swab—do not rub vertically.
Clean the lash band with a bit of rubbing alcohol on a swab to prepare for reuse. Store in its original tray to maintain shape.
Frequently Asked Questions
Can I use any type of tweezers for this?
No—not all tweezers are suitable. Standard eyebrow tweezers may be too short or blunt. Look for ones specifically designed for lash application: long, fine-tipped, and preferably anti-slip. Stainless steel models are easier to clean and provide better grip.
What if the glue dries too fast?
If your adhesive becomes unworkable before you’re ready, switch to a formula labeled “extended working time” or “slow-dry.” Alternatively, store the glue in a cool, dark place to slow curing. Always cap it tightly after use to prevent drying out.
Are there glue-free alternatives that work with tweezers?
Yes, magnetic lashes eliminate glue entirely and can be positioned precisely with tweezers. However, they require matching magnetic eyeliner and may not provide the same seamless blend as traditional strips. For a truly residue-free experience without adhesives, they’re worth exploring.
Final Thoughts and Call to Action
Mastering false eyelash application with tweezers alone isn’t just about convenience—it’s about elevating your routine to one of precision, cleanliness, and confidence. By minimizing glue use, leveraging the accuracy of fine tools, and following a disciplined process, you can enjoy dramatic lashes without the telltale signs of residue or irritation. This method rewards patience and practice, but the payoff is consistent, camera-ready results with healthier eyelids over time.
The next time you reach for falsies, leave the fingers behind and trust the tweezers. Start slow, focus on placement, and celebrate the small victories—a perfectly aligned wing, a budge-free wear, a clean removal. Share your progress, experiment with different lash styles, and refine your technique. Beauty isn’t about perfection; it’s about control, care, and the quiet satisfaction of getting it right—without a trace left behind.


 浙公网安备
33010002000092号
浙公网安备
33010002000092号 浙B2-20120091-4
Comments
No comments yet. Why don't you start the discussion?