
Applying false eyelashes can elevate your makeup game instantly, adding volume, length, and drama with minimal effort. But one of the most common frustrations? Visible glue lines that ruin an otherwise perfect look. Whether you're preparing for a special occasion or just enhancing your everyday style, eliminating visible adhesive is essential for achieving a clean, natural finish. The good news is that with the right preparation, technique, and tools, it’s entirely possible to apply falsies seamlessly—without a trace of glue in sight.
Understanding Why Glue Shows
Before mastering the solution, it's important to understand why glue often becomes visible during application. Most issues stem from improper lash band thickness, excess adhesive, incorrect drying time, or misalignment with the natural lash line. Many drugstore lashes come with thick, stiff bands that are difficult to conceal, even when glued perfectly. Additionally, applying too much glue causes it to seep out from under the band when pressed down, creating white or clear blobs at the corners or along the lash line.
Another contributing factor is rushing the process. When glue isn’t given enough time to become tacky before application, it remains wet and spreads easily upon contact. This increases the likelihood of smudging and visibility. Furthermore, if the lashes aren't trimmed to fit your eye shape properly, gaps form at the inner or outer corners, allowing glue to peek through.
Step-by-Step Guide to Invisible Lash Application
Achieving invisible glue comes down to precision and patience. Follow this detailed sequence to ensure your falsies look like they grew from your lids.
- Choose the Right Lashes: Opt for falsies with thin, flexible bands—preferably made from transparent or black polymer rather than thick black plastic. These blend more naturally with your lash line.
- Trim to Fit: Hold the lash strip against your eyelid and trim from the outer end if needed. The goal is to have the lash start where your natural lashes begin and end before reaching the outer corner crease.
- Pre-Curl Natural Lashes: Use an eyelash curler on your real lashes first. This helps them align better with the false ones and creates a cohesive base.
- Apply Minimal Adhesive: Squeeze a small amount of lash glue onto the back of your hand. Using a toothpick or the applicator brush, apply a very thin, even layer along the band. Avoid pooling glue at the ends.
- Wait 30–45 Seconds: Let the glue become tacky. This step is crucial—freshly applied glue is too wet and will spread when pressed.
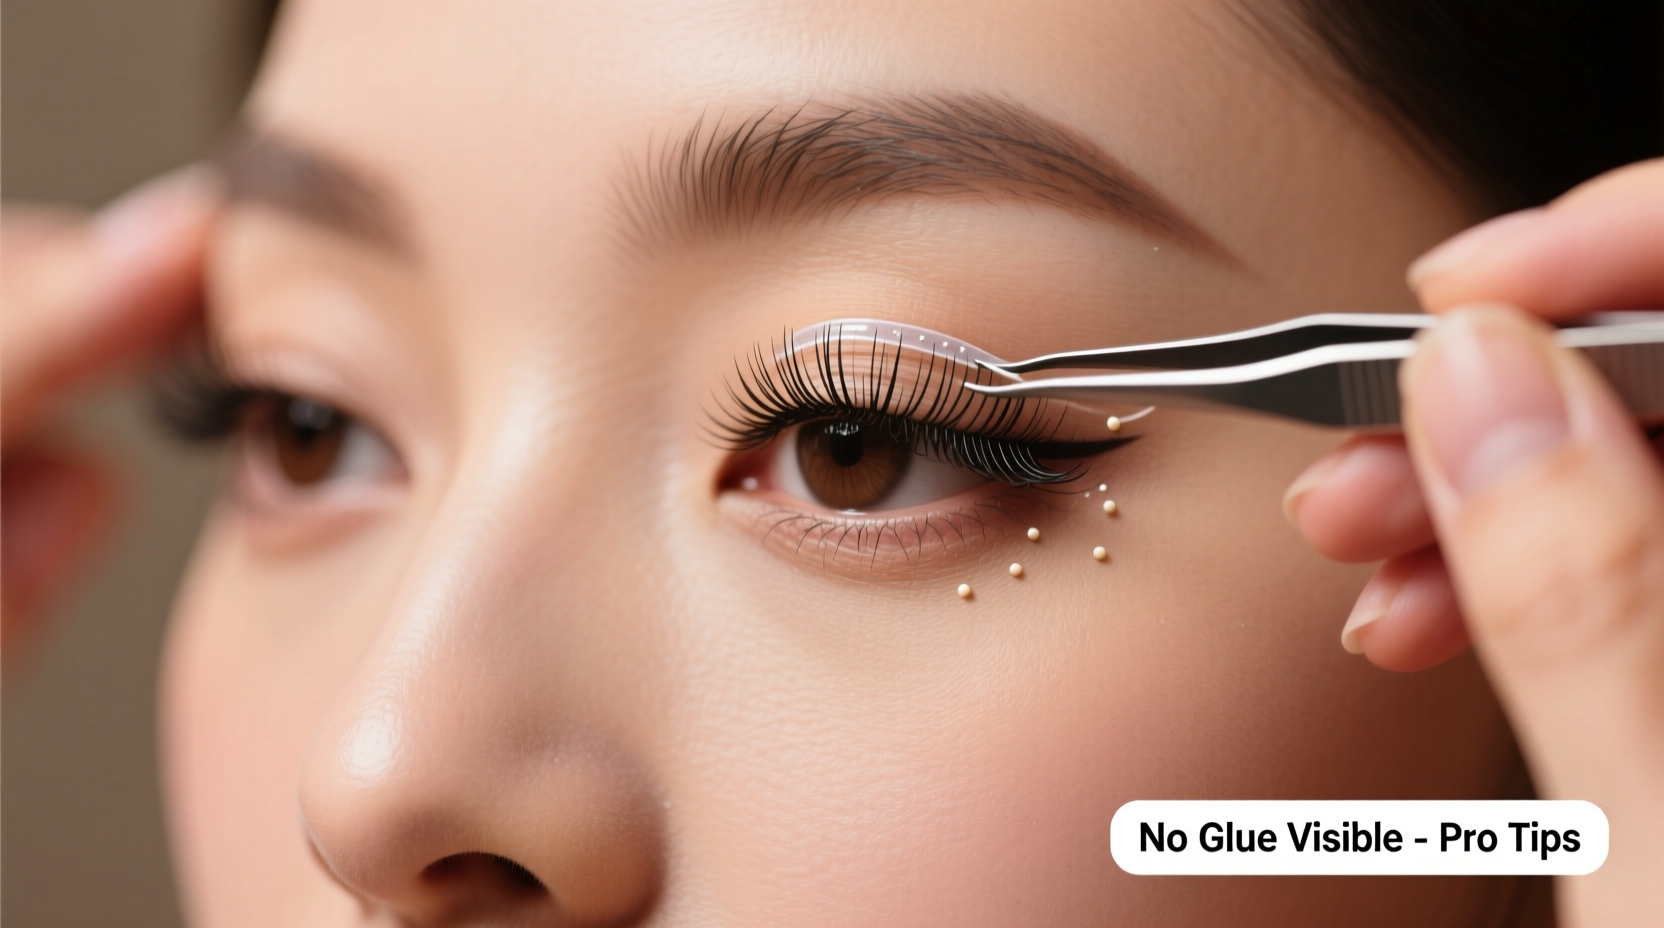
- Use Tweezers or Applicator: Pick up the lash with precision tools. Position it as close to your natural lash line as possible, starting from the center and then pressing down the inner and outer corners.
- Press Gently with a Spoolie or Eyelash Curler: Once placed, use a clean spoolie or the edge of an eyelash curler to press the band gently into place, especially at the corners where glue tends to show.
- Blend with Mascara: After both eyes are done, apply one coat of mascara to merge your natural lashes with the falsies. This hides any minor gaps and secures everything together.
Essential Tools and Products
The success of invisible lash application hinges not only on technique but also on the quality of products used. Here’s what makes a difference:
- Lash Glue: Choose a latex-free, clear-drying formula for transparency, or black glue to camouflage along dark lash lines. Popular options include Duo Clear Striplash Adhesive and House of Lashes Lash Adhesive.
- Thin-Tipped Applicator: A fine brush or toothpick allows controlled glue distribution without over-application.
- Magnetic Tweezers or Lash Applicator: These provide better grip and accuracy than fingers, reducing the chance of disturbing the glue placement.
- Transparent Lash Bands: Brands like Ardell Demi Wispies or Kiss So Wispy! feature nearly invisible bases that disappear once applied.
| Product Type | Recommended For | Why It Helps Prevent Visible Glue |
|---|---|---|
| Clear Drying Glue | All skin tones, daytime wear | Dries transparent; no white residue |
| Black Lash Glue | Evening looks, bold makeup | Blends with liner and lashes; conceals edges |
| Faux Mink Strip Lashes | Natural enhancement | Thin, flexible band molds to lid |
| Lash Primer | Oily lids, humid climates | Creates dry surface for better adhesion |
Common Mistakes That Reveal Glue
Even experienced users fall into habits that compromise the final look. Recognizing these pitfalls can help you avoid them:
- Using Too Much Glue: Excess adhesive squeezes out when pressure is applied. Less is more—use a thread-like line, not a blob.
- Applying Immediately After Gluing: Fresh glue is slippery and spreads. Waiting ensures it grips instead of sliding.
- Ignoring Eye Shape: One-size-fits-all rarely works. Failing to trim lashes leads to gaps where glue shows.
- Skipping Prepping the Eyes: Oils from moisturizers or leftover makeup prevent proper bonding, forcing users to reapply glue, increasing buildup.
- Using Old or Chunky Glue: Expired glue loses elasticity and may clump, making smooth application impossible.
Real Example: From Glue Disaster to Flawless Finish
Sophia, a makeup enthusiast based in Austin, used to dread wearing falsies because her friends would always point out “the white line” under her lashes. She followed online tutorials but still struggled with visibility, especially at the inner corners. After researching, she realized she was using a thick-band lash and applying glue straight from the tube without letting it set.
She switched to a lightweight mink-style lash with a sheer band and began using a toothpick to apply a micro-thin layer of clear glue. She waited 40 seconds before placing each lash, starting from the center outward. Then, she used the flat edge of her eyelash curler to press the band firmly along the lash line. The result? Her next Instagram post received dozens of comments asking if she got lash extensions. The transformation wasn’t due to expensive products—it was all about technique.
Expert Insight: What Professionals Do Differently
Professional makeup artists have refined their falsie application over thousands of clients. Their approach prioritizes invisibility and longevity.
“Most people think glue is the hero, but prep and patience are. I always pre-fit the lash, blot any oil, and let the glue breathe for half a minute. That tiny wait eliminates 90% of visible residue.” — Lena Torres, Celebrity Makeup Artist
Torres also emphasizes blending: “After placement, I use a waterproof gel liner to draw a fine line directly over the lash band. It fuses the fake and natural lashes into one seamless line. No gap, no glue—just definition.”
Checklist for Glue-Free Lash Success
Follow this checklist every time you apply false lashes to minimize the risk of visible adhesive:
- ☐ Cleanse eyelids and remove any oils or residue
- ☐ Trim lashes to match your eye width
- ☐ Choose lashes with a thin, flexible, or transparent band
- ☐ Apply a minimal amount of glue using a precise tool
- ☐ Wait 30–45 seconds for glue to become tacky
- ☐ Place lashes starting from the center, then secure ends
- ☐ Press down gently along the entire band with a spoolie or tool
- ☐ Use eyeliner or mascara to blend the lash line
- ☐ Check in mirror under natural light for any visible glue spots
Frequently Asked Questions
Can I use eyeliner to hide visible glue?
Yes. Applying a thin layer of waterproof eyeliner directly over the lash band helps camouflage both the band and any residual glue. Use a soft gel or pencil liner for best control and seamless blending.
What should I do if glue shows after application?
If you notice a small dot of glue at the corner, wait until it’s fully dry, then gently lift the edge of the lash with tweezers and wipe the excess with a cotton swab dipped in micellar water. Re-press the area carefully.
Are magnetic lashes better for avoiding glue visibility?
Magnetic lashes eliminate adhesive altogether, so there’s no risk of visible glue. However, they require matching magnetic eyeliner and may not offer the same comfort or natural movement as traditional strips. They’re ideal for beginners wary of glue mess.
Final Tips for a Seamless Look
Beyond the basics, a few advanced tricks can take your lash game to the next level. One is “pre-sealing” the lash band: Before your first use, apply a single thin coat of clear glue to the band and let it dry completely. This seals any porous areas and creates a smoother surface that adheres better and reduces absorption, meaning less glue is needed during application.
Another pro move is using translucent setting powder. After applying your base makeup, lightly dust a tiny amount under the outer corner of the eye (where glue often peeks out). This absorbs oil and creates a dry canvas, improving adhesion and reducing slippage.
Finally, consider individual or cluster lashes for maximum discretion. Instead of a full strip, applying small clusters along your natural lash line allows for greater customization and virtually undetectable results—especially when combined with a thin-dry glue and careful placement.
Conclusion
Applying false eyelashes without visible glue isn’t magic—it’s method. By selecting the right materials, refining your timing, and practicing precision, you can achieve a polished, extension-like finish that enhances your eyes without drawing attention to the application itself. It takes practice, but each attempt brings you closer to mastery. The confidence that comes from flawlessly applied lashes is worth the effort. Try the steps outlined here, keep your toolkit fresh, and soon, invisible glue will be your new standard.


 浙公网安备
33010002000092号
浙公网安备
33010002000092号 浙B2-20120091-4
Comments
No comments yet. Why don't you start the discussion?