
Glitter eyeshadow adds drama, dimension, and a touch of magic to any makeup look. Whether you're going for a festival glow, a nighttime glam, or a subtle sparkle for a special occasion, glitter can elevate your eye makeup instantly. But there's one universal challenge: fallout. Those tiny shimmering particles that land under your eyes not only create a mess but can also ruin your foundation, concealer, and overall symmetry. The good news is that with the right technique, tools, and preparation, you can apply glitter eyeshadow flawlessly—without a speck out of place.
Why Glitter Eyeshadow Fallout Happens
Fallout occurs when loose pigment particles from glitter shadows detach during application and settle on the skin below the eyes. Unlike matte or satin shadows, glitter formulas often contain larger, heavier particles suspended in a less cohesive base. When you tap, swipe, or press the brush against your lid, gravity pulls excess particles downward. This is especially noticeable with loose glitters or poorly adhered pressed formulas.
The problem worsens if you apply concealer or foundation first, as these create a smooth surface that makes cleanup difficult. Additionally, natural oils on the skin or improper primer use can cause uneven adhesion, increasing the chance of excess product shedding.
The Right Tools and Products for Clean Application
Using the correct tools is half the battle. Not all brushes and primers are created equal when it comes to handling glitter. The goal is to maximize pickup and minimize dispersion.
Essential Tools
- Flat Shader Brush: A dense, flat-tipped brush allows for precise placement and pressing rather than sweeping.
- Angled Liner Brush: Ideal for detailed glitter liner work with minimal overspill.
- Sponge Applicator: Fingers or silicone sponges provide better grip on glitter particles than bristle brushes.
- Glitter-Proof Primer: Use a tacky, long-wearing adhesive base like glitter glue or specialized shadow primer.
Avoid fluffy blending brushes when applying glitter—they disperse pigment too widely and increase fallout risk.
Choosing the Right Glitter Formula
Not all glitter shadows behave the same way. Consider these types:
| Formula Type | Fallout Risk | Best For |
|---|---|---|
| Loose Glitter | High | Dramatic looks; requires glue base |
| Pressed Glitter (with binder) | Medium | Daily wear; easier control |
| Cream-to-Glitter | Low | Longevity and precision |
| Metallic Foil Shadows | Very Low | Subtle shine with zero mess |
For beginners or those seeking minimal mess, cream-based or foil finishes offer the cleanest application with high payoff.
“Fallout isn’t inevitable—it’s usually a sign of poor adhesion. A sticky base and proper tool selection eliminate most issues.” — Lila Chen, Professional Makeup Artist & Educator
Step-by-Step Guide: Applying Glitter Without Fallout
Follow this methodical approach to achieve a crisp, glitter-free zone under your eyes.
- Prep Your Face First (But Skip Under-Eye Concealer): Apply moisturizer and foundation, but avoid concealing under the eyes until after glitter application. This prevents smudging and allows easy wipe-down.
- Prime the Lid with a Tacky Base: Use a dedicated glitter adhesive like MAC Fix+ Glitter Glue, Urban Decay Heavy Metal Glitter Primer, or even a clear lash glue diluted slightly with water. Apply only to the area where glitter will go. Let it become tacky—about 30 seconds—but not dry.
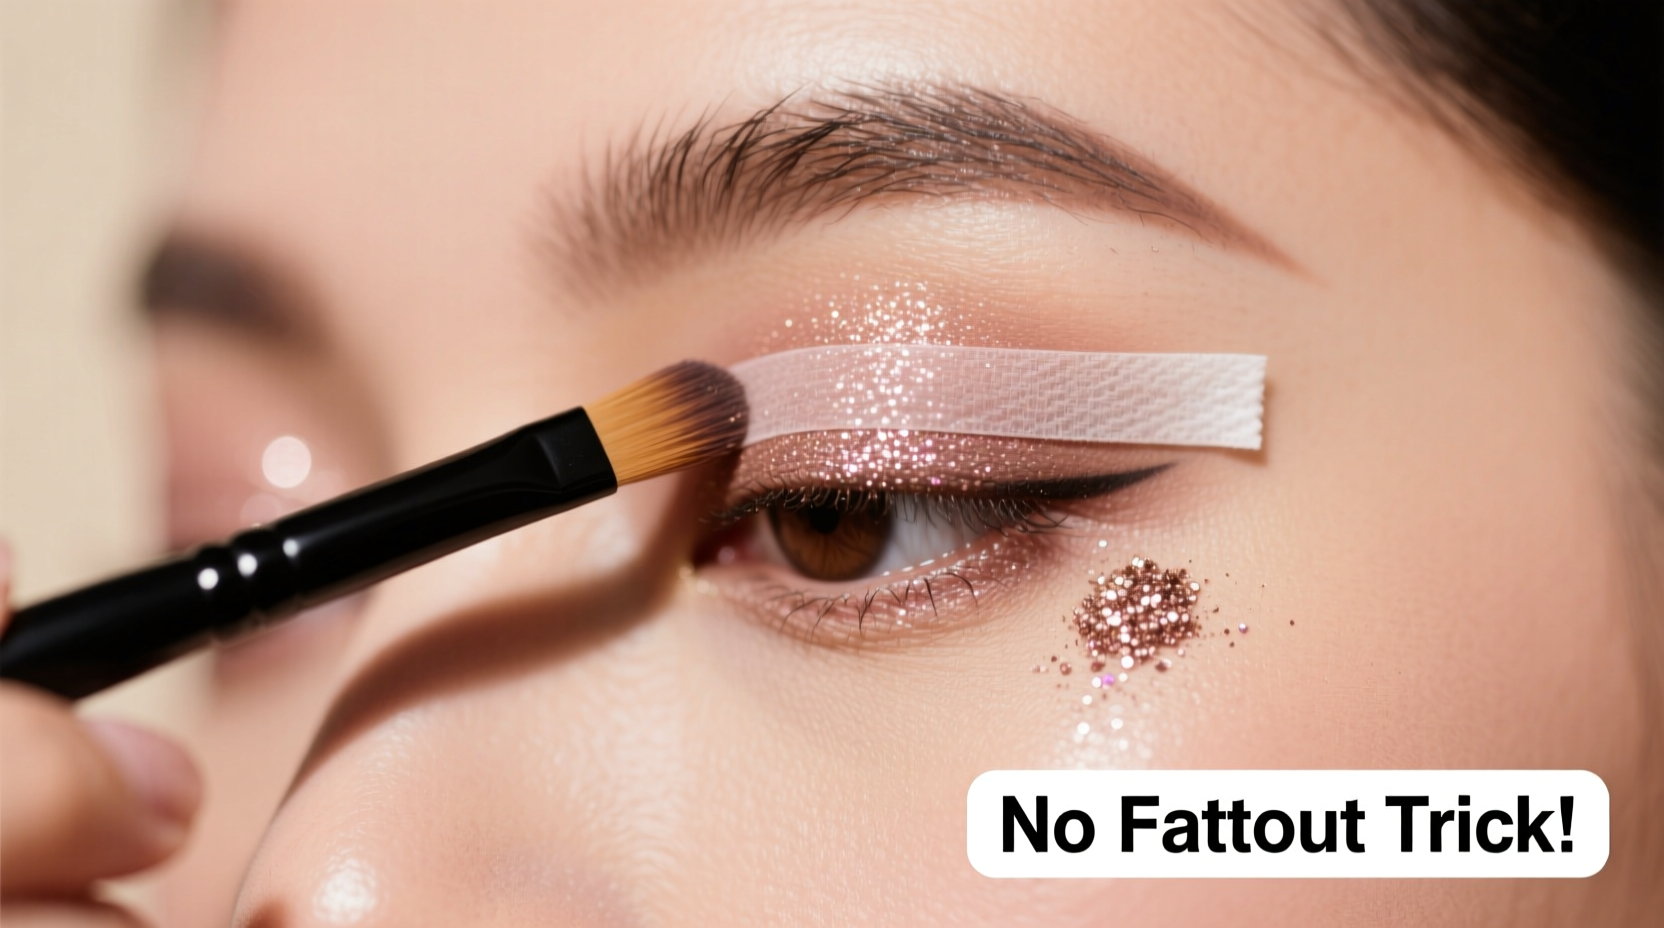
- Position a Shield or Tape: Place a small piece of translucent tape or a makeup shield under your lower lash line. Align it with the outer corner and follow the curve of your eye socket. This catches stray particles before they land on your skin.
- Use a Dampened Sponge or Flat Brush: Dip a flat synthetic brush or silicone applicator into the glitter. Press—not swipe—the product onto the lid. Build intensity gradually by layering with light taps.
- Work One Eye at a Time: Complete the entire process on one eye before moving to the next. This ensures symmetry and reduces cross-contamination.
- Remove Shield Carefully: Gently lift the tape or shield straight up and away from the face to avoid dragging glitter across the skin.
- Clean Up Any Residue: Use a pointed cotton swab dipped in micellar water or makeup remover to erase any stray flecks near the lash line or brow bone.
- Apply Concealer Last: Now is the time to perfect your under-eye area. The clean canvas ensures no glitter mixes into your concealer.
Common Mistakes That Cause Excess Fallout
Even experienced users fall into traps that lead to messy results. Avoid these pitfalls:
- Applying glitter over powder primer: Powder creates a slippery surface. Opt for liquid or gel glitter bases instead.
- Using too much product: Start with a small amount. You can always add more, but removing excess causes smudging.
- Sweeping instead of pressing: Motion matters. Swiping disperses glitter; pressing embeds it into the adhesive.
- Skipping the shield: Relying solely on post-application cleanup is inefficient and risks disturbing other makeup.
- Touching your eyes mid-application: Rubbing or blinking excessively can shift wet glitter and spread fallout.
Real Example: A Bridal Makeup Session Gone Smooth
Jessica, a bridal makeup artist in Portland, was tasked with creating a soft glam look featuring rose-gold glitter on the inner corners for her client’s outdoor wedding. The bride had sensitive skin and was concerned about glitter migrating throughout the day—or worse, ruining her carefully applied under-eye concealer.
Jessica reversed her usual order: she applied foundation and blush first, then used a micro eyeliner brush dipped in glitter glue to precisely dot the shimmer onto the tear ducts. She placed thin strips of surgical tape beneath each eye, extending diagonally toward the temples. After pressing the glitter gently with a fingertip, she removed the tape, cleaned minor edges with a Q-tip, and finished with waterproof mascara and final concealer.
The result? Zero fallout, no irritation, and the glitter stayed intact through tears, dancing, and photos. “The key,” Jessica later shared, “was patience and sequence. Doing concealer last made all the difference.”
Pro Checklist: Glitter Application Without Fallout
Print or bookmark this checklist for foolproof glitter application:
- ☐ Apply foundation and set makeup—but skip under-eye concealer
- ☐ Choose a sticky glitter adhesive (not regular eyeshadow primer)
- ☐ Allow adhesive to become tacky before applying glitter
- ☐ Use tape or a shield under the eye to catch fallout
- ☐ Apply glitter with a flat brush, sponge, or finger—press, don’t swipe
- ☐ Work one eye at a time for consistency
- ☐ Remove shield gently without dragging
- ☐ Clean up stray particles with a cotton swab
- ☐ Finish with under-eye concealer and setting powder
- ☐ Set with a glitter-safe setting spray (avoid heavy mists directly on glitter)
Frequently Asked Questions
Can I use regular eyeshadow primer for glitter?
Regular powder or cream shadow primers aren’t designed to hold heavy glitter particles. They may improve longevity slightly, but they lack the adhesive strength needed to prevent fallout. Always use a dedicated glitter glue or sticky base for best results.
How do I remove glitter without irritating my skin?
Soak a cotton pad with an oil-based remover (like coconut oil or Bioderma Sensibio H2O) and hold it over your eyelid for 10–15 seconds. This breaks down the adhesive. Gently wipe downward—never rub—to lift the glitter. Follow with a mild cleanser to remove residue.
Is it safe to use tape under my eyes?
Yes, if done correctly. Use low-adhesion tape like medical tape or Scotch tape, and apply it gently without stretching the skin. Remove it slowly in the direction of hair growth to avoid tugging. If you have sensitive or mature skin, opt for reusable silicone shields instead.
Final Thoughts and Call to Action
Applying glitter eyeshadow without fallout isn’t about luck—it’s about strategy. From choosing the right formula to mastering the sequence of application, every step plays a role in achieving that dazzling yet clean finish. The techniques outlined here are used daily by professional artists who need reliability, precision, and longevity in their work.
You don’t need expensive products to succeed. Even a simple DIY glitter glue made from mixing a drop of school glue with water (patch test first!) can outperform high-end powders when used correctly. What matters most is consistency, preparation, and attention to detail.


 浙公网安备
33010002000092号
浙公网安备
33010002000092号 浙B2-20120091-4
Comments
No comments yet. Why don't you start the discussion?