
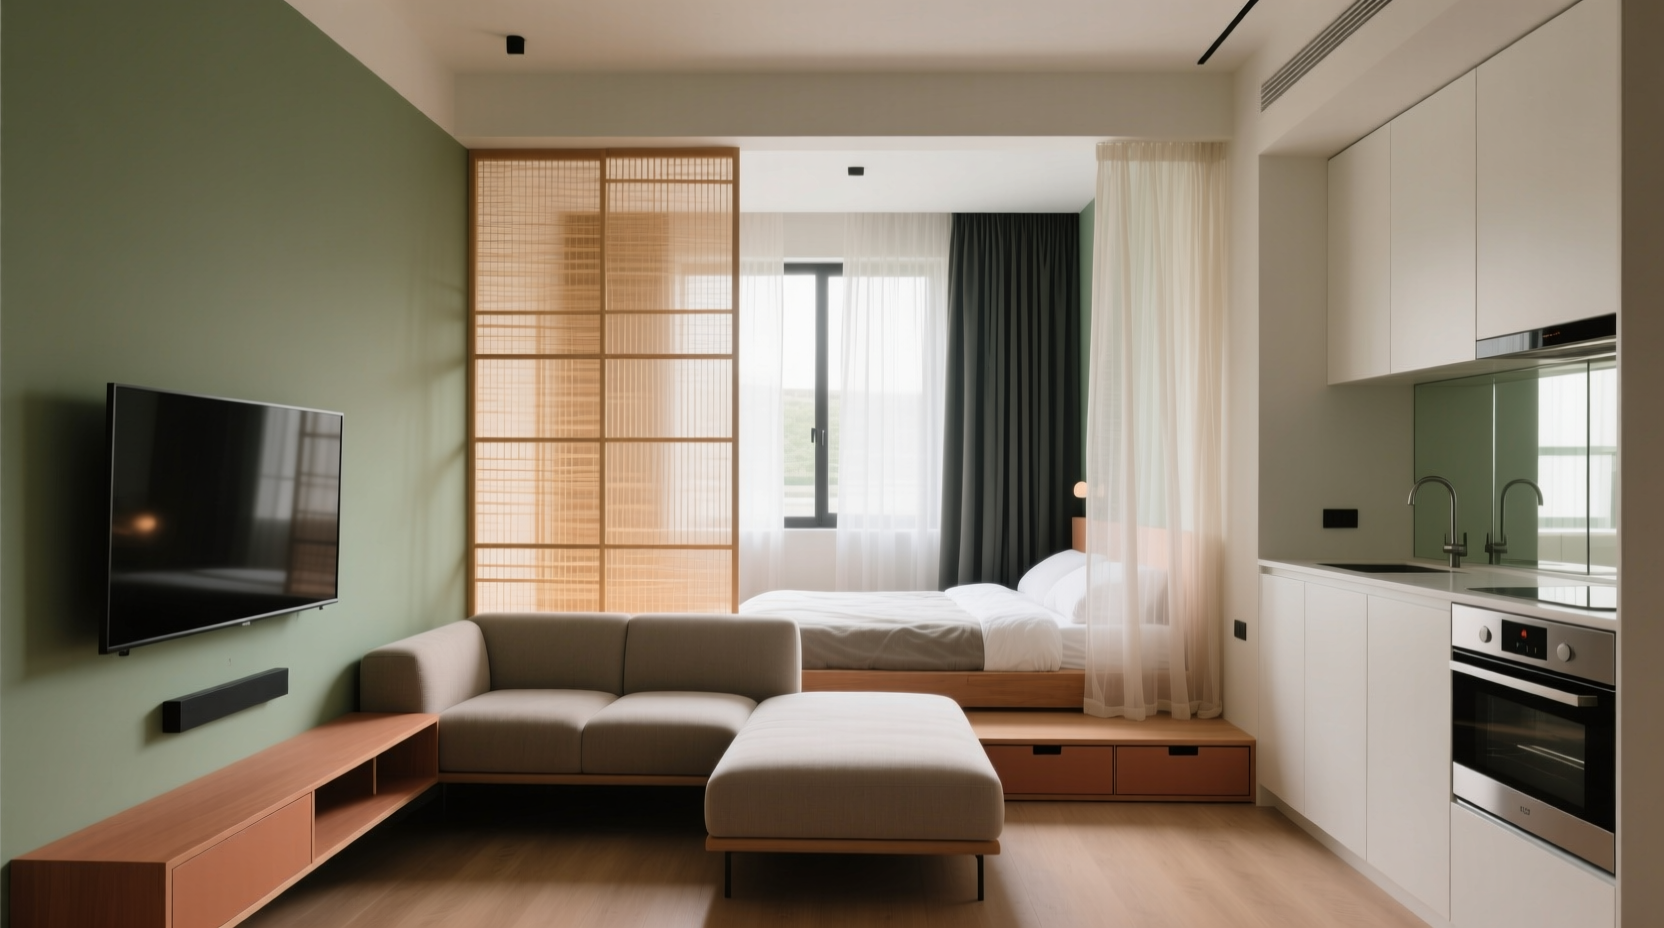
Living in a studio apartment means embracing compact living without sacrificing comfort or personal space. One of the biggest challenges in these open-concept homes is creating a sense of privacy—especially when your sleeping area, kitchen, and living room all exist within the same footprint. Without walls to separate functions, it’s easy to feel exposed or distracted. But with thoughtful furniture placement and strategic design choices, you can carve out distinct zones that offer both visual and psychological separation. The goal isn’t just to fit everything in—it’s to create a layout that feels intentional, functional, and private.
Understand Your Studio’s Layout and Flow
Before moving any furniture, assess the natural flow of your studio. Identify key elements: entry points, windows, doors, HVAC vents, outlets, and built-in features like closets or kitchen counters. These will dictate where large pieces can go and influence traffic patterns. For instance, placing a sofa directly in front of a doorway disrupts movement and creates congestion. Instead, align major furniture along permanent walls or structural boundaries to preserve open pathways.
Most studios follow one of three common floor plans: square, rectangular, or L-shaped. Rectangular studios often allow for clear zoning by length—sleeping at one end, living at the other. Square studios benefit from central focal points like a rug or coffee table to anchor zones. L-shaped spaces can use the bend as a natural divider between areas.
Create Visual and Functional Zones
Privacy in a studio doesn’t require full walls. Instead, focus on defining zones through furniture arrangement and visual cues. Each zone—sleeping, lounging, dining, and working—should have its own identity while maintaining cohesion.
Start by anchoring each area with key furniture. A bed shouldn’t face the front door; position it against a solid wall, ideally perpendicular to the main entrance. Use a low bookshelf, console table, or storage ottoman behind the bed to subtly mark the boundary between bedroom and living space. In the living area, orient seating toward a focal point—like a TV or window—rather than facing the bed, which reduces visual overlap.
Rugs are powerful zone definers. Place different rugs under distinct areas—a plush one under the sofa, a smaller runner beside the bed—to signal transitions. Vary textures or colors slightly to enhance separation without clashing.
“Zoning is about perception as much as physical barriers. Even subtle shifts in flooring, lighting, or furniture height can create a mental divide.” — Lena Torres, Interior Designer & Small Space Specialist
Use Furniture as a Privacy Tool
Furniture itself can act as a room divider. Strategic placement turns functional pieces into privacy-enhancing assets.
- Sofa back as a barrier: Position a sofa with its back facing the bed to separate the living and sleeping areas. Choose a taller-back model for better visual blocking.
- Dining table as a threshold: A small table placed midway between kitchen and living zones can serve as a transitional marker, especially when paired with pendant lighting above.
- Bookshelves and storage units: Open-back shelves provide partial sightline obstruction while maintaining light flow. Use them to display books or decor on one side and store items on the other.
- Dressers and consoles: A narrow dresser behind a sofa or at the foot of the bed adds storage and acts as a low-height screen.
Avoid placing tall furniture in the center of the room unless it's specifically designed as a freestanding divider. This can make the space feel boxed in and disrupt airflow and lighting.
Strategic Room Dividers and Screens
When furniture alone isn’t enough, consider dedicated dividers. These range from simple folding screens to custom-built solutions.
| Type | Best For | Pros | Cons |
|---|---|---|---|
| Folding Screens | Temporary separation, renters | Portable, decorative, no installation | Limited sound blocking, can tip over |
| Bookcase Dividers | Permanent or semi-permanent zoning | Double-sided storage, sturdy | Bulky, blocks some light |
| Curtains or Drapes | Soft separation, bed enclosures | Inexpensive, customizable, light-filtering | Less durable, requires ceiling or wall hardware |
| Sliding Panels | Modern aesthetics, frequent access | Space-saving, sleek look | Higher cost, professional install often needed |
For renters, tension rod-mounted curtains are a non-invasive option. Hang blackout fabric from ceiling to floor around the bed frame to create a “bedroom” feel. Pair with dimmable string lights inside for ambiance.
Case Study: Transforming a 450-Square-Foot Studio
Maria, a graphic designer in Chicago, moved into a compact studio with high ceilings but zero privacy. Her bed was visible from the front door, and her desk faced the kitchen sink. She felt constantly exposed, even when working late.
Her solution:
- She repositioned the bed into a corner adjacent to the bathroom wall, using the existing structure as a partial backdrop.
- Placed a six-foot-tall open bookshelf perpendicular to the bed, angled slightly to block direct sightlines from the entry while allowing light through.
- Installed a floor-to-ceiling curtain on a ceiling track, which she closes at night for full enclosure.
- Used a low L-shaped sofa to define the living area, facing away from the sleeping zone.
- Added a small fold-down desk near the window, making her workspace feel separate from the rest.
The result? A functional, calming space where each activity has its place. Maria reports feeling more relaxed and focused, and guests often don’t realize it’s a studio until they see the bed.
Lighting and Mirror Placement for Perceived Privacy
Lighting plays a surprisingly important role in shaping privacy. Overhead lighting tends to flatten space, eliminating shadows that help define depth and separation. Instead, use layered lighting: ambient (ceiling), task (desk or reading lamps), and accent (wall sconces or LED strips).
Place floor or table lamps in corners of each zone to draw attention inward and create pockets of warmth. For example, a small arc lamp behind the sofa emphasizes the living area, while a bedside lamp signals intimacy.
Mirrors can enhance privacy indirectly. By reflecting light into darker corners, they reduce the need for bright, open illumination that exposes every part of the room. Position mirrors opposite windows to bounce daylight deeper into the space. Avoid placing mirrors so they reflect the bed from the main entrance—that defeats the purpose of visual concealment.
Step-by-Step Guide to Arranging for Privacy
Follow this sequence to optimize your studio layout:
- Measure your space: Record dimensions of the room and all furniture. Note locations of doors, windows, and outlets.
- Define your priorities: Decide which zones are most important (e.g., sleep, work, entertaining) and allocate space accordingly.
- Anchor the bed: Place it against a solid wall, ideally not visible from the door. Leave at least 18–24 inches on either side for access.
- Position large furniture: Arrange sofa, dining table, or desk to create natural pathways and indirect sightline breaks.
- Add dividers: Install a screen, shelf, or curtain where visual separation is weakest.
- Layer with rugs and lighting: Use area rugs and directed light to reinforce each zone’s identity.
- Test and adjust: Live with the setup for a few days. Adjust based on comfort, traffic flow, and privacy needs.
Checklist: Studio Privacy Setup in 10 Steps
- ☐ Measure room and furniture dimensions
- ☐ Identify primary zones (sleep, live, cook, work)
- ☐ Position bed against a solid, non-entry wall
- ☐ Orient seating away from sleeping area
- ☐ Use a sofa back or bookshelf as a partial divider
- ☐ Install a curtain or screen around the bed if needed
- ☐ Define zones with area rugs
- ☐ Add task lighting in each functional area
- ☐ Avoid mirrors that reflect the bed from public zones
- ☐ Test traffic flow and adjust for ease of movement
Common Mistakes to Avoid
Even well-intentioned layouts can undermine privacy. Watch out for these pitfalls:
- Blocking natural light: Placing tall furniture in front of windows cuts brightness and makes spaces feel smaller.
- Overcrowding the center: Avoid clustering furniture in the middle. Keep the core of the room open for movement.
- Ignoring acoustics: Thin dividers may block sightlines but not sound. Add soft textiles (rugs, curtains, cushions) to dampen noise.
- Using only one rug: A single large rug can blur zones. Use multiple smaller ones to clarify boundaries.
- Forgetting vertical space: Utilize wall-mounted shelves and hanging storage to keep floors clear and maintain sightlines.
Frequently Asked Questions
Can I have a private bedroom in a studio without building walls?
Yes. Use a combination of tall furniture (like a bookshelf), floor-to-ceiling curtains, or folding screens to enclose the bed. Adding a canopy or overhead rail with drapery can also create a bedroom-like feel without permanent construction.
What’s the best way to hide the bed during the day?
If space allows, consider a murphy bed or sofa bed. Otherwise, keep bedding neatly made and use a stylish daybed with a backrest. Drape a lightweight throw over the mattress and place a tray or plant on top to shift focus away from its function.
How do I maintain privacy while still making the space feel open?
Balance is key. Use partial dividers that block direct views but allow light and air to pass—such as open shelving, glass partitions, or half-walls. Stick to a cohesive color palette to unify the space visually, even as zones are defined.
Final Thoughts: Design for Intimacy, Not Just Space
Privacy in a studio apartment isn’t about hiding—it’s about designing for dignity, focus, and rest. Thoughtful furniture arrangement transforms a single room into a collection of intimate, purposeful spaces. You don’t need square footage to gain seclusion; you need strategy. Whether you’re working from home, hosting friends, or unwinding after a long day, a well-zoned studio supports every aspect of your life without compromise.


 浙公网安备
33010002000092号
浙公网安备
33010002000092号 浙B2-20120091-4
Comments
No comments yet. Why don't you start the discussion?