
Decorating your home for the holidays brings warmth and cheer, but improper installation of Christmas lights can lead to unintended consequences—especially when it comes to your gutter system. Gutters are designed to channel rainwater and melting snow away from your roof and foundation. When obstructed by poorly placed lights or fasteners, they can clog, overflow, or even detach under excess weight. The good news is that with the right techniques and tools, you can achieve a stunning light display while preserving your gutter’s functionality.
This guide walks through proven, damage-free methods to secure holiday lights along gutters, ensuring seasonal beauty doesn’t compromise structural integrity. Whether you're using traditional incandescent strands or modern LED ropes, these strategies will help you decorate confidently and safely.
Why Proper Gutter Lighting Matters
Gutters play a critical role in protecting your home. They prevent water from pooling around the foundation, eroding landscaping, or seeping into walls and basements. During winter months, especially in colder climates, gutters also manage melting snow and ice. Any blockage—even temporary ones caused by decorations—can cause water to back up, leading to:
- Overflowing water damaging fascia boards and soffits
- Ice dams forming near blocked areas
- Increased risk of mold or wood rot
- Potential detachment of gutters due to added strain
Christmas lights, if improperly secured with nails, screws, or excessive clips, can create micro-blockages or restrict water flow at key drainage points. Even small obstructions accumulate debris like leaves and twigs, worsening over time. That’s why choosing non-invasive attachment methods is essential—not just for efficiency, but for long-term home maintenance.
Best Tools and Materials for Gutter-Friendly Light Installation
The key to successful, drainage-safe decoration lies in selecting the right hardware. Avoid permanent fixtures like staples or roofing nails. Instead, opt for flexible, removable solutions designed specifically for holiday lighting.
| Tool/Method | Drainage Impact | Installation Ease | Durability (Weather Resistance) |
|---|---|---|---|
| Plastic Gutter Clips (S-shaped) | Low – minimal obstruction | Easy | High – UV-resistant plastic |
| Adhesive Hooks (Outdoor-rated) | Very Low – no physical barrier | Moderate | Moderate – may degrade in extreme cold |
| Magnetic Lights (for metal gutters) | None – zero contact with interior | Very Easy | High – if magnet coating is weatherproof |
| Zip Ties | High – risk of creating dams | Easy | Low – brittle in freezing temps |
| Nails/Staples | Critical – punctures & blockages likely | Easy | High, but causes damage |
From this comparison, plastic gutter clips and adhesive hooks emerge as top choices for homeowners who want both safety and visual appeal. Magnetic options work exceptionally well on steel or aluminum gutters but aren’t suitable for vinyl models.
Step-by-Step Guide: Installing Lights Without Blocking Drainage
Follow this practical sequence to hang your Christmas lights efficiently while safeguarding your gutter system.
- Inspect Your Gutters First
Clear out any debris such as leaves, pine needles, or dirt. Ensure downspouts are fully open and functioning. This prevents existing clogs from being worsened by decorative additions. - Plan the Layout
Walk around your house and sketch where lights will go. Focus on continuous runs along straight sections, avoiding corners and downspout areas. Mark spacing every 6–12 inches depending on clip type. - Choose the Right Clips or Fasteners
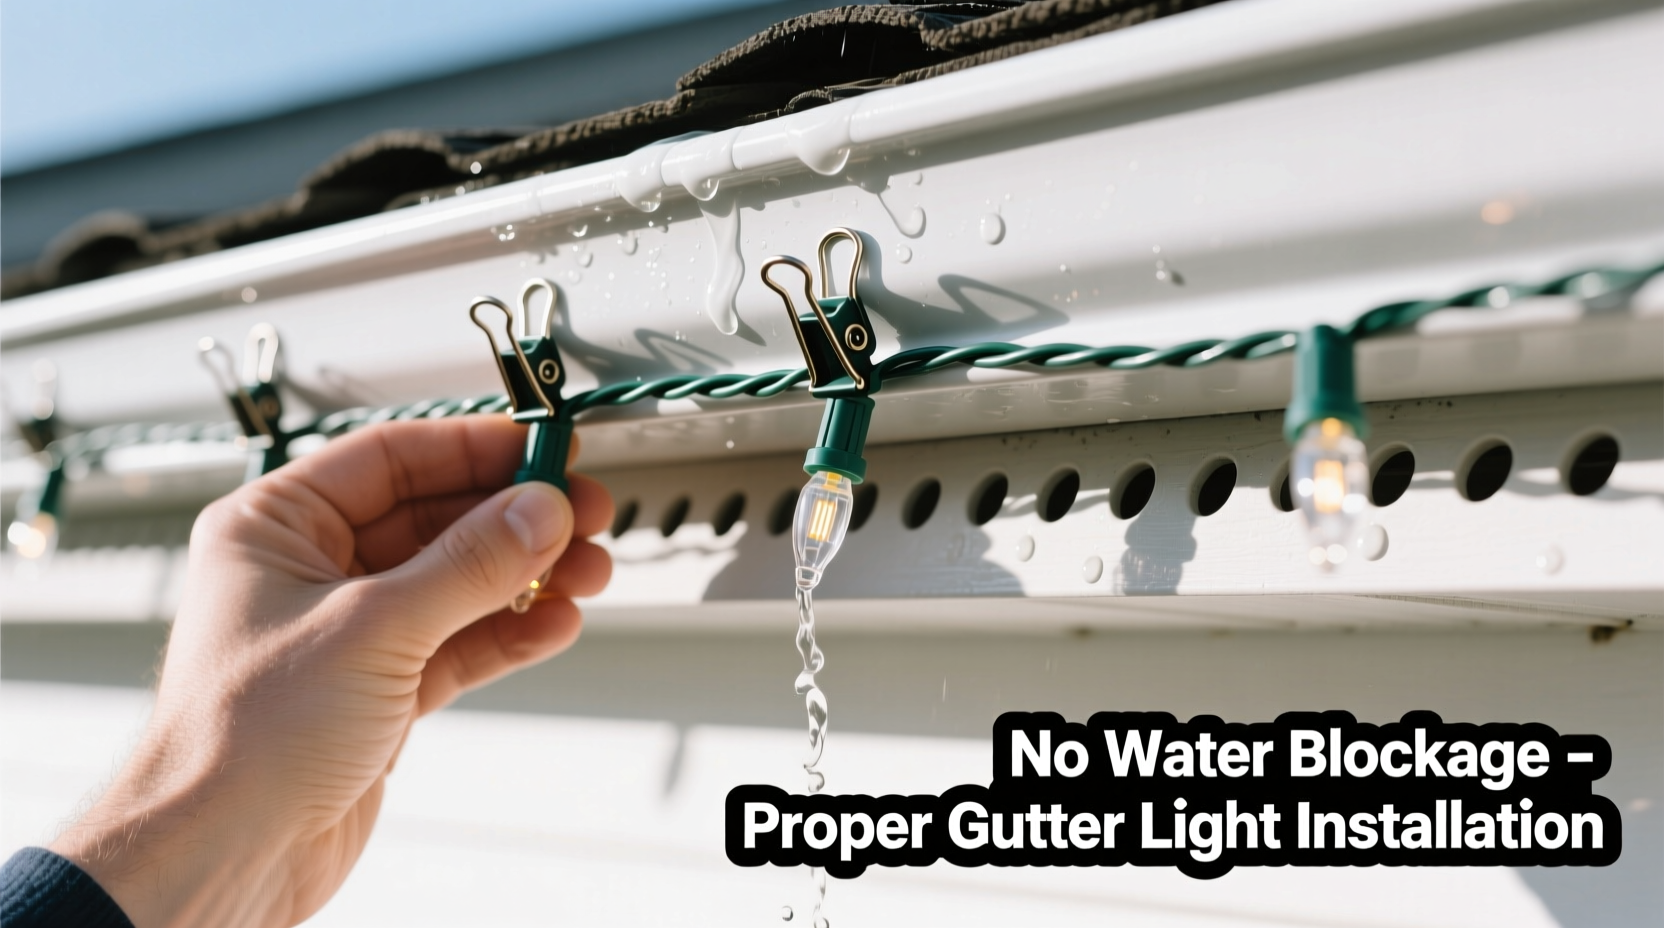
Select S-shaped plastic clips sized for your gutter profile. These hook over the front edge without penetrating the surface. For seamless integration, match clip color to your gutter trim (white, brown, etc.). - Install Clips Strategically
Place clips only along the outer lip of the gutter—never inside the trough where water flows. Leave at least a 3-inch gap before each downspout to allow unimpeded runoff. Space them evenly based on light strand intervals (typically 6–12 inches apart). - Attach the Light Strands
Weave the plug end through the first clip and gently snap the wire into place. Pull lightly to ensure security, but avoid tension. Over-tightening can warp clips or stress joints. - Route Cords Safely
Run extension cords along downspouts using insulated cord wraps or low-adhesion outdoor tape. Never drape cords across walkways unless elevated or covered. Connect all strands to a GFCI-protected outlet. - Test Before Finalizing
Turn on the lights after dark to assess brightness and uniformity. Adjust misaligned sections or add missing clips. Double-check that no part of the wiring dips into the gutter channel. - Schedule Regular Checks
After heavy rain, snowfall, or wind events, inspect your setup. Remove ice buildup carefully with warm (not hot) water. Replace broken clips immediately to prevent sagging wires.
This process ensures that aesthetics never override function. By respecting the natural slope and capacity of your gutter system, you maintain protection against water damage throughout the season.
Avoiding Common Mistakes That Harm Drainage
Even well-intentioned decorators fall into traps that compromise gutter performance. Recognizing these pitfalls helps prevent costly repairs later.
- Using zip ties too tightly: While convenient, overtightened zip ties compress gutters and can form dams. As debris collects behind them, water pools upstream.
- Ignoring downspout zones: Placing clips or lights directly above or within downspouts disrupts vertical flow. Water backs up during storms, increasing overflow risks.
- Overloading one section: Bundling multiple strands in one area adds weight and narrows the effective width of the gutter. Stick to one layer per run.
- Leaving lights on during thaw cycles: Rapid temperature changes cause condensation and ice formation around wiring. Turn off lights temporarily during freeze-thaw periods to reduce moisture retention.
“Homeowners often don’t realize that something as simple as a misplaced clip can trigger thousands in water damage repairs. Seasonal decor should enhance your home—not endanger it.” — Daniel Reeves, Licensed Roofing Contractor & Home Inspector
Real Example: A Near-Miss in Suburban Minnesota
In December 2022, Sarah L., a homeowner in Maple Grove, MN, installed her annual string of 200-count LED lights along the front eaves using standard zip ties. She noticed minor sagging after two weeks but assumed it was normal settling. By mid-January, a sudden warm spell caused rapid snowmelt. Water began spilling over the front edge of her north-side gutter, soaking the flower beds below.
Upon inspection, she found that three zip ties had shifted inward, trapping pine needles and forming a partial dam. Ice formed behind the blockage, lifting the gutter slightly from its hangers. A contractor estimated $420 in repair costs—easily avoided with proper clips and placement.
After removing the lights early, Sarah switched to S-shaped plastic clips the following year. She spaced them correctly, avoided downspout proximity, and reported zero issues during subsequent winters. Her experience highlights how small adjustments make a significant difference in real-world conditions.
Checklist: Safe Gutter Light Installation
Use this concise checklist before and during installation:
- ☐ Clean gutters and test downspout flow
- ☐ Choose non-penetrating fasteners (plastic clips or adhesive hooks)
- ☐ Measure and mark clip positions every 6–12 inches
- ☐ Avoid placing clips within 3 inches of any downspout
- ☐ Install clips only on the outer lip—never inside the water channel
- ☐ Secure light strands gently; avoid tugging or stretching
- ☐ Route power cords safely to GFCI outlets
- ☐ Test lights at night for full visibility and alignment
- ☐ Schedule monthly inspections during active display period
- ☐ Remove promptly after the holiday season ends
Frequently Asked Questions
Can I use tape to hold Christmas lights on gutters?
You can use outdoor-rated adhesive hooks with strong backing, but avoid general-purpose tapes like duct tape or packing tape. These lose adhesion in cold weather and leave residue. Look for products labeled “all-weather” or “UV-resistant” for reliable performance.
How do I remove light clips without damaging gutters?
Most plastic clips are designed for easy removal. Grip the base firmly and pull straight down—do not twist or pry. If resistance occurs, gently rock the clip side-to-side to loosen it. For stubborn adhesive residues, use rubbing alcohol on a soft cloth to clean the surface without scratching.
Are magnetic Christmas lights safe for all gutters?
No—magnetic lights only work on ferrous (iron-containing) metals like steel. They won’t adhere to aluminum or vinyl gutters. Also, ensure magnets are coated to resist rust; otherwise, they may stain or corrode over time.
Conclusion: Decorate Smart, Protect Your Home
Hanging Christmas lights on gutters doesn’t have to come at the expense of your home’s health. With thoughtful planning and the right tools, you can enjoy a radiant holiday display while keeping your drainage system fully operational. Prioritize methods that respect the design and purpose of your gutters—avoid punctures, blockages, and excess weight. Use plastic clips, space them wisely, and stay clear of downspouts.
Your efforts today prevent costly repairs tomorrow. A beautifully lit home should inspire joy, not anxiety about hidden water damage. Take a few extra minutes to install your lights the right way—your future self, and your roof, will thank you.


 浙公网安备
33010002000092号
浙公网安备
33010002000092号 浙B2-20120091-4
Comments
No comments yet. Why don't you start the discussion?