
Decorating for the holidays often means draping lush green garlands along stair railings to create a festive atmosphere. While the visual impact is undeniable, many homeowners hesitate—rightfully so—when it comes to attaching garland to wooden banisters. Traditional methods like nails, tacks, or heavy-duty adhesives can leave dents, scratches, or residue that compromise the integrity and beauty of fine woodwork.
The good news: you don’t need to choose between stunning holiday decor and preserving your banister. With thoughtful materials and techniques, you can securely display garland while keeping your wood finish intact. This guide walks through proven, damage-free methods backed by interior designers, preservation experts, and seasoned decorators.
Why protecting your banister matters
Wooden banisters are more than structural elements—they’re often handcrafted details that contribute significantly to a home’s character. Whether your railing is stained oak, polished cherry, or painted pine, surface damage from decorating can reduce its lifespan and aesthetic value. Scratches, dents, and adhesive buildup not only look unsightly but may require refinishing or professional repair after the holidays.
Additionally, historic homes or properties with original millwork demand extra care. According to the National Trust for Historic Preservation, “Even minor alterations during seasonal decorating can accumulate over time, leading to irreversible wear.” The goal isn’t just to decorate beautifully—it’s to do so responsibly.
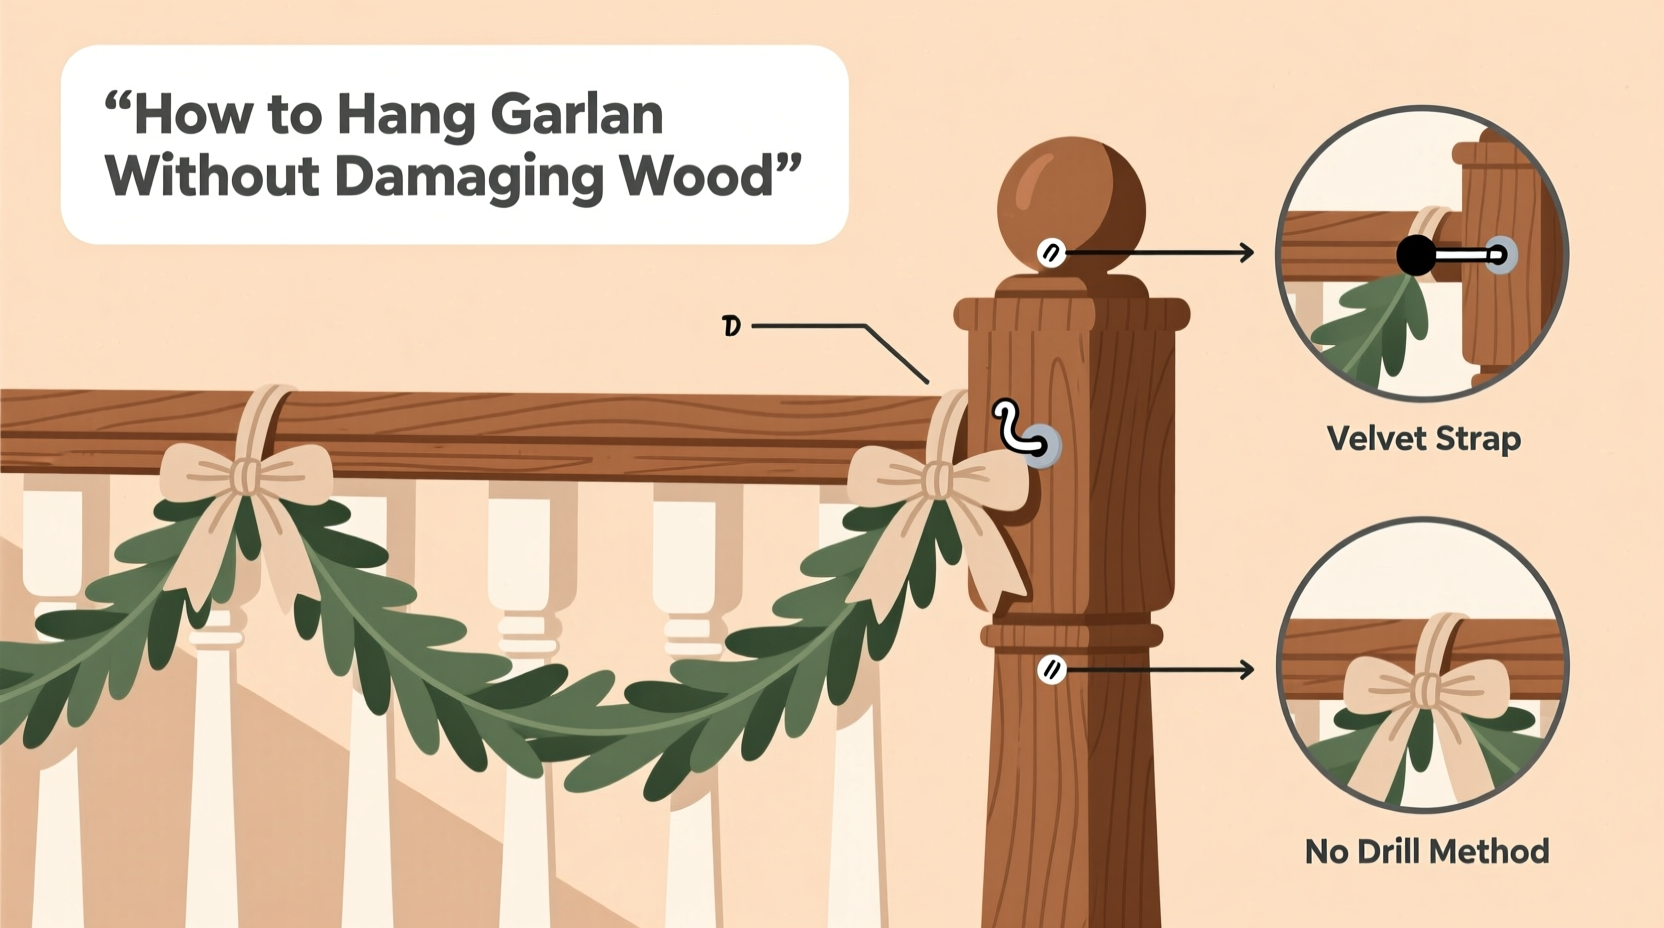
Damage-free methods for securing garland
The key to safe garland installation lies in distributing weight evenly and avoiding direct contact with harsh fasteners. Below are five reliable, non-damaging techniques suitable for most indoor banisters.
1. Use clear floral wire or twist ties
Floral wire is flexible, strong, and nearly invisible when applied correctly. Choose thin-gauge (22–26) green or clear wire to blend with foliage. Cut 6–8 inch lengths and wrap them around both the garland and the underside of the banister spindle or rail. Twist tightly at the back to secure, then trim excess.
2. Employ removable adhesive hooks
Products like Command™ Decorative Hooks or similar removable adhesive systems are engineered to hold moderate weight without residue. Select small, low-profile hooks rated for at least 1 pound per hook. Space them every 12–18 inches along the banister.
To install, clean the railing surface with rubbing alcohol, press the hook firmly for 30 seconds, and wait one hour before hanging garland. When removing post-holiday, pull the tab straight down slowly—the adhesive should release cleanly.
3. Utilize ribbon or satin cord
A classic and elegant solution, ribbon can double as both fastener and decoration. Use wide (1.5–2 inch) satin or grosgrain ribbon in a neutral or festive color. Cut pieces about 18 inches long and tie them in a double knot around the garland and railing. Leave long tails for a decorative bow effect.
This method works best with lighter garlands made of faux greenery or sparse natural sprigs. For heavier garlands, reinforce with additional ribbons spaced closer together.
4. Install plastic cable ties (zip ties) temporarily
Though typically associated with permanent installations, clear zip ties can be used safely if removed promptly. Slide the tie under the railing, loop it through the garland base, and tighten just enough to hold position—do not overtighten.
After the season, snip the tail end with scissors and gently pull the strip out from the locking mechanism. Residue is rare with high-quality clear ties, but inspect the wood afterward. Never use black or colored zip ties—they stand out and may stain.
5. Suspend with fishing line
Fishing line offers near-invisibility and surprising strength. Attach one end to a discreet point on the garland (such as a stem junction), thread it under the railing, and tie the other end securely. Use a marine knot like a double fisherman’s for reliability.
Because fishing line lacks stretch, ensure tension is minimal to avoid pressing into softwood finishes. Ideal for supplemental support rather than primary attachment.
Step-by-step guide: Installing garland safely in 6 steps
- Assess your banister type: Determine if it’s hardwood, softwood, painted, or varnished. Softwoods like pine are more prone to indentation; take extra care with pressure points. <
- Choose your garland: Opt for lightweight options if using ribbon or adhesive hooks. Heavier natural garlands may require wire or zip tie reinforcement.
- Clean the railing surface: Wipe down areas where adhesives or ties will go. Dust and oils reduce grip and increase slippage risk.
- Plan spacing and attachment points: Mark intervals every 12–18 inches depending on garland density. More points = better weight distribution.
- Attach using selected method(s): Begin at the top of the stairs and work downward, overlapping sections slightly for continuity.
- Inspect and adjust: Step back and view from multiple angles. Ensure even droop and no sagging. Reinforce weak spots immediately.
Do’s and Don’ts: Garland installation checklist
| Do’s | Don’ts |
|---|---|
| Use soft, flexible fasteners like floral wire or ribbon | Hammer nails or screws into the railing |
| Test adhesive hooks on a small area first | Leave tape or glue residue past removal date |
| Overlap garland ends for a seamless look | Overtighten ties, which can crush greenery or dent wood |
| Remove all fasteners within two weeks post-holiday | Use duct tape, packing tape, or electrical tape |
| Store garland properly for reuse next year (if artificial) | Allow moisture from real garlands to sit against wood |
Real example: A Victorian home’s holiday transformation
Sarah M., a homeowner in Salem, Massachusetts, faced a challenge each December: her 1880s home featured original mahogany banisters she refused to mar. Past attempts with staples had left tiny dimples she regretted.
In 2022, she switched tactics. She purchased 20 mini clear Command™ hooks and paired them with eucalyptus-and-pine garlands wrapped in burlap twine. She installed the hooks beneath the handrail, spaced 15 inches apart, and draped the garland over them, securing each section with a hidden twist of green floral wire.
The result? A magazine-worthy staircase that drew compliments all season. After New Year’s, she removed the hooks with zero residue. “I finally found a way to have festive decor without sacrificing my home’s history,” she said. “It took 20 minutes to put up and 10 to take down.”
Expert insight: What professionals recommend
“Preservation begins with intentionality. Every puncture or adhesive choice sends a message about how we value our spaces. Damage-free decorating isn’t just possible—it’s expected in high-end residential styling.” — Lena Torres, Interior Preservation Consultant, Heritage Design Group
“For clients with antique woodwork, I always recommend ribbon or clear wire. They offer control, reversibility, and aesthetic harmony. The last thing you want is to explain to future owners why there are nail holes in an original balustrade.” — Marcus Reed, Period Home Stylist & Holiday Decor Director
Tips for maintaining garland appearance and safety
- Check daily for slippage, especially during the first few days after installation. Temperature changes and foot traffic vibrations can loosen ties.
- Keep real garlands misted lightly to prevent drying and needle drop—but never spray directly onto the wood. Use a towel barrier if needed.
- Avoid overloading with heavy ornaments. If adding decorations, distribute weight evenly and hang them from the garland itself, not the railing.
- Ensure walkway clearance. Garland should not extend into the walking path or obstruct handrail use, particularly important for homes with children or elderly residents.
- Unplug lights before adjusting garland to prevent short circuits or shocks, especially with natural greenery that may retain moisture.
Frequently asked questions
Can I use hot glue to attach garland to a wooden banister?
No. Hot glue adheres strongly to wood and often pulls off finish or leaves a brittle residue when removed. It also poses a fire risk near lights or candles. Avoid entirely.
How do I prevent garland from slipping on a glossy banister?
Glossy finishes are slick, making adhesion harder. Use a combination of methods—for example, pair adhesive hooks with light ribbon ties. You can also place small rubber shelf liners (cut into tiny strips) between the garland and railing for grip, then remove them later.
Will fishing line damage the wood over time?
Not if used correctly. Standard monofilament fishing line exerts minimal pressure. However, avoid braided lines or excessive tension, which could indent softer woods. Always check contact points weekly.
Final thoughts: Beauty without compromise
Holiday decorating should enhance your home, not endanger its condition. Attaching garland to a banister doesn’t require trade-offs between aesthetics and preservation. With the right tools and attention to detail, you can achieve a professionally styled look that respects your craftsmanship and lasts season after season.
Whether you opt for discreet floral wire, elegant ribbon, or advanced adhesive solutions, the principles remain the same: distribute weight, minimize contact stress, and prioritize easy reversibility. These habits protect not just this year’s decor, but decades of enjoyment in your home.


 浙公网安备
33010002000092号
浙公网安备
33010002000092号 浙B2-20120091-4
Comments
No comments yet. Why don't you start the discussion?