
Holiday decorations bring warmth and whimsy to any space, but when it comes to hanging delicate paper snowflakes on textured walls—like stucco, orange peel, or knockdown finishes—many people face a frustrating dilemma. Standard tape often fails to adhere properly, peels off paint, or leaves behind sticky residue that’s difficult to clean. The challenge is especially real in rental properties or homes where wall preservation matters.
The good news is that with the right tools and techniques, you can display your handmade or store-bought paper snowflakes beautifully—without damaging your walls or dealing with cleanup afterward. This guide explores tested, non-damaging attachment methods, compares their effectiveness, and provides actionable steps for achieving a festive look that lasts through the season—and beyond.
Understanding the Challenge of Textured Walls
Textured walls are designed to hide imperfections and add visual depth, but their uneven surfaces make adhesion difficult. Traditional tapes rely on flat contact points to create a strong bond. On bumpy or porous textures, there’s less surface area for the adhesive to grip, which leads to poor hold or immediate detachment.
Additionally, many tapes use aggressive adhesives that, while effective on smooth surfaces, can pull loose paint particles or leave behind gummy residue when removed from textured drywall. This is particularly problematic with older walls or those painted with matte finishes, which tend to be more fragile.
Another consideration is weight distribution. Paper snowflakes are extremely lightweight—usually under 0.1 ounces—but their large surface area creates wind resistance indoors (from HVAC systems or movement), increasing the chance of peeling or falling if not secured properly.
“Adhesion on textured surfaces isn’t about strength—it’s about contact. You need an adhesive that conforms to micro-ridges, not one that just sticks hard.” — Dr. Lena Torres, Materials Scientist at Green Adhesives Lab
Safe and Effective Attachment Methods
Several alternatives to traditional tape exist that offer reliable hold while minimizing risk to your walls. Each method has pros and cons depending on wall type, snowflake size, and duration of display.
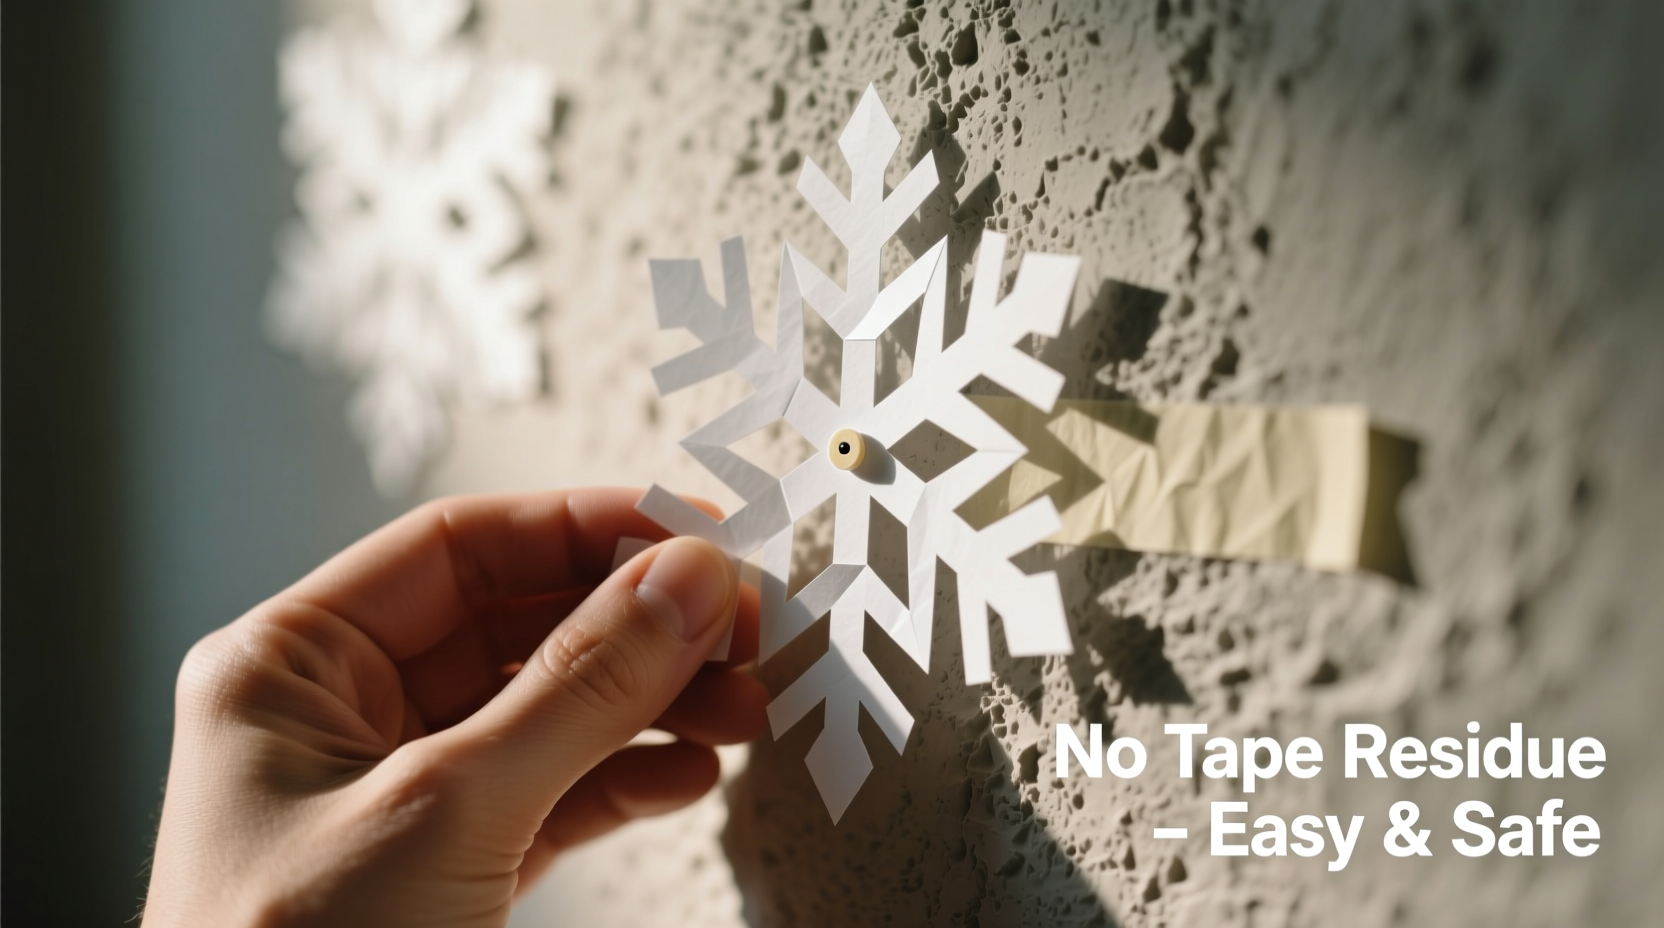
1. Removable Putty (e.g., Blu Tack, Poster Putty)
Removable putty is one of the most popular solutions for hanging lightweight decor. It molds easily and conforms to uneven surfaces, filling gaps in textured walls for better grip.
- Use pea-sized amounts per snowflake corner
- Press firmly for 10–15 seconds to ensure full contact
- Best for indoor temperatures above 60°F (15°C)
2. Double-Sided Mounting Squares (Reusable)
These small foam squares come with low-tack adhesive on both sides. They compress slightly under pressure, allowing them to bridge minor surface irregularities.
Choose sizes appropriate for paper weight—typically 0.5” x 0.5” works well. Press one side onto the back of the snowflake, then press the other side firmly onto the wall. Avoid overuse; one square per corner is usually sufficient.
3. Static Cling Decals with Transfer Tape
If you're working with plastic-coated or laminated paper snowflakes, static cling sheets can be used. These generate electrostatic attraction to surfaces, eliminating the need for adhesives entirely.
To apply:
- Print or transfer your snowflake design onto static cling vinyl
- Cut out the shape
- Use transfer tape to position it on the wall
- Smooth from center outward to remove air pockets
This method is ideal for smooth areas of textured walls (such as around outlets or baseboards) but may not work on deeply grooved surfaces.
4. Washi Tape with Strategic Placement
While regular masking or duct tape damages walls, washi tape—a decorative Japanese paper tape—is gentler and removes cleanly from most surfaces. Though typically used on flat walls, it can work on light textures when applied correctly.
For success:
- Apply across high points of the texture, not valleys
- Use multiple short strips rather than one long piece
- Limit exposure time to no more than 4 weeks
Comparison of Methods: Do’s and Don’ts
| Method | Works on Deep Texture? | Leaves Residue? | Repositionable? | Max Hold Time |
|---|---|---|---|---|
| Removable Putty | Yes | Rarely (if removed carefully) | Yes | Up to 8 weeks |
| Double-Sided Mounting Squares | Moderate | No | Limited | 6 weeks |
| Static Cling Vinyl | No | None | Yes | Seasonal |
| Washi Tape | Light only | No | Yes | 4 weeks |
| Avoid: Duct/Masking Tape | No | Yes – significant | No | Not recommended |
Step-by-Step Guide: Hanging Snowflakes Without Damage
Follow this sequence to safely install paper snowflakes on textured walls, ensuring longevity and easy removal.
- Clean the Wall Surface: Dust and wipe the area with a dry microfiber cloth. Avoid wet cleaning unless necessary—moisture can weaken adhesion.
- Select Your Attachment Method: Based on texture depth and display duration, choose removable putty or mounting squares for best results.
- Prepare the Snowflake: Reinforce weak points by adding a small piece of clear mending tape to each corner on the backside. This prevents tearing during application or removal.
- Apply Adhesive: For putty, roll into four small balls and press one onto each corner. Let sit for 30 seconds to activate stickiness.
- Position Carefully: Start from the top corner. Press the snowflake firmly against the wall, holding for 10 seconds per corner. Use a level app on your phone if alignment matters.
- Check Stability: Gently tug the edges after 1 hour. If any corner lifts, reapply with fresh adhesive.
- Monitor Over Time: Check weekly for loosening, especially near vents or doors where airflow is stronger.
Real-World Example: A Teacher’s Classroom Display
Maria Chen, a third-grade teacher in Portland, needed to decorate her classroom’s stucco-like cinderblock walls for the winter festival. She wanted student-made paper snowflakes displayed prominently but couldn’t risk damage or sticky messes when removing them after break.
She tested three methods on separate wall sections: masking tape (her usual go-to), washi tape, and blue poster putty. Within two days, half the masking tape pieces had fallen, taking flakes of paint with them. The washi tape held longer but began curling at the edges. Only the putty remained fully intact after three weeks.
She scaled up using putty, training students to apply it gently. At the end of the season, she rolled each piece off slowly and reused what was still clean. “The kids loved seeing their art stay up all month,” she said, “and the custodian thanked me for not making a mess.”
Essential Checklist Before You Begin
- ✅ Inspect wall texture and cleanliness
- ✅ Choose non-residue adhesive (putty or mounting squares)
- ✅ Reinforce snowflake corners with mending tape
- ✅ Test one snowflake for 24 hours
- ✅ Plan layout using removable pencil marks (erase after)
- ✅ Document placement for symmetrical designs
- ✅ Schedule mid-season check-ins
- ✅ Prepare for residue-free removal
Frequently Asked Questions
Can I reuse removable putty after taking down snowflakes?
Yes, in most cases. If the putty hasn’t collected dust or lint and still feels tacky, roll it between clean fingers to reactivate. Discard if it turns brittle or darkened.
Will these methods work on ceiling tiles or popcorn ceilings?
Proceed with caution. Popcorn ceilings are fragile and can crumble when touched. If you must hang from the ceiling, use the lightest possible method—static cling or minimal putty—and avoid pressing too hard. Better yet, suspend from fishing line attached to a discreet hook in a joist.
What should I do if residue remains after removal?
Rarely, even safe adhesives leave a faint film. To remove it:
- Dampen a soft cloth with warm water and mild dish soap
- Gently rub the spot in circular motions
- Rinse with a clean damp cloth
- Dry immediately with a towel
Final Tips for Long-Lasting, Damage-Free Displays
Success lies not just in choosing the right product, but in how you apply and maintain it. Temperature and humidity affect adhesion—dry winter air can reduce tackiness over time. In heated rooms, consider using a humidifier to stabilize conditions.
Also, think about visibility and spacing. Snowflakes look best when grouped asymmetrically or in cascading patterns. Use larger ones as focal points and fill gaps with smaller versions. This reduces the number of attachment points needed overall, lowering risk.
Finally, label storage containers for your adhesives. Keep unused putty in its original case and note the season it was used. That way, you’ll know what’s still viable next year.
Conclusion: Decorate Fearlessly, Remove Easily
You don’t have to sacrifice holiday charm for the sake of wall safety. With thoughtful preparation and the right tools, lightweight paper snowflakes can grace even the most challenging textured walls—adding magic to your space without compromising surfaces.
By using removable putty, reusable mounting squares, or innovative static solutions, you protect your home or classroom while creating memorable seasonal displays. When January arrives, you’ll remove the decorations with confidence, leaving no trace behind—just the memory of a job well done.


 浙公网安备
33010002000092号
浙公网安备
33010002000092号 浙B2-20120091-4
Comments
No comments yet. Why don't you start the discussion?