
Creating a gradient eye look is one of the most elegant ways to elevate your makeup game. Unlike flat or sharply defined styles, a well-blended gradient transitions smoothly from light to dark, adding depth, dimension, and sophistication. But achieving that seamless blend—where colors melt into each other without harsh lines or patchiness—requires more than just swiping shadows on your lid. It demands the right tools, technique, and understanding of color placement and layering.
Whether you're working with warm tones, cool hues, or a rainbow spectrum, mastering the blend transforms good eye makeup into something truly polished. This guide breaks down the process into actionable steps, shares expert insights, and reveals common pitfalls so you can create smooth, professional-looking gradients every time.
Understanding the Gradient Eye Look
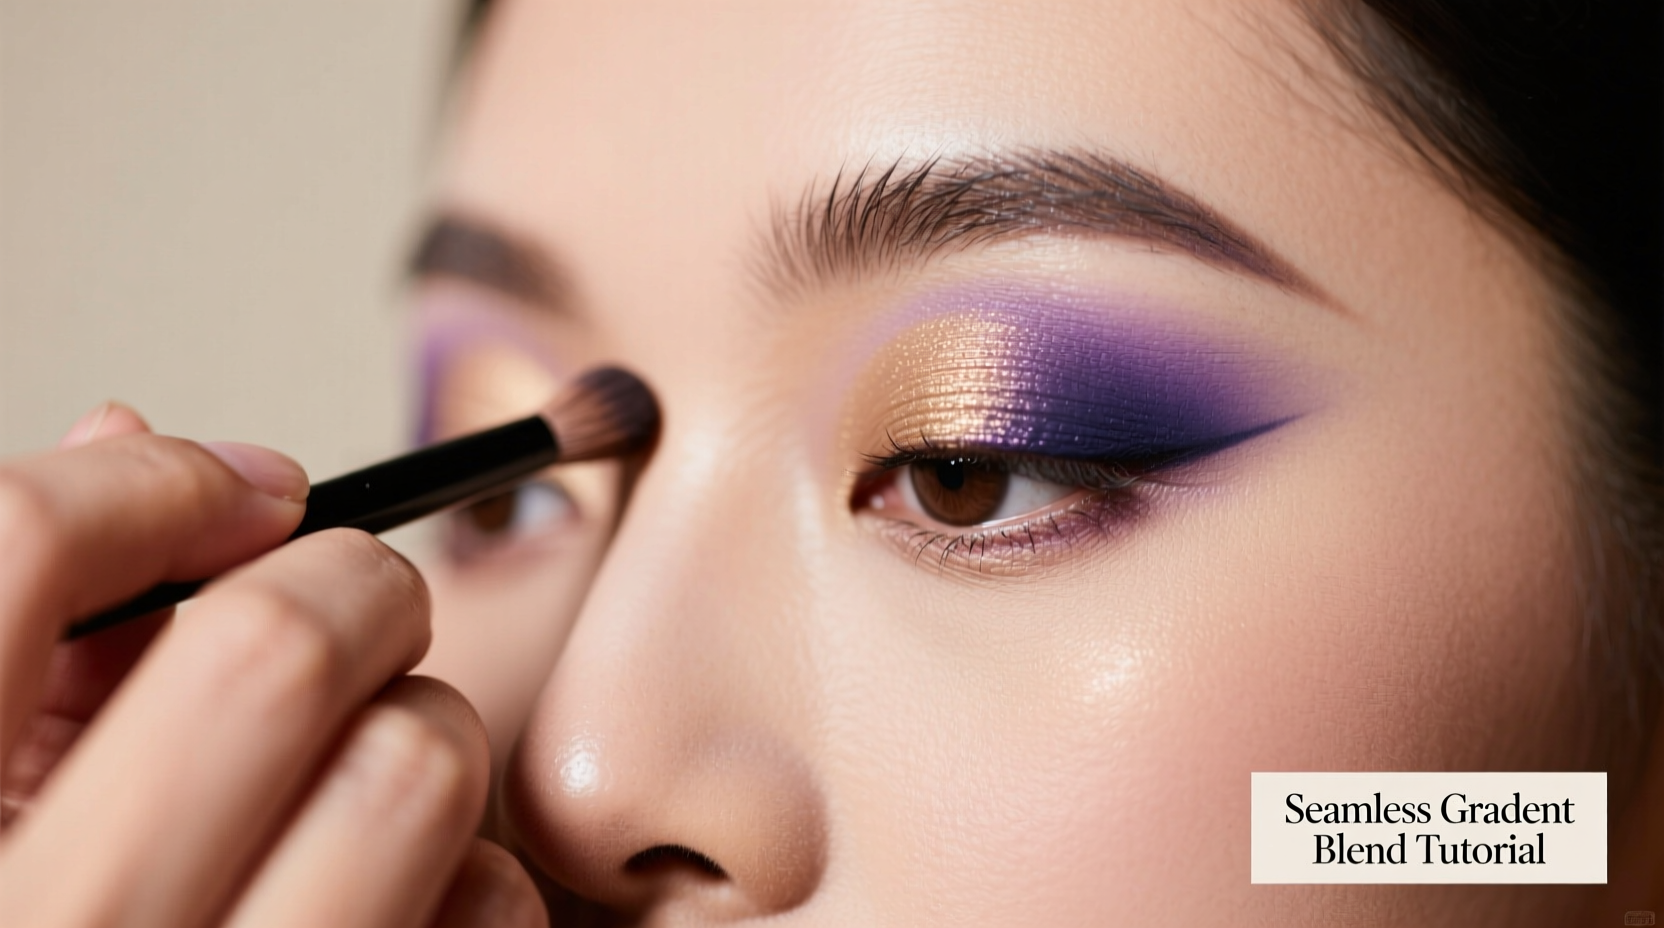
A gradient eye look involves layering multiple eyeshadow shades in a way that creates a smooth transition across the eyelid and crease. Typically, the lightest shade starts at the inner corner or brow bone, gradually deepening toward the outer corner. The goal is to avoid visible lines between colors, resulting in a soft ombre effect.
This style works across various color families—neutral taupes, smoky greys, vibrant purples, or sunset oranges—and adapts beautifully to both daytime and evening wear. What sets it apart from traditional cut crease or graphic liner styles is its fluidity. There are no sharp edges; instead, the focus is on diffusion and harmony.
To achieve this, you must understand how pigments interact, how brushes distribute product, and how skin texture affects adherence. It’s not just about applying color—it’s about controlling deposition and manipulating density through layering and blending.
The Right Tools Make All the Difference
No amount of skill can compensate for the wrong brush. Just as a painter selects specific bristles for blending oils versus detailing, a makeup artist chooses brushes based on function: pickup, deposit, and diffusion.
Here’s a breakdown of essential brushes for gradient work:
- Fluffy Blending Brush (e.g., tapered dome shape): Ideal for diffusing color in the crease. Its loose bristles allow for soft, circular motions that blur edges.
- Flat Shader Brush: Used to pack pigment onto the lid with precision. Start here before blending outward.
- Pencil Brush: Perfect for smudging along the lower lash line or refining the outer V.
- Small Tapered Brush: Offers control when placing darker shades exactly where needed without spilling.
- Brow Bone Highlight Brush (small, firm): Applies highlight cleanly under the arch of the brow.
Synthetic bristles work best for cream shadows or wet application, while natural fibers pick up and distribute powder pigments more evenly. Many professionals use a combination depending on the formula.
Do’s and Don’ts of Brush Usage
| Action | Do | Don't |
|---|---|---|
| Blending | Use light pressure and windshield-wiper motions | Press too hard or drag aggressively |
| Color Placement | Tap off excess pigment before applying | Dip directly and apply heavily |
| Transition Shades | Use medium-toned matte shadow to bridge gaps | Jump straight from light to dark |
| Cleaning | Wash with gentle shampoo weekly | Soak ferrules or let water enter handle |
“Blending isn’t about covering up mistakes—it’s about building intention. Every stroke should have a purpose.” — Lena Torres, Celebrity Makeup Artist
Step-by-Step Guide to Seamless Gradient Blending
Follow this structured approach to build a flawless gradient from start to finish. Consistency in order and technique ensures repeatable results.
- Prime the Eyelid
Apply an eyeshadow primer or concealer set with translucent powder. This creates an even base, prevents creasing, and enhances pigment longevity. - Map Your Transition Shade
Using a fluffy brush, apply a mid-tone matte shade (like soft taupe or warm brown) slightly above your natural crease. This acts as a buffer zone between light and dark, making final blending easier. - Place the Darkest Shade First
With a small tapered or pencil brush, place your deepest color precisely in the outer corner and outer third of the crease. Focus on the “V” area—where the upper and lower creases meet. Avoid sweeping it across the entire lid. - Build the Middle Tone
Select a shade between your darkest and lightest. Using a clean blending brush, lightly sweep this over the middle portion of the crease, overlapping slightly with the dark shade. Use back-and-forth motions to soften the edge. - Add the Base Lid Color
With a flat shader brush, press your lightest or main lid shade onto the mobile lid. Keep it centered and avoid bringing it too far into the crease at this stage. - Blend, Blend, Blend
Switch to a clean fluffy brush. Starting from the outer edge, use small circular motions to blend the dark into the middle tone. Then blend the middle into the base. Never blend empty—always have some pigment on the brush to help diffuse rather than erase. - Highlight Strategically
Use a small detail brush to apply a shimmer or satin shade to the inner corner and center of the lid. Add matte ivory or champagne under the brow bone to lift the eye. - Final Soften Pass
Take a completely clean blending brush and go over all seams once more. This removes any lingering harshness and unifies the overall effect.
Common Challenges and How to Fix Them
Even experienced artists encounter issues like patchiness, muddiness, or uneven transitions. Recognizing the root cause helps correct it quickly.
- Muddy Colors: Usually caused by overblending or using too many similar undertones. Stick to a cohesive temperature (all warm or all cool) unless intentionally contrasting.
- Harsh Lines: Often due to skipping the transition shade or applying too much pigment at once. Build color gradually in thin layers.
- Patchy Application: Can result from dry skin, poor primer, or low-pigment shadows. Exfoliate gently before makeup and consider mixing shadows with a drop of mixing medium.
- Darker Than Intended: If the outer corner overwhelms, lighten it by tapping a clean brush over the area to sheer out the pigment.
“When I see someone struggling with blend, 9 times out of 10, they’re using one brush for everything. Dedicate tools to stages.” — Marcus Lee, Editorial MUA
Real Example: From Patchy to Polished
Jamie, a makeup enthusiast, struggled with creating a rose-gold gradient using pinks, coppers, and plums. Her first attempts resulted in a streaky outer corner and a disconnected inner highlight. After reviewing her process, she realized she was using the same brush throughout and pressing too hard when trying to deepen the outer V.
She adjusted her method: primed with a gripping base, used separate brushes for placement and blending, and introduced a warm peach matte as a transition shade between pale pink and deep plum. She also started tapping off excess pigment and blending in short bursts with frequent brush cleaning.
The result? A seamless ombré that flowed from soft blush at the tear duct to rich berry at the tail of the eye—earning compliments at her friend’s wedding where she served as maid of honor.
Pro Checklist: Achieve Flawless Gradient Eyes
- Applied eyeshadow primer
- Selected 3–4 harmonious shades (light, mid, dark, highlight)
- Chose appropriate brushes for each step
- Used transition shade in crease
- Built intensity gradually (no heavy initial application)
- Blended edges with clean, fluffy brush
- Highlighted inner corner and brow bone
- Did final pass with clean brush to soften
- Checked symmetry in natural light
Frequently Asked Questions
How do I prevent my gradient from looking muddy?
Muddiness occurs when too many pigments mix beyond their intended zones. To avoid this, stick to a consistent color family or temperature (e.g., all warm tones). Use clean brushes between shades, especially when moving from dark to light. Also, ensure your transition shade is neutral enough to bridge colors without dominating.
Can I create a gradient with only shimmer shadows?
Yes, but it’s more challenging. Shimmers reflect light and can emphasize texture, making seams more visible. For best results, pair shimmer shades with matte transition colors in the crease. Apply shimmer to the lid and inner corner, then use matte tones above to anchor and blend the look.
How long should I spend blending?
Most gradient eyes take 5–8 minutes of active blending. However, the key isn’t duration—it’s technique. Focus on small circular motions at the edges, frequent brush cleaning, and gradual layering. If you’re spending more than 10 minutes, you may be overworking the product, which lifts base layers and causes fallout.
Final Thoughts: Mastery Through Practice and Patience
Seamless gradient eyes aren’t achieved overnight. They require repetition, attention to detail, and an understanding of how color behaves on your unique eye shape and skin tone. What works on a video tutorial may need adjustment for hooded lids or deeper-set eyes. That’s normal.
The most important habit to develop is patience. Build your gradient slowly. Respect each shade’s role. Let blending be intentional, not frantic. Over time, your muscle memory will improve, and what once took ten minutes will feel effortless.
Remember, great makeup isn’t about perfection—it’s about expression. A slightly imperfect blend can still radiate confidence if worn with authenticity.


 浙公网安备
33010002000092号
浙公网安备
33010002000092号 浙B2-20120091-4
Comments
No comments yet. Why don't you start the discussion?