
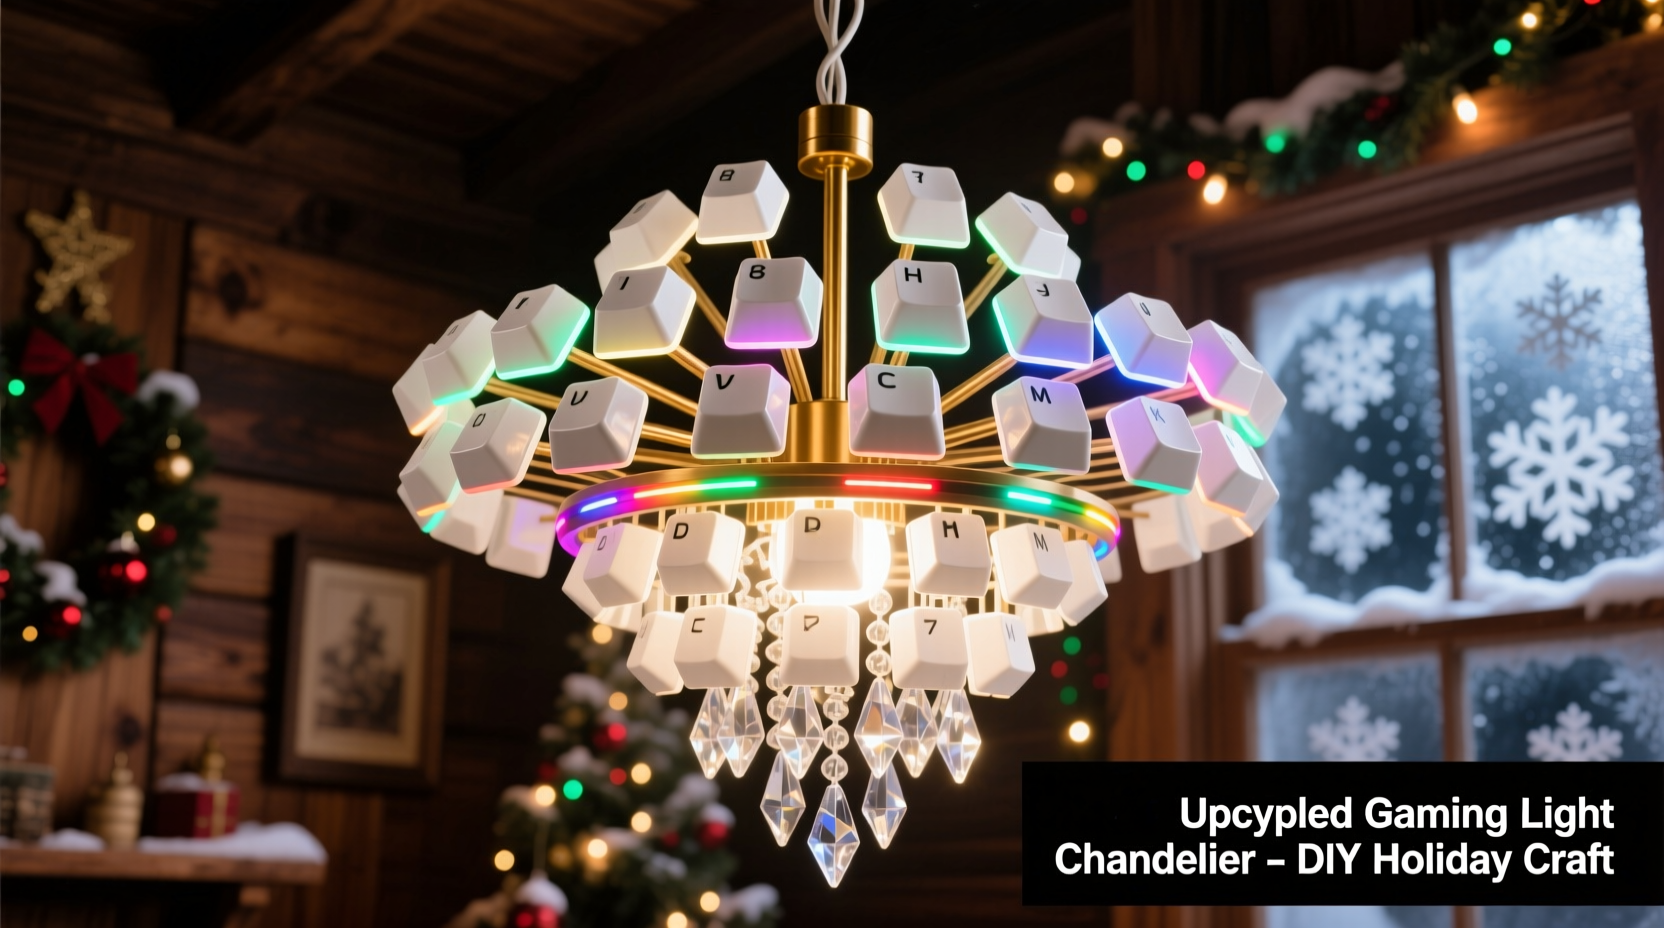
There’s something quietly magical about transforming digital detritus into festive art. Gaming keyboards—especially mechanical ones—accumulate wear, obsolescence, and emotional weight over time. Keys become loose, switches fail, or upgrades render entire units obsolete. Rather than consigning them to landfill, savvy makers are reclaiming those vibrant, tactile keycaps as raw material for holiday installations that blend nostalgia, sustainability, and luminous craftsmanship. A Christmas light chandelier built from upcycled keyboard keys isn’t just décor—it’s a conversation piece rooted in intentionality: honoring the tools of play and work while reimagining their purpose in warmth and light.
This project sits at the intersection of upcycling ethics and accessible electronics. It requires no soldering expertise, minimal power tools, and leverages readily available components—yet delivers a custom, gallery-worthy centerpiece. Whether you’re a hobbyist seeking a meaningful DIY challenge or an educator looking to demonstrate circular design principles, this chandelier bridges function and symbolism: each key once registered intent; now, it refracts light, holds space, and invites reflection on reuse in the digital age.
Why Keyboard Keys Make Exceptional Chandelier Elements
Gaming keyboard keys offer unique physical and aesthetic advantages over generic craft materials. Most mechanical keycaps are injection-molded from PBT (polybutylene terephthalate) or ABS plastic—durable, heat-resistant, and often textured for grip. Their geometry is precise: uniform stem interfaces, consistent thickness (typically 1.2–1.5 mm), and subtle curvature that diffuses LED light beautifully. Unlike flat acrylic discs or glass beads, keycaps scatter illumination with gentle directional nuance—casting soft halos rather than harsh spots.
Color variety is another major asset. RGB gaming keyboards feature translucent or semi-transparent keycaps designed specifically for backlighting. Cherry MX, Gateron, and Kailh switches commonly ship with caps in vivid reds, blues, purples, and frosted whites—colors that align naturally with traditional and modern holiday palettes. Even opaque keys retain visual interest through legends (letters/symbols), surface texture (matte vs. glossy), and subtle gradients.
Crucially, keyboard keys carry narrative resonance. A WASD cluster evokes countless hours of collaboration or competition. An Enter key symbolizes commitment. A spacebar—often oversized and weighted—becomes a grounding anchor in the composition. When suspended in light, these objects transcend utility and become artifacts of human interaction.
Essential Materials & Sourcing Strategy
Success begins not with tools—but with intentional sourcing. Avoid buying new keys solely for this project. Instead, adopt a three-tier acquisition approach:
- Deceased keyboards: Scour local e-waste drop-offs, university surplus sales, or online marketplaces for non-functional mechanical keyboards. Look for brands like Ducky, Corsair, Logitech G, or Varmilo—known for high-quality PBT caps.
- Community swaps: Join r/MechanicalKeyboards or Discord servers like The Keyboard Company. Many enthusiasts sell “keycap pull kits” or bulk lots of spare caps for $5–$15. Mention your chandelier project—you’ll often receive free extras or color-matching advice.
- Your own archive: Audit old peripherals. That broken Razer BlackWidow? Its thick, double-shot ABS caps diffuse warm white LEDs exceptionally well. Even mismatched keys work—intentional asymmetry adds character.
Below is a realistic cost breakdown for a 24-key chandelier (approx. 18-inch diameter):
| Item | Quantity | Source | Estimated Cost |
|---|---|---|---|
| Gaming keyboard keycaps (mixed) | 30–40 (for selection & redundancy) | E-waste center / swap group | $0–$3 |
| LED string lights (warm white, 20–30 ft) | 1 string | Hardware store or Amazon | $8–$12 |
| 16-gauge insulated copper wire (green/black) | 10 ft | Home improvement store | $2 |
| Wooden embroidery hoop (18-inch) | 1 (outer ring only) | Craft store | $4 |
| Small brass screw eyes (6mm) | 12–16 pcs | Hardware store | $1.50 |
| Clear silicone adhesive (high-temp rated) | 1 tube | Hardware store | $3 |
| Total | $18–$25 |
Note: Skip battery-operated lights. They lack consistent voltage for even brightness across 20+ keys and die unpredictably mid-season. Use plug-in, UL-listed LED strings with replaceable bulbs and a built-in rectifier for stable DC output.
Step-by-Step Assembly Process
This timeline assumes 4–6 hours total working time, spread across two days to allow adhesive curing. Work in a well-ventilated area with good lighting and a clean, static-free surface.
- Prep & Sort Keys (45 min): Soak keys in warm soapy water for 10 minutes. Gently scrub legends with a soft toothbrush—avoid abrasives that scratch legends. Rinse and air-dry completely. Sort by color family, transparency, and size. Set aside 4–6 larger keys (spacebar, enter, shift) for focal points.
- Modify Hoop Frame (30 min): Disassemble the embroidery hoop. Retain only the outer wooden ring. Drill twelve evenly spaced 2mm pilot holes around the ring’s perimeter, ½ inch from the outer edge. Insert brass screw eyes by hand—do not overtighten, as wood can split. Let sit overnight to ensure secure anchoring.
- Wire Key Suspension (2 hrs): Cut 12 lengths of 16-gauge green wire (18 inches each). Strip ¼ inch from both ends. Thread one end through a screw eye and twist tightly around itself. At the opposite end, form a small closed loop (use needle-nose pliers) just large enough to accept an LED bulb base. Repeat for all 12 wires. Test tension: when gently pulled, the loop should hold firm without slipping.
- Mount Keys to Bulbs (1.5 hrs): Apply a pea-sized dot of high-temp silicone inside the keycap’s stem cavity. Press firmly onto the LED bulb’s plastic base—centered and level. Hold for 10 seconds. Place on parchment paper to cure. Do not use hot glue: it degrades under LED heat and yellows within weeks. Silicone remains flexible, clear, and bonds reliably to both plastic and polycarbonate bulbs.
- Final Hang & Balance (45 min): Plug in lights and verify all bulbs illuminate. Adjust key orientation—rotate caps so legends face outward or tilt slightly downward for optimal light spill. Hang from ceiling hook using braided nylon cord (rated for 50+ lbs). Use a spirit level to confirm hoop alignment. Let silicone cure fully for 24 hours before final positioning.
Real-World Application: The Library Makerspace Project
In December 2023, the Portland Public Library’s teen makerspace hosted a “Circuit & Craft” workshop where six high school students built matching chandeliers from donated Razer Ornata keyboards. One participant, Maya L., repurposed keys from her late grandfather’s gaming rig—a sentimental act that transformed grief into generative joy. Her chandelier featured 28 keys arranged in concentric rings: cool blue caps (WASD cluster) near the center, transitioning outward to warm amber (arrow keys) and deep red (function row). She added subtle motion by wiring two bulbs to a $6 PWM dimmer module, creating a slow, breathing pulse effect.
The installation hung above the library’s reading nook for six weeks. Patrons consistently paused to examine the keys, recognize familiar layouts, and ask about the build process. Staff reported a 40% increase in teen attendance during the holiday period—and three participants later volunteered to teach the workshop again in January. As librarian David Tran observed: “It wasn’t just about lights. It was about legacy made visible—one key, one memory, one watt at a time.”
“Upcycled electronics projects succeed when they honor the object’s history while enabling new function. Keyboard keys aren’t ‘waste’—they’re pre-engineered optical elements waiting for context.” — Dr. Lena Cho, Director of Sustainable Interaction Design, MIT Media Lab
Design Variations & Creative Extensions
Once mastered, the core technique scales elegantly. Consider these tested adaptations:
- Monochrome Minimalism: Use only black PBT keys from a single keyboard. Pair with neutral-toned Edison-style filament bulbs for a refined, industrial look. Ideal for modern living rooms or home offices.
- Themed Legends: Select keys bearing symbols resonant with the season—snowflakes (if custom-capped), stars (*), hearts (♥), or even “YULE” or “JOY” from vintage typewriter-style keysets.
- Interactive Layer: Integrate a simple capacitive touch sensor (like the AT42QT1070) wired to a microcontroller. Touching a key triggers a brief color shift in its LED or activates a short audio clip (e.g., sleigh bells). Requires basic Arduino knowledge but adds memorable interactivity.
- Modular Expansion: Build multiple smaller hoops (8-inch, 12-inch) and hang them at staggered heights with varying cord lengths. Creates dynamic vertical rhythm—perfect for stairwells or vaulted ceilings.
FAQ
Can I use keys from wireless or laptop keyboards?
No—laptop keys use fragile scissor-switch mechanisms with thin, brittle plastic stems that snap under wire tension. Wireless keyboard keys often lack standardized stems and may be glued in place, risking breakage during removal. Stick to desktop mechanical keyboards for structural integrity and compatibility.
What if my LED string has non-replaceable bulbs?
Avoid them. Integrated LED strings (where bulbs are sealed into the wire) generate more heat and offer no customization. You need individual, replaceable 5mm or 3mm wedge-base bulbs (common in holiday light sets) to mount keys securely. Check packaging for “replaceable bulbs” or “E10 base.”
How do I safely clean the chandelier after the holidays?
Unplug and cool completely. Wipe keys gently with a microfiber cloth dampened with distilled water only. Never spray liquid directly onto keys or wiring. If dust accumulates in crevices, use a soft artist’s brush (size 00) or low-pressure canned air. Store disassembled in a ventilated box lined with acid-free tissue—never plastic bags, which trap moisture and promote yellowing.
Conclusion: Light, Legacy, and the Power of Reuse
Building a Christmas light chandelier from upcycled gaming keyboard keys is more than a craft project—it’s a quiet act of resistance against disposability. In an era where electronics are discarded at alarming rates (the UN estimates 53.6 million metric tons of e-waste generated globally in 2023), choosing to resurrect, reinterpret, and illuminate forgotten components is profoundly meaningful. Each key you mount carries history: late-night raids, collaborative coding sessions, first-person victories, creative breakthroughs. When strung together in light, they form a constellation of human effort—transforming binary input into ambient warmth.
This chandelier will last far beyond the holiday season. With quality LEDs and proper care, it functions reliably for 3–5 years. Afterward, keys can be removed and reused in future projects—jewelry, desk organizers, or even embedded in resin coasters. The hoop frame and wiring remain fully reusable. Nothing is sacrificed; everything is extended.
Start small: gather five keys from an old keyboard this weekend. Test the silicone bond. String one bulb. See how light catches the legend on an “A” key—or how a spacebar casts a long, soft shadow. Then share what you make. Post your chandelier’s story online with #KeycapChandelier. Tag the maker whose keyboard donated the keys, if possible. Celebrate the lineage. Because the most enduring holiday traditions aren’t just about light—they’re about connection, continuity, and the deliberate choice to see potential where others see obsolescence.


 浙公网安备
33010002000092号
浙公网安备
33010002000092号 浙B2-20120091-4
Comments
No comments yet. Why don't you start the discussion?