
A Christmas light tunnel can transform an ordinary front yard into a festive wonderland. Unlike standard light displays, a tunnel creates an immersive experience—inviting guests to walk through a glowing archway of color and warmth. Whether you're aiming for subtle elegance or dazzling spectacle, building a custom tunnel is more accessible than it seems. With careful planning, the right materials, and attention to safety, you can craft a centerpiece that becomes a neighborhood highlight every holiday season.
Design Planning: Size, Shape, and Location
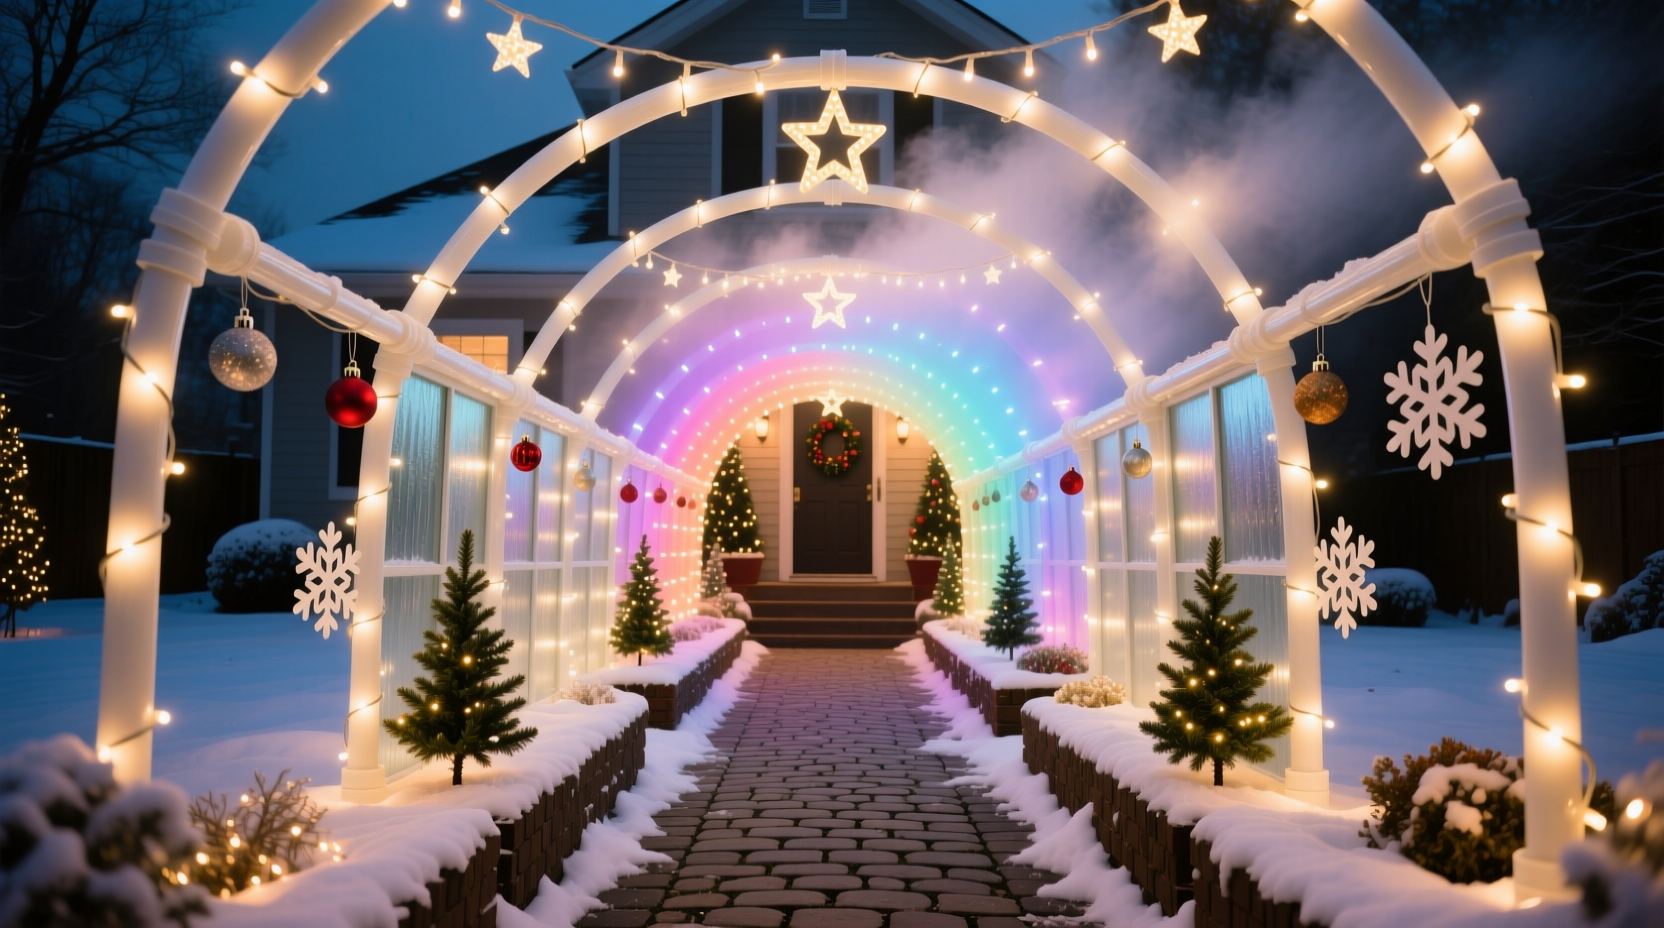
Before purchasing supplies, determine where and how large your tunnel will be. Most residential tunnels range from 6 to 10 feet in height and 8 to 14 feet in width, allowing room for adults and children to pass comfortably. Consider foot traffic patterns—place the tunnel near a sidewalk, driveway, or garden path where visitors naturally approach.
The shape influences both aesthetics and structural needs. A classic semi-circular arch provides even weight distribution and visual symmetry. For a more dramatic effect, consider a Gothic-style pointed arch or a multi-arch sequence. Sketch your design on paper or use free online tools like SketchUp Free to visualize proportions.
Also factor in electrical access. Each section of LED lights draws power, so plan outlet locations or invest in heavy-duty outdoor extension cords rated for winter conditions. If outlets are distant, consider using a weatherproof power strip near the base of the structure.
Materials and Tools Checklist
Selecting durable, weather-resistant components ensures your tunnel survives wind, snow, and temperature swings. Below is a comprehensive checklist tailored for a medium-sized (8’W x 7’H) tunnel.
Essential Materials
- Four to six 10-foot flexible fiberglass rods (1/2-inch diameter) or PVC pipes (Schedule 40, ¾-inch)
- Two wooden or metal end frames (2x4s or pre-cut plywood arches)
- Outdoor-rated zip ties (UV-resistant, 8-inch length)
- LED string lights (warm white or multicolor; 50–100 bulbs per strand)
- Ground stakes or rebar rods (for anchoring frame ends)
- Waterproof electrical tape
- Heavy-duty extension cords (UL-listed for outdoor use)
- Optional: Mesh netting or tarp for backing, diffusing light
Tools Required
- Measuring tape
- Handsaw or PVC pipe cutter
- Drill with wood/metal bits
- Work gloves
- Ladder (6-foot minimum)
- Wire cutters
“Using flexible fiberglass rods instead of rigid PVC allows the frame to bend safely under snow load without snapping.” — Mark Reynolds, Seasonal Display Engineer, Holiday Lighting Solutions Inc.
Step-by-Step Construction Guide
Follow this timeline-based process over one weekend to complete your tunnel efficiently and safely.
- Day 1 – Frame Assembly (2–3 hours)
Attach the flexible rods to the end frames. Drill holes at equal intervals (every 12–18 inches) along the top edge of each wooden base. Insert rods through the holes, bending them gently into an arch. Secure opposite ends into ground stakes driven at least 12 inches deep. Ensure symmetry by measuring peak height and span width. - Day 1 – Anchoring (30 minutes)
Drive rebar or long metal stakes into the ground at a 45-degree angle outside each frame base. Use nylon straps or coated wire to tether the base corners to these anchors, preventing lateral movement during storms. - Day 2 – Wiring Preparation (1 hour)
Lay out all light strands to test functionality. Plug them in and inspect for dark bulbs or damaged sockets. Group strands by color or effect (e.g., steady vs. twinkle). Label each set with masking tape for easy identification during installation. - Day 2 – Light Installation (2–4 hours)
Begin at the base of one side and work upward, securing lights to the frame with UV-resistant zip ties spaced every 6–8 inches. Overlap adjacent strands slightly to avoid dark spots. Maintain consistent tension—don’t pull too tight, as cold temperatures make wires brittle. Repeat on the opposite side and across the peak. - Final Touches (1 hour)
Connect all strands to extension cords, ensuring connections are elevated off the ground and protected with waterproof covers. Test the full display after dusk. Adjust spacing if needed and reinforce loose ties.
Material Comparison: PVC vs. Fiberglass vs. Metal
Choosing the right frame material affects durability, cost, and ease of setup. The table below compares common options.
| Material | Pros | Cons | Best For |
|---|---|---|---|
| PVC Pipe | Low cost, widely available, easy to cut | Can crack in freezing temps, less flexible | First-time builders, short-term displays |
| Fiberglass Rods | Highly flexible, lightweight, shatter-resistant | Higher initial cost, requires secure anchoring | Recurring installations, snowy climates |
| Steel Conduit | Extremely durable, supports heavy lighting | Heavy, difficult to bend, prone to rust | Permanent or commercial-grade displays |
Safety and Maintenance Best Practices
Holiday lighting involves electricity and outdoor exposure, making safety paramount. All components must be rated for outdoor use and inspected annually. Discard any lights with frayed wires, cracked sockets, or corroded connectors.
To prevent fire hazards, never exceed the maximum load capacity of extension cords or power strips. Most outdoor cords support up to 1,800 watts—calculate total draw by multiplying the number of strands by their wattage (typically 4–7 watts per 50-light strand).
Maintenance extends beyond the season. After disassembly, clean rods with a damp cloth and store in labeled bins. Coil lights carefully around cardboard forms or spools to prevent tangling. Keep all hardware together in sealed bags with a desiccant pack to inhibit moisture buildup.
Real Example: The Miller Family’s Neighborhood Favorite
The Millers in Portland, Oregon, built their first light tunnel in 2019 after their daughter suggested “making our yard feel like Narnia.” Using eight fiberglass rods and 12 strands of warm-white LEDs, they created a 9-foot-wide tunnel flanked by matching lit trees. They anchored the base with rebar and used a timer to activate lights daily from 5–10 PM.
In its first year, the display drew over 200 visitors. By 2023, they upgraded to RGB smart lights controlled via app, adding seasonal color themes. Their secret? “We lay out every light strand on the lawn before attaching anything,” says homeowner Lisa Miller. “It saves hours and prevents gaps.”
FAQ: Common Questions Answered
Can I leave the tunnel up all winter?
Yes, if constructed with durable materials and properly anchored. However, inspect it weekly for damage caused by wind or ice accumulation. Remove promptly after the holiday season to extend component lifespan.
Are smart lights worth the investment?
For customization and convenience, yes. Smart LED strands allow remote control, scheduling, and dynamic effects like color waves or chases. While pricier upfront, many models sync across multiple zones, enabling coordinated displays. Just ensure your Wi-Fi signal reaches the yard or use a mesh extender.
How do I prevent sagging over time?
Sagging usually results from inadequate anchoring or thermal contraction. Reinforce ground stakes annually and use adjustable guy lines to maintain tension. Avoid overtightening zip ties—they can compress soft frames over time.
Conclusion: Bring Magic to Life This Season
Building a custom Christmas light tunnel isn’t just about decoration—it’s about creating moments. The glow of lights overhead, the crunch of snow underfoot, the laughter of children walking hand-in-hand beneath a radiant arch: these are the memories that endure far beyond December.
You don’t need professional skills or a massive budget. With thoughtful planning, resilient materials, and a few evenings of effort, your yard can become a beacon of joy. Start sketching your design today. Measure your space. Order supplies early. And when the first strand flickers to life, know you’ve built something more than a structure—you’ve built an experience.


 浙公网安备
33010002000092号
浙公网安备
33010002000092号 浙B2-20120091-4
Comments
No comments yet. Why don't you start the discussion?