
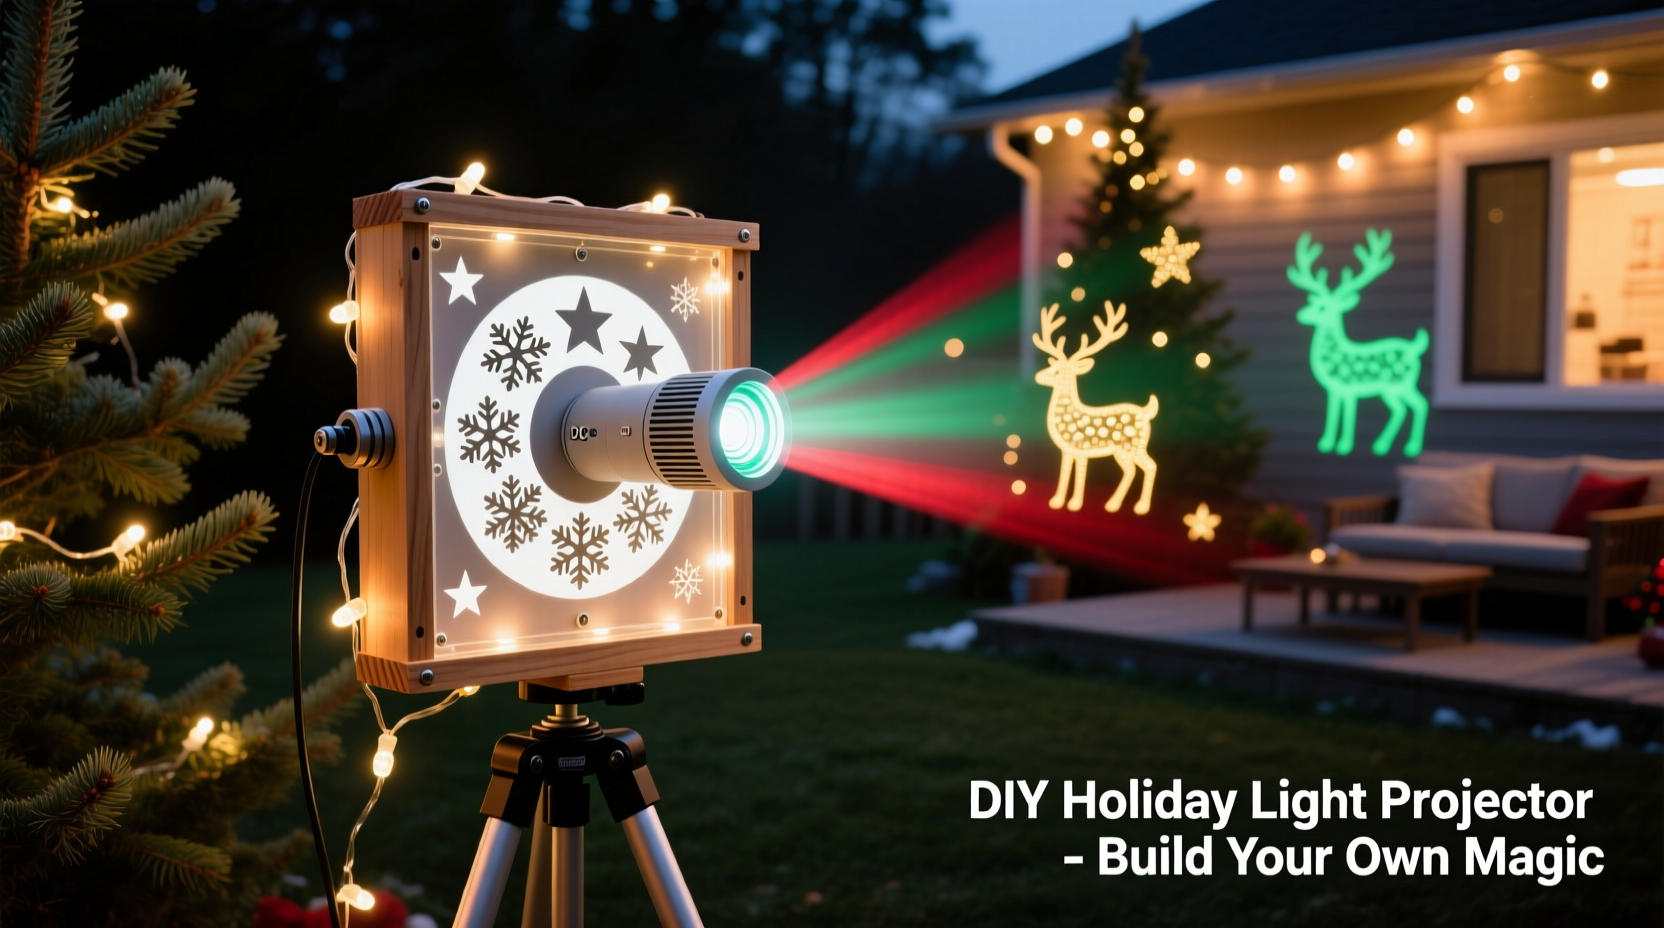
Transform your backyard into a winter wonderland without stringing hundreds of lights or climbing ladders. A DIY Christmas light projector offers an affordable, scalable way to create vibrant holiday displays visible from the street and beyond. With just a few components and some careful planning, you can project animated snowflakes, dancing reindeer, or glowing stars across your house, trees, or fence. This guide walks through the process of building your own projector, from sourcing parts to optimizing brightness and projection quality.
Why Build Your Own Projector?
Commercial holiday projectors are widely available, but they often come with limitations—fixed patterns, limited brightness, and repetitive animations. Building your own gives you full control over design, color, animation speed, and projection size. You can customize themes for different holidays, layer multiple effects, or even sync visuals to music. Plus, a homemade unit typically costs less than $50 in materials, especially if you already have basic tools and spare electronics on hand.
DIY projectors also offer better adaptability. You can modify lenses, swap out LEDs, or upgrade power sources as needed. For tech-savvy hobbyists or families looking for a fun weekend project, this is both a creative and practical endeavor.
Essential Components and Tools
Before starting construction, gather all necessary materials. Most can be found at hardware stores, electronics retailers, or online marketplaces like Amazon or eBay.
Core Components
- Bright LED (preferably RGB): At least 10W for strong output; higher wattage increases brightness and throw distance.
- Heat sink: Prevents LED overheating during extended use.
- Constant-current LED driver: Matches power supply to LED requirements (e.g., 12V input, 700mA output).
- Fresnel lens or magnifying glass: Focuses and enlarges the projected image. A 6–12 inch diameter works well.
- Pattern disc or stencil holder: Rotating or static mount for custom designs (cardboard, plastic, or metal).
- DC power supply: Typically 12V or 24V, depending on LED specs.
- Enclosure: A sturdy box (plastic or metal) to house components and block stray light.
- Small motor (optional): For rotating pattern discs to create motion effects.
Tools Required
- Soldering iron and solder
- Wire cutters and strippers
- Drill and hole saw bits
- Screwdrivers and mounting hardware
- Multimeter (for testing voltage and connections)
- Hot glue gun or thermal adhesive
“Custom-built projectors allow for greater luminance and pattern flexibility than most off-the-shelf models. Enthusiasts can achieve professional-grade results with modest investment.” — Derek Lin, Lighting Engineer & Holiday Display Designer
Step-by-Step Assembly Guide
Follow these steps carefully to assemble a functional, safe, and effective projector.
- Prepare the enclosure: Choose a box that’s deep enough to accommodate the LED, lens, and any moving parts. Drill a hole in the front panel for the lens and a rear hole for wiring. Ensure tight seals to prevent internal reflections.
- Mount the LED: Attach the high-power LED to the heat sink using thermal adhesive. Secure the assembly inside the enclosure so the LED faces forward. Connect wires to the LED terminals, leaving enough slack for adjustments.
- Install the driver: Wire the constant-current driver according to its specifications. Connect it to the DC power supply on the input side and to the LED on the output side. Double-check polarity to avoid damage.
- Set up the lens: Fix the Fresnel lens securely in the front opening. The optimal distance between the LED and lens is typically 4–8 inches, depending on focal length. Test positioning by projecting onto a nearby wall and adjusting for sharpness.
- Create or insert the pattern: Cut a transparent or semi-transparent disc with your desired image (e.g., snowman, star, tree). Use black tape or paint to block areas you don’t want illuminated. Mount the disc directly in front of the LED or on a small motor shaft for rotation.
- Add motion (optional): If using a motor, connect it to a low-voltage source (3–6V) and secure the pattern disc to its shaft. Position it so the disc spins freely between the LED and lens.
- Seal and test: Close the enclosure, route the power cord outside, and plug in the system. Turn off ambient lights and aim the projector at a flat surface. Adjust focus and alignment until the image is clear and bright.
Designing Effective Projection Patterns
The quality of your display depends heavily on the design of the pattern. Unlike commercial projectors that use pre-made slides, a DIY setup lets you innovate with unique visuals.
Use opaque materials like black acetate, darkened plastic sheets, or even printed transparency film. Laser-cutting services or craft plotters can produce precise shapes, but hand-cutting with a craft knife works for simple designs. Remember: only the unblocked (clear) portions will project light.
For animated effects, consider multi-layered discs or alternating patterns on opposite sides of a rotating wheel. You can simulate falling snow by cutting staggered diagonal lines and spinning the disc slowly.
| Pattern Type | Best For | Tips |
|---|---|---|
| Solid silhouettes (trees, reindeer) | Classic holiday themes | Keep edges clean; avoid thin lines that may blur |
| Stippled or dotted designs | Starfields, snowfall | Space dots evenly to maintain uniform effect |
| Radial gradients | Sunbursts, halos | Use gradual transitions from opaque to clear |
| Segmented rotating discs | Animation (dancing figures) | Limited to 2–4 frames due to resolution limits |
Color effects can be achieved using RGB LEDs controlled via a simple circuit or microcontroller. Program slow fades or sudden shifts to match music or time of night.
Real-World Example: The Neighborhood Light Show Upgrade
In suburban Ohio, homeowner Maria Tran wanted to elevate her family’s annual Christmas display without increasing setup time. Her existing string lights required three evenings to install and were vulnerable to wind damage. Inspired by online forums, she built two DIY projectors—one for a rotating nativity scene and another for a pulsing aurora borealis effect.
Using salvaged LED arrays from old grow lights, repurposed magnifying lenses, and laser-cut acrylic patterns, Maria assembled both units over a weekend. She mounted them on adjustable brackets along her porch railing, aiming one at the garage door and the other across the front lawn.
The result was immediate attention. Neighbors reported seeing the display from the sidewalk, and local news featured her home in a “Best Holiday Lights” segment. Total cost: under $70. Setup and takedown now take less than 15 minutes each season.
Optimization and Safety Best Practices
A powerful projector demands responsible handling. Follow these guidelines to ensure longevity and safety.
Do’s
- Use proper heat management: Always pair high-wattage LEDs with a heat sink.
- Weatherproof outdoor units: Seal enclosures with silicone gaskets or use IP-rated boxes.
- Limit runtime: Operate no more than 6–8 hours per night to reduce thermal stress.
- Position securely: Mount on stable surfaces to prevent tipping or misalignment.
Don’ts
- Don’t overload circuits: Avoid plugging multiple high-draw devices into one outlet.
- Don’t ignore ventilation: Even sealed enclosures need airflow around the heat sink.
- Don’t point at public roads: Bright projections can distract drivers and violate local ordinances.
If placing the projector outdoors, use a GFCI-protected outlet and cover connections with waterproof caps. Consider adding a timer or smart plug to automate operation.
FAQ: Common Questions About DIY Projectors
Can I use a smartphone flashlight as the light source?
No. Phone LEDs lack the intensity and directional focus needed for projection. They also overheat quickly. Use dedicated high-power LEDs designed for illumination tasks.
How far can the projector throw an image clearly?
With a 10W LED and proper lens, expect clear images up to 20–30 feet. Beyond that, brightness diminishes significantly unless using higher-wattage LEDs (30W+) and larger optics.
Can I project video or complex animations?
Not with mechanical setups. True video requires a digital micromirror device (DMD), like in DLP projectors. However, you can simulate simple motion using rotating pattern wheels or programmable RGB pulses.
Checklist: Build Your Projector in 10 Steps
- Acquire a high-power LED and compatible driver
- Select a suitable enclosure with space for components
- Attach LED to heat sink and mount inside the box <4>Wire driver to LED and power supply (verify polarity)
- Install Fresnel lens at correct focal distance
- Design and cut first pattern on transparent material
- Mount pattern in front of LED (static or rotating)
- Test projection indoors before final assembly
- Seal enclosure and weatherproof for outdoor use
- Install in desired location and connect to power
Conclusion: Illuminate Your Holidays Creatively
Building a DIY Christmas light projector isn’t just about saving money—it’s about reclaiming creativity in seasonal traditions. With accessible technology and straightforward assembly, anyone can produce a display that rivals professional installations. Whether you're entertaining kids, surprising neighbors, or simply enjoying the glow from your living room window, a custom projector adds magic with minimal upkeep.
Start small: build one unit this year, then expand next season with synchronized multi-projector effects or sound-reactive lighting. The skills you gain—basic electronics, thermal management, optical alignment—are transferable to other maker projects throughout the year.


 浙公网安备
33010002000092号
浙公网安备
33010002000092号 浙B2-20120091-4
Comments
No comments yet. Why don't you start the discussion?