
A Christmas light tunnel can transform an ordinary front yard into a magical winter wonderland. More than just a decorative display, it invites neighbors, children, and passersby to pause, smile, and experience the joy of the season up close. Unlike flat light layouts or static inflatables, a light tunnel creates immersive depth—drawing people in with rhythm, color, and motion. The good news? You don’t need professional skills or a contractor’s budget to build one. With basic tools, careful planning, and a few evenings of work, you can construct a durable, eye-catching tunnel that becomes a neighborhood landmark.
This guide walks through every phase: from choosing materials and designing the frame, to wiring lights safely and programming dynamic effects. Whether you’re aiming for a subtle glow or a synchronized light show set to music, the approach here ensures safety, longevity, and visual impact.
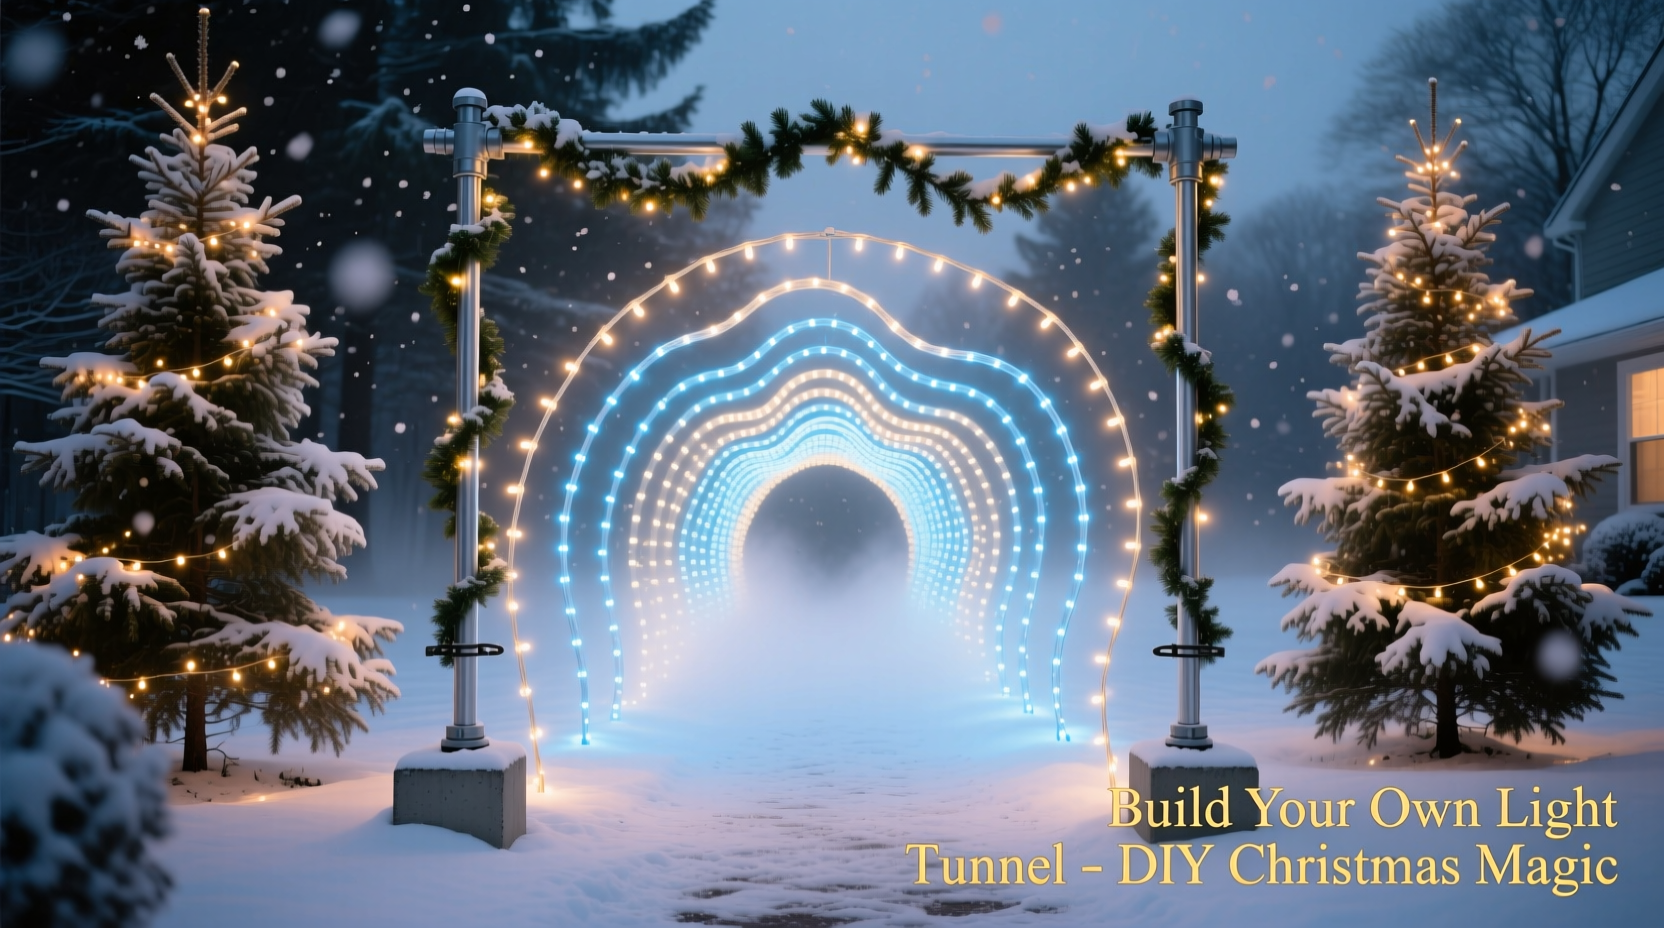
Design Planning and Layout
Before cutting any pipe or stringing a single bulb, invest time in thoughtful design. A poorly planned tunnel may sag, block walkways, or create electrical hazards. Start by measuring the area where the tunnel will stand. Most residential yards accommodate a tunnel between 8 and 16 feet long, 6 to 8 feet wide, and 7 to 9 feet high at the peak. These dimensions allow most adults to walk through comfortably while maintaining structural stability.
Sketch a simple layout showing entry and exit points, clearance for foot traffic, and proximity to power sources. If your outlet is more than 50 feet from the display site, plan for heavy-duty extension cords or consider installing a temporary outdoor-rated power strip protected in a weatherproof enclosure.
Decide on the tunnel shape. The two most common are:
- Arched (semi-circular): Created using flexible PVC pipes bent into hoops. Offers smooth lines and even light distribution.
- Gabled (tent-like): Uses rigid frames with straight sides and a peaked roof. Allows for vertical side panels and more complex lighting patterns.
The arched design is easier for beginners and requires fewer materials. It also withstands wind better due to its aerodynamic curve.
Materials and Tools Checklist
Gathering all necessary supplies upfront avoids mid-project delays. Below is a comprehensive checklist tailored for a 12-foot-long arched tunnel made from PVC.
“Preparation separates a dazzling display from a tangled mess.” — Daniel Reyes, Holiday Lighting Designer, BrightPath Displays
Structural Components
- ¾-inch schedule 40 PVC pipes (10-foot lengths) – 6 pieces
- PVC cross tees or T-connectors – 4 units
- PVC end caps – 4 units
- Steel rebar stakes (½-inch diameter, 24-inch length) – 6 pieces
- Zip ties (UV-resistant, 8-inch) – 100+ count
- Measuring tape and permanent marker
Lighting and Electrical
- LED mini string lights (warm white or multicolor) – 15–20 strands (each 25-light)
- Commercial-grade C9 LED bulbs (optional for outer rim emphasis) – 50–75 units
- Extension cords (outdoor-rated, 16 AWG minimum) – 2–3 runs
- Power strips (weatherproof, GFCI-protected) – 1–2 units
- Wire connectors or waterproof wire nuts
- Light controller (optional for sequencing effects)
Tools
- Hacksaw or PVC pipe cutter
- Hammer or mallet
- Level
- Ladder (4–6 feet)
- Gloves and safety glasses
| Material | Why It Matters | Pro Tip |
|---|---|---|
| UV-resistant zip ties | Standard ties become brittle in cold and sun; UV versions last all season | Keep extras on hand for mid-season repairs |
| LED over incandescent | LEDs use 80% less energy, generate no heat, and last longer | Choose strings with replaceable bulbs for easy maintenance |
| GFCI protection | Prevents electrocution in wet conditions—required by NEC for outdoor circuits | Test GFCI monthly by pressing the “test” button |
Step-by-Step Construction Guide
With materials gathered and layout marked, follow this sequence to assemble your tunnel safely and efficiently.
- Prepare the Frame Hoops: Cut six 10-foot PVC pipes into three 12-foot arcs. To do this, gently bend each pipe into a U-shape and secure both ends into T-connectors mounted on vertical support posts (to be driven into the ground). Alternatively, cut each 10-foot pipe into two 5-foot sections to form smaller hoops if spanning a shorter path.
- Install Rebar Anchors: Drive steel rebar stakes into the ground at each corner and midpoint of the tunnel outline using a hammer. Position them at a slight inward angle so they grip the PVC securely. Space stakes approximately 3–4 feet apart along each side.
- Assemble the Arches: Slide the ends of each PVC hoop over the rebar stakes. Ensure both sides rise evenly. Use a level across the peak of each arch to confirm alignment. Adjust stake depth as needed.
- Connect Arches (Optional): For added rigidity, run horizontal PVC supports along the top and sides, connecting each arch with elbow joints. This creates a grid that resists lateral movement in wind.
- Attach Lighting Strings: Begin at one end, draping lights vertically down each arch. Secure every 6–8 inches with zip ties, ensuring consistent spacing. Overlap strands slightly to eliminate dark spots. For a denser effect, wrap lights around the entire circumference of each hoop.
- Wire Power Connections: Group light strands into circuits of no more than 400 watts combined load. Connect each circuit to a central power strip housed in a covered, elevated enclosure (e.g., a plastic toolbox on bricks). Avoid daisy-chaining more than three standard light strings.
- Test Before Finalizing: Turn on all lights after installation but before final securing. Walk through the tunnel to check brightness, uniformity, and flicker. Replace any faulty bulbs or connections immediately.
- Secure and Weatherproof: Coil excess cord neatly and elevate off the ground. Cover all electrical junctions with waterproof caps or silicone sealant. Anchor loose zip ties and inspect tension on all supports.
Real Example: The Miller Family Light Tunnel
The Millers of Bloomington, Indiana, built their first Christmas light tunnel in 2022 after their daughter saw a viral video of a synchronized display in Colorado. With a $350 budget and no prior experience, they followed a simplified version of this guide.
They used five 10-foot PVC pipes bent into arches anchored with rebar, spaced 3 feet apart. Each arch was wrapped with four strands of warm-white LED mini lights, totaling 20 strings. Instead of a central controller, they used three separate timers to stagger the on/off cycle and reduce surge load.
What made their display stand out was interaction. They placed a Bluetooth speaker nearby playing classic carols and added laminated signs inviting visitors to “Make a Wish as You Walk Through.” By Christmas Eve, over 500 people had visited—including local news crews.
Their biggest challenge? Wind gusts exceeding 30 mph on December 10th. Two arches collapsed, but because they’d used zip-tie attachment points every 6 inches, only half the lights came loose. They reinforced the structure with diagonal guy lines tied to lawn screws and completed repairs in under an hour.
Now an annual tradition, the Miller tunnel has grown to include color-changing LEDs and a simple app-controlled sequence that pulses like a heartbeat during “Silent Night.”
Safety, Maintenance, and Seasonal Storage
No holiday project should compromise safety. Outdoor electrical setups are subject to moisture, temperature swings, and physical wear. Follow these best practices throughout the display period.
- Inspect lights weekly for frayed wires, broken sockets, or loose connections.
- Clear snow buildup promptly—excessive weight can deform PVC frames.
- Turn off the display during severe storms or high winds (over 25 mph).
- Use only outdoor-rated cords and avoid running cables across walkways unless covered with rubber ramp protectors.
After the holidays, disassemble carefully. Label each section of PVC and bag light strands by circuit number. Store in clearly marked bins—keep zip ties, connectors, and controllers together. Clean dust from bulbs with a dry microfiber cloth before packing.
“Treat your display like a seasonal toolkit. Proper storage means faster setup and fewer replacements year after year.” — Lena Patel, Home Automation Technician
Frequently Asked Questions
Can I leave my light tunnel up all winter?
While possible, prolonged exposure increases wear from UV rays, ice, and wind. Most DIY tunnels are designed for seasonal use (mid-November to early January). Extended deployment risks material fatigue, especially in regions with heavy snowfall. If you wish to extend display time, reinforce the frame and use commercial-grade components rated for continuous outdoor use.
How many lights do I need for full coverage?
For dense, even illumination, aim for 4 to 6 strands of 25-count mini lights per arch. This translates to roughly 100–150 bulbs per hoop. Larger tunnels (over 14 feet) may require additional horizontal runs or secondary layers. Use a test strand first to visualize spacing before committing.
Is it safe to let kids walk through unsupervised?
Yes, provided the structure is stable and all electrical components are secured and insulated. Ensure the floor beneath is even and free of tripping hazards. Avoid low-hanging cords and monitor for overcrowding during peak visitation hours. Consider adding soft pathway lighting leading to the entrance for nighttime safety.
Conclusion: Bring Magic to Your Front Yard
Building a DIY Christmas light tunnel isn’t just about aesthetics—it’s an act of community generosity. In a season often defined by rush and stress, your illuminated archway offers a moment of wonder. Children giggle as they walk beneath twinkling stars. Elderly neighbors pause to take photos. Strangers wave as they pass by, drawn in by warmth and color.
The process teaches practical skills—basic carpentry, electrical safety, creative problem-solving—but the real reward is emotional. You’re not assembling PVC and wires. You’re crafting memories.


 浙公网安备
33010002000092号
浙公网安备
33010002000092号 浙B2-20120091-4
Comments
No comments yet. Why don't you start the discussion?