
Hamsters are naturally curious and active animals. In the wild, they explore vast territories, dig complex burrows, and climb over terrain. When kept as pets, their cage environment can become monotonous if not enriched properly. A well-designed playground stimulates their minds, encourages natural behaviors, and helps prevent stress-related issues like bar-chewing or lethargy.
While commercial toys and tunnels are available, many contain plastics or adhesives that may pose health risks. The good news? You don’t need to spend money on specialized gear. With careful selection and preparation, common household items can be transformed into a safe, engaging play space. This guide walks through the process of building a DIY hamster playground using only non-toxic, readily available materials—ensuring both safety and enrichment.
Why Enrichment Matters for Hamsters
Enrichment is more than just entertainment—it's essential for psychological and physical well-being. Hamsters have high energy levels and strong instincts to burrow, climb, and forage. Without outlets for these behaviors, they can develop anxiety, obesity, or repetitive habits known as stereotypies.
A study published in *Applied Animal Behaviour Science* found that rodents provided with complex environments showed significantly lower cortisol levels—a key stress hormone—compared to those in barren enclosures. This means that even simple additions like tunnels, platforms, or climbing structures can make a measurable difference in your hamster’s quality of life.
“Environmental complexity directly influences rodent brain development and emotional regulation. Simple changes can reduce stress and promote healthier behavior.” — Dr. Lila Chen, Behavioral Zoologist, University of Edinburgh
Choosing Safe Household Materials
The foundation of any DIY project is material safety. Hamsters chew constantly to manage tooth growth, so anything in their environment must be non-toxic and free from sharp edges, glues, or chemical residues.
Below is a comparison of common household items, categorized by suitability:
| Material | Suitable? | Notes |
|---|---|---|
| Cardboard tubes (toilet paper/paper towel rolls) | Yes | Ensure no ink residue; avoid glossy prints |
| Untreated wooden blocks or chopsticks | Yes | Must be natural wood, no varnish or paint |
| Egg cartons (cardboard type) | Limited | Only use plain cardboard; avoid foam versions |
| Plastic bottles or containers | No | Chewing releases microplastics; risk of entrapment |
| New paperback books (pages only) | Yes | Remove staples, glue bindings; avoid glossy pages |
| Clean shoeboxes or tissue boxes | Yes | Remove labels, tape, and adhesive residues |
| Aluminum foil or wire mesh | No | Potential for cuts or ingestion hazards |
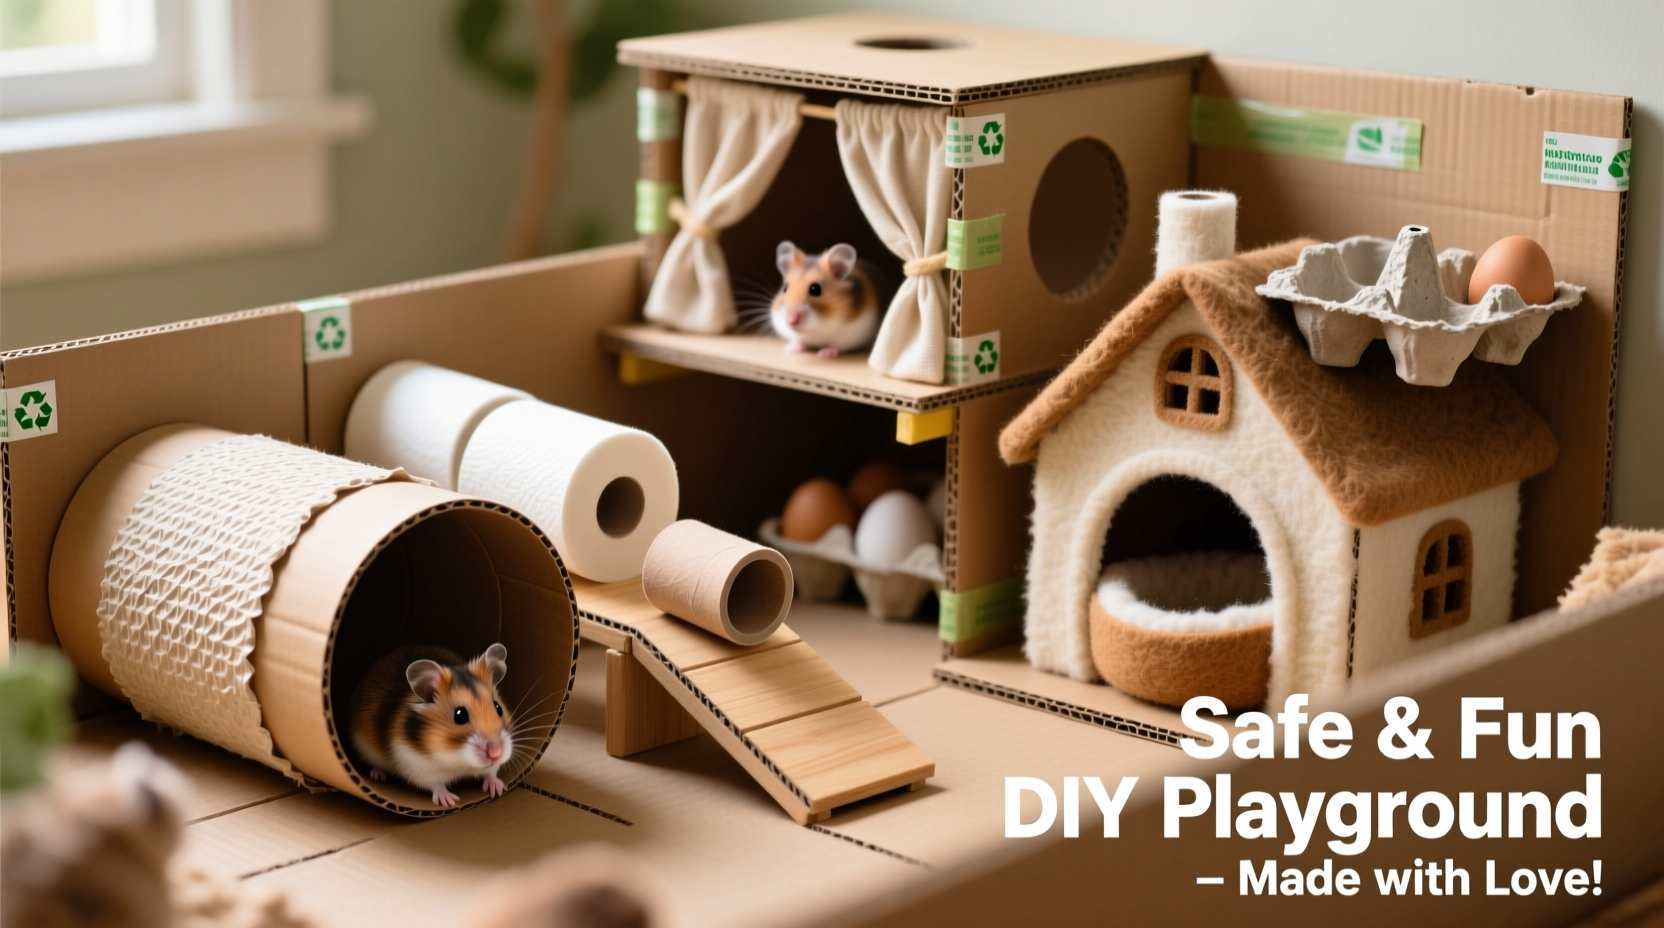
Step-by-Step Guide to Building the Playground
Creating a functional and safe playground doesn't require tools or expertise. Follow this sequence to assemble an enriching structure within an afternoon.
- Gather materials: Collect clean toilet paper rolls, a medium-sized shoebox, unvarnished wooden spoons or popsicle sticks, corrugated cardboard sheets, and non-toxic glue (like flour-and-water paste).
- Design the base layout: Lay out the shoebox as the main chamber. Cut entry holes (about 2–3 inches wide) on multiple sides to allow access.
- Create tunnels: Connect toilet paper rolls end-to-end using small dabs of flour-based glue. Bend slightly to create curves. Attach one end to the shoebox hole using the same paste.
- Add vertical elements: Stack flat cardboard pieces between two upright wooden sticks glued to the base. This creates a ladder or climbing wall. Ensure stability before introduction.
- Incorporate hiding spots: Fold book pages into triangular tents or roll them into cones. Secure lightly with non-toxic glue. Place inside the box or under tunnels.
- Test stability: Gently shake the structure. If parts wobble or detach, reinforce with additional paste and let dry overnight.
- Introduce gradually: Place the playground near—but not inside—the cage for one day so your hamster can investigate. Then place it inside during cleaning time.
Dry time is crucial. Allow at least 12 hours for all glued components to set completely. Wet paste can mold or weaken, creating collapse risks.
Real Example: Sarah’s Kitchen Scrap Playground
Sarah, a teacher from Portland, wanted to enrich her Syrian hamster Max’s enclosure without buying new products. She used leftover materials from her kitchen: empty toilet paper rolls, a cleaned coffee cup sleeve (made of corrugated fiber), and a small wooden spoon from takeout.
She cut openings in the sleeve and threaded three toilet rolls through them at different angles, securing them with a flour-water mix. The wooden spoon was laid horizontally across two cardboard walls inside a tissue box to act as a bridge. After drying overnight, she placed the structure in Max’s cage.
Within minutes, Max began exploring, dragging bedding into the tunnels and climbing onto the bridge. Over the next week, Sarah observed increased activity and no signs of chewing on unsafe areas. The entire project cost nothing and took less than two hours.
Essential Safety Checklist
Before placing any DIY structure in your hamster’s habitat, verify each of the following:
- ✅ All materials are non-toxic and untreated
- ✅ No staples, plastic coatings, or synthetic adhesives present
- ✅ Entry holes are large enough for easy passage but not so big that limbs could slip through
- ✅ Structure is stable and won’t collapse when climbed on
- ✅ No loose threads, frayed edges, or sharp points
- ✅ Items are thoroughly dried and free from moisture or mold risk
- ✅ Playground is removed and inspected weekly for wear or damage
What to Avoid: Common Mistakes
Even with good intentions, some household items can be dangerous. Here are frequent errors to avoid:
- Using tape or hot glue: These can flake off and be ingested. Hamsters may also get stuck.
- Repurposing cereal boxes with inner liners: Many have thin plastic layers that aren’t visible but are toxic if chewed.
- Adding string or yarn: These can wrap around limbs, causing injury or amputation.
- Leaving food-based elements: Don’t use cereal, pasta, or bread as structural parts—they attract mites and spoil quickly.
- Overcrowding the cage: Too many objects limit movement and create stress. One DIY structure plus 1–2 store-bought items is ideal.
Frequently Asked Questions
Can I use old magazines or newspapers in the playground?
Modern soy-based inks are generally safe, but glossy pages contain coatings that resist digestion. Stick to plain printer paper or newsprint without shine. Never use magazine pages with laminated finishes.
How often should I replace the DIY playground?
Inspect weekly. Replace immediately if you notice soft spots, droppings buildup, or chewing that compromises structural integrity. Most cardboard-based builds last 2–4 weeks depending on use.
Is it safe if my hamster eats part of the playground?
Small amounts of plain cardboard or untreated wood are not toxic and will pass through the digestive system. However, excessive consumption may indicate boredom or dietary deficiency. Ensure your hamster has enough hay and chew-safe wood blocks available at all times.
Maximizing Play Value Through Rotation and Design
Just like children, hamsters benefit from variety. A static environment loses its appeal quickly. To keep engagement high, design modular components that can be rearranged.
For example, construct separate tunnel segments, climbing platforms, and hideouts that interlock loosely. Swap their positions weekly or combine them differently. This mimics natural exploration and prevents habituation.
You can also integrate foraging challenges. Wrap small treats in folded paper pockets tucked inside tunnels. Or balance a lightweight cardboard seesaw made from a strip anchored on a wooden dowel—this encourages balance and coordination.
The goal isn’t complexity, but cognitive stimulation. Even minor changes trigger curiosity and problem-solving, which are vital for mental health.
Conclusion: Build, Observe, Improve
Building a DIY hamster playground is more than a craft project—it’s an act of care. By repurposing safe household materials, you provide enrichment that supports your pet’s instinctual needs while minimizing waste and expense. The best designs evolve through observation: watch how your hamster interacts with each element, note what they ignore or favor, and refine accordingly.
Start simple. Try a basic tunnel system this weekend. See how your hamster responds. Then expand with ladders, bridges, or multi-level hideaways. Share your creations online—you might inspire others to adopt safer, more thoughtful approaches to small pet care.


 浙公网安备
33010002000092号
浙公网安备
33010002000092号 浙B2-20120091-4
Comments
No comments yet. Why don't you start the discussion?