
Small-space living doesn’t mean sacrificing festive spirit—it means designing with intention. A floating Christmas shelf delivers holiday warmth without cluttering floors or competing for wall real estate. Unlike traditional shelves that rely on bulky brackets or deep cabinets, a true floating shelf appears to hover, supported by hidden hardware and precise engineering. This isn’t just decoration; it’s spatial intelligence in wood and steel. Whether you live in a 400-square-foot studio, a narrow city apartment, or a compact dorm room, this project adds vertical holiday presence while preserving walkways, seating, and sightlines. More importantly, it’s built to last beyond December—designed for reuse year after year with seasonal swaps of ornaments, greenery, candles, and heirloom figurines.
Why Floating Shelves Excel in Small-Space Holiday Decor
In tight quarters, every inch counts—not just in square footage, but in visual weight. Traditional shelves with exposed L-brackets or thick corbels consume visual breathing room and often clash with minimalist or modern interiors. A well-executed floating shelf eliminates that visual noise. It anchors the eye at an intentional height (typically 54–66 inches from floor level), creating a natural focal point above a sofa, desk, or entryway console—without blocking light, door swings, or circulation paths. Structural integrity is non-negotiable: holiday decor includes heavier items like ceramic nutcrackers, glass globes, battery-operated LED garlands, and stacked gift boxes. That’s why this guide prioritizes load capacity, concealed support, and material stability over aesthetic shortcuts.
Architectural designer Lena Torres, who specializes in adaptive micro-housing solutions, confirms this approach:
“Floating shelves succeed in small spaces not because they’re ‘lighter’ visually—but because they redistribute weight intelligently. When the support is invisible and the load path is direct into wall studs, you gain both physical clearance and psychological openness.” — Lena Torres, FAIA, Co-founder of CompactSpace Studio
Materials & Tools: What You Actually Need (No Overbuying)
Many DIY guides list 15+ tools and exotic materials. This version cuts to what’s essential—and explains *why* each item matters. The goal is reliability, not complexity.
| Item | Specification | Why It Matters |
|---|---|---|
| Shelf board | 1×8 or 1×10 hardwood (maple, oak, or poplar); 36–48\" long; sanded smooth | Thicker stock prevents sagging under weight; hardwood resists dents from ornaments and candle holders. |
| Wall cleat | 1×4 pine or poplar, same length as shelf; cut to exact shelf width | Serves as the hidden backbone—must be perfectly aligned and securely anchored to studs. |
| Mounting hardware | 3-inch #10 wood screws (for cleat-to-stud); 2-inch #8 screws (for shelf-to-cleat) | Shorter screws prevent blowout through front edge; longer screws ensure cleat penetrates stud by ≥1.5 inches. |
| Level & stud finder | Digital stud finder with AC detection; 24-inch bubble level | Studs must be located *and verified*—not guessed. Old plaster walls or furring strips fool basic magnet finders. |
| Drill & bits | Variable-speed drill; 1/8\" pilot bit; countersink bit | Countersinking prevents screw heads from marring shelf underside during installation. |
Step-by-Step Build & Installation Timeline
This sequence balances safety, precision, and efficiency. Do not rush the wall-mounting phase—this is where most small-space projects fail.
- Measure & Plan Layout (15 minutes): Decide shelf height based on surrounding furniture. Ideal placement: centerline of shelf at eye level (57–60\") when seated, or 6–8\" above a sofa back. Mark intended shelf width on wall with light pencil lines.
- Locate & Verify Studs (10 minutes): Use digital stud finder to locate centers of two or three adjacent studs within your marked span. Tap lightly—solid thud = stud; hollow echo = cavity. Confirm with a 1/8\" drill bit test at 1.5\" depth.
- Cut & Prep Cleat (20 minutes): Cut 1×4 cleat to exact shelf width. Sand edges smooth. Pre-drill three evenly spaced 1/8\" pilot holes per stud location—drill straight, not angled. Countersink all holes 1/16\" deep.
- Mount Cleat to Wall (25 minutes): Hold cleat level against wall, aligning top edge with your height mark. Secure with three 3\" screws per stud—ensuring each screw hits center of stud. Double-check level before final tightening.
- Attach Shelf to Cleat (15 minutes): Apply wood glue along cleat top edge. Position shelf face-down on work surface. Align cleat precisely beneath shelf’s rear edge. Drive 2\" screws upward through shelf into cleat—two per stud location. Wipe excess glue immediately with damp cloth.
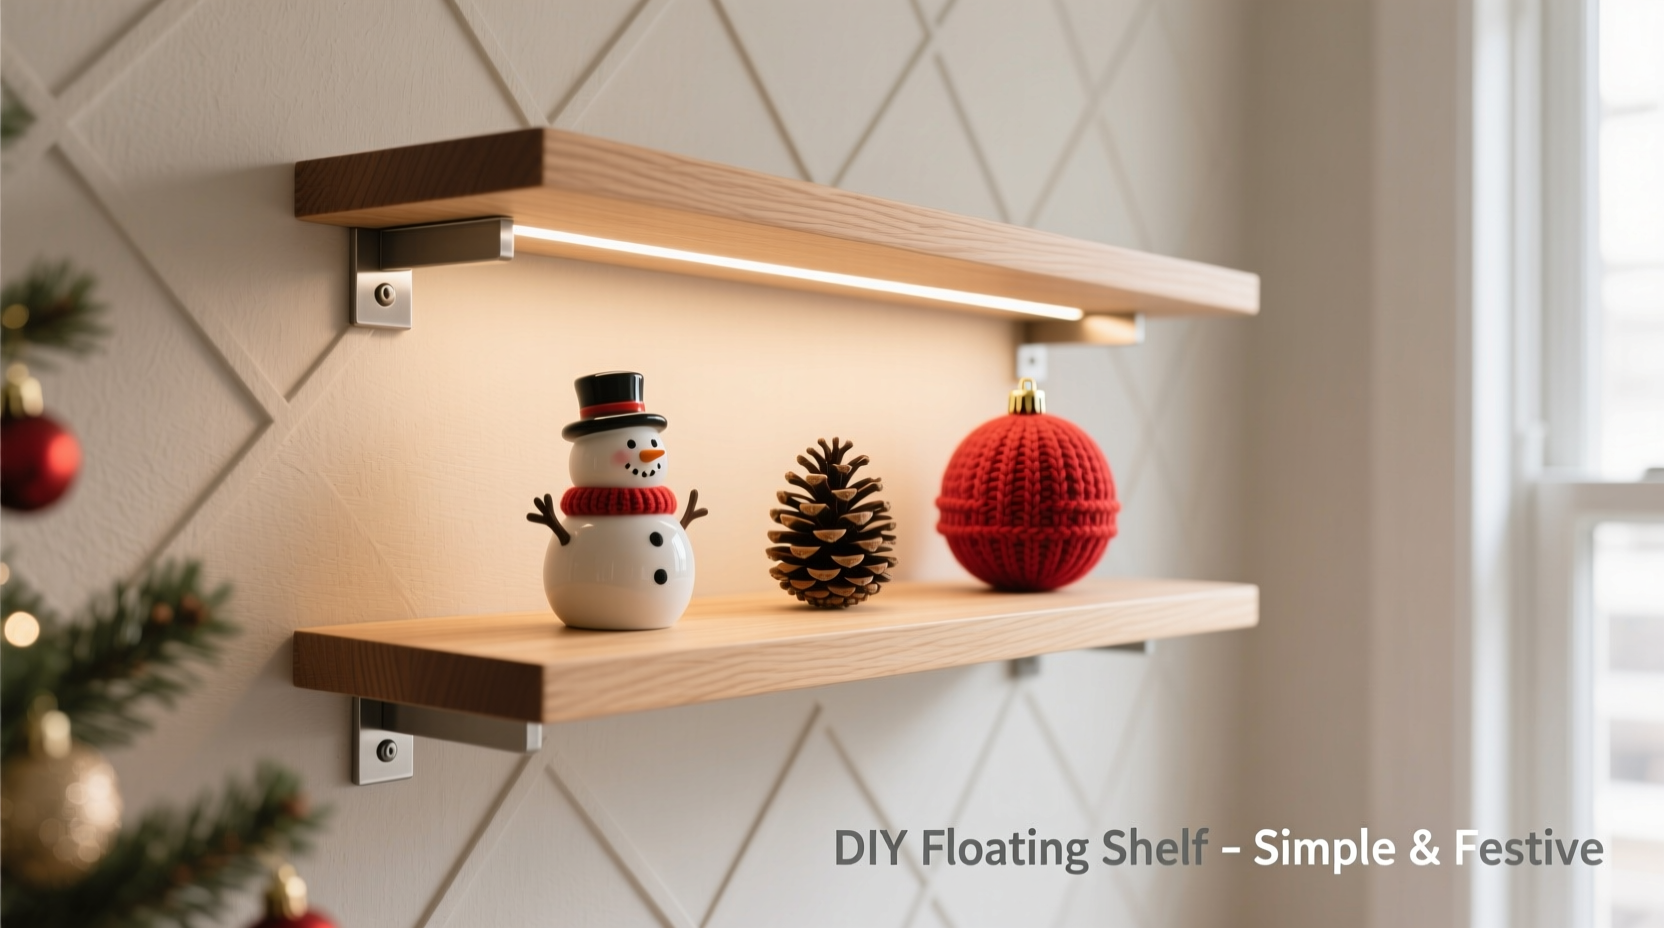
- Finishing & Styling (10 minutes): Lightly sand any glue squeeze-out. Wipe clean. For holiday use, apply matte white or warm walnut stain—or leave raw for rustic texture. Style with staggered heights: pillar candle (back), miniature tree (center), mercury-glass ornaments (front).
Real-World Example: The Brooklyn Studio Transformation
Maya R., a graphic designer in a 420-square-foot Williamsburg studio, faced a common dilemma: her only available wall space was behind a narrow daybed. Floor stands blocked the only exit path; leaning a shelf against the wall felt precarious and temporary. She built a 42\"-long floating shelf using poplar (chosen for its affordability and ease of staining) and mounted it 7\" above the bed’s headboard. She used a single 1×4 cleat anchored to two studs and reinforced the middle with a third screw into a third stud she discovered during scanning. Her shelf now holds a faux-fur garland, three tapered beeswax candles, vintage tin stars, and a rotating display of handmade cards from friends. “It took me 90 minutes start to finish,” she notes, “and I’ve reused it every December since 2021. No one believes it’s not attached to brackets—until I lift the shelf to dust underneath.”
Small-Space Styling Principles for Maximum Impact
A floating shelf’s power lies in curation—not accumulation. In constrained environments, visual hierarchy trumps quantity. Follow these principles:
- Rule of Three (with variation): Group items in odd numbers, but vary scale: tall (candle), medium (ornament cluster), short (mini book stack or pinecone). Avoid uniform heights—they read as static, not festive.
- Color Anchoring: Choose one dominant hue (e.g., deep forest green) and two supporting tones (cream + brass). This prevents visual chaos on limited surfaces.
- Depth Management: Keep front edge clear—no items should extend beyond the shelf’s front plane. Use shallow dishes or low-profile risers to lift items without protruding.
- Light Integration: Embed battery-powered micro-LEDs (warm white, 2700K) inside a shallow groove routed into the shelf’s underside. They cast soft uplight onto greenery without cords or outlets.
Do’s and Don’ts for Long-Term Durability
| Action | Do | Don’t |
|---|---|---|
| Weight Distribution | Place heaviest items directly above stud locations | Cluster heavy decor toward shelf ends—causes cantilever stress and potential sag |
| Seasonal Storage | Wrap shelf in breathable cotton cloth; store flat in dry closet | Lean vertically in damp basement or stack with other wood items—invites warping |
| Cleaning | Wipe monthly with slightly damp microfiber cloth; air-dry fully | Use vinegar solutions or citrus cleaners—they degrade wood finishes over time |
| Hardware Check | Inspect screws annually before hanging; tighten if needed | Assume “set and forget”—vibrations from foot traffic or HVAC can loosen fasteners |
FAQ: Practical Questions from Small-Space Builders
Can I install this on drywall without hitting studs?
No—floating shelves carrying holiday weight require direct stud anchoring. Hollow-wall toggles (like SnapToggles) are insufficient for dynamic loads: ornaments shift, candles burn down, and garlands get adjusted. If studs don’t align with your ideal placement, adjust shelf width or height to match existing framing. Most residential walls have studs spaced 16\" on-center—so minor repositioning almost always works.
How much weight can a properly installed shelf hold?
A 42\"-long shelf anchored to three studs with 3\" screws supports 45–60 lbs *static load*. That accommodates 8–10 medium ornaments, 3 taper candles, 1 mini tree (under 12\"), garland, and a few wrapped gifts. Never exceed 75% of rated capacity—holiday decor moves, so safety margin is critical.
What if my wall is plaster or brick?
Plaster: Use a masonry bit to drill into lath-and-plaster walls, then anchor with lead sleeves and lag screws into wood backing. Brick: Drill with carbide-tipped masonry bit, insert sleeve anchors, and use stainless steel screws. Both require torque-limiting drill setting to avoid cracking. When in doubt, consult a licensed contractor—small-space walls often conceal wiring or plumbing.
Conclusion: Your Space, Elevated—Literally and Spiritually
A floating Christmas shelf is more than a DIY project—it’s a declaration that small spaces deserve big moments. It proves that thoughtful design doesn’t demand square footage; it demands clarity of purpose, respect for materials, and attention to human-scale detail. You don’t need a workshop or years of carpentry experience. You need accurate measurements, honest stud detection, and the willingness to invest two hours in something that will bring quiet joy each December for years. This shelf won’t just hold ornaments—it’ll hold memories: the first candle lit in your new home, the card from a friend who moved across the country, the tiny wooden star your child painted in kindergarten. Build it right, style it intentionally, and let it become part of your home’s quiet rhythm.


 浙公网安备
33010002000092号
浙公网安备
33010002000092号 浙B2-20120091-4
Comments
No comments yet. Why don't you start the discussion?